Welcome to the 6th tutorial on our series Mastering Forge.
In our previous article, Mastering Forge #5, we learned how to use Forge’s MQTT Module to publish and subscribe data in UNS format using a broker running on AWS.
In this article, we are going to look at Forge’s History Module that is used for OPC UA Historical Access. This module stores data into a database and provides an interface that allows both current and historical data to be accessed from the same node. The data will be stored using InfluxDB, which can be downloaded through the InfluxDB download page.
Also, if you prefer your tutorials in video format instead, you can watch our video on how to store and access historical data on YouTube.
During this tutorial, we’ll be using the following products:
- Prosys OPC UA Forge
- You can download an evaluation version through the request form.
- Prosys OPC UA Simulation Server
- You can download the free version through the product’s request form.
- Prosys OPC UA Browser
- You can download the free version through the product’s request form.
Connect Forge to InfluxDB
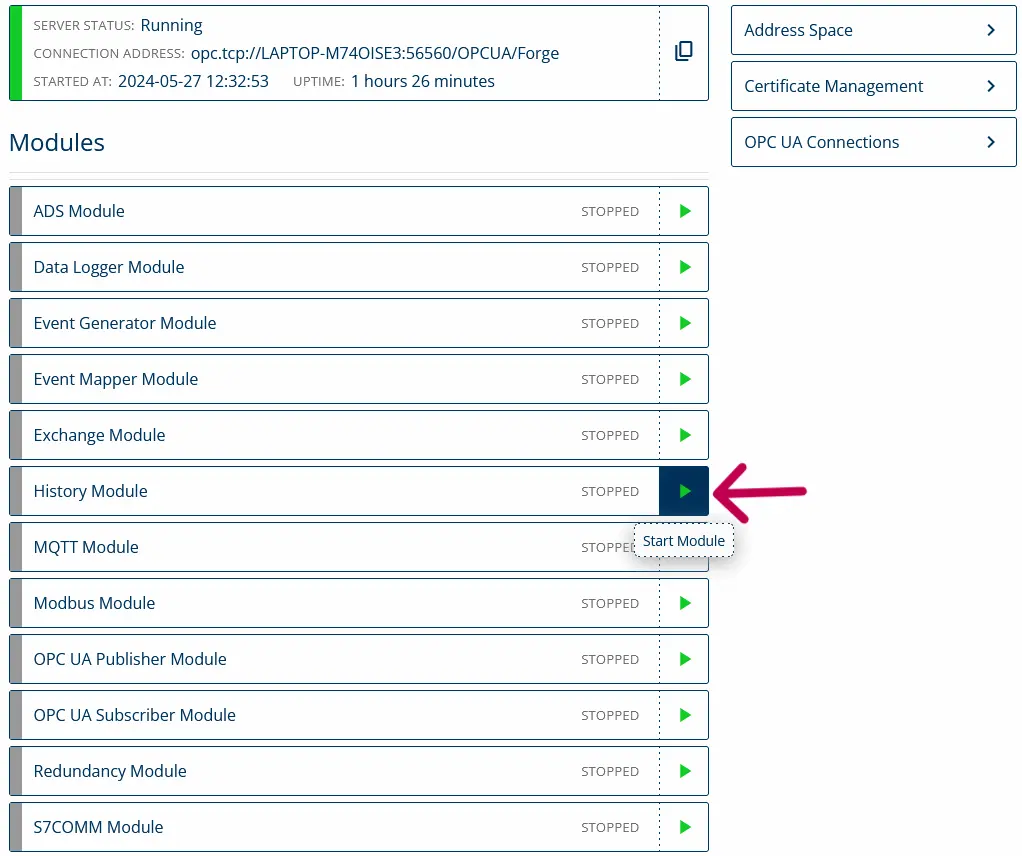
1. From the Dashboard, start the History Module.
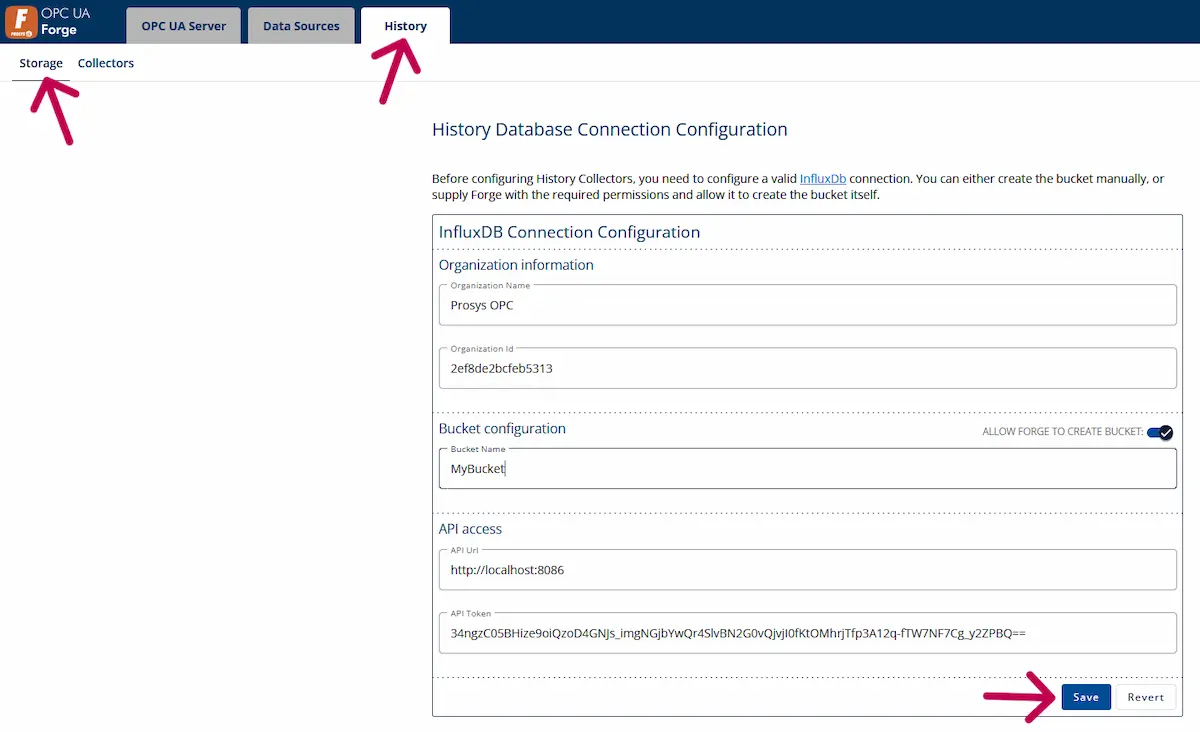
2. Navigate to History > Storage.
3. From InfluxDB’s user interface, you can find the necessary information to configure the connection with Forge. For this, you will need the Organization Name and Organization ID and the API URL and API Token from InfluxDB. After the configuration has been done, press Save.
Collect and Read Variable Data from the Address Space
1. Navigate to History > Collectors and click Add Collector. Give your History Collector a name and press Add.

2. Press the + button from the collector to add the variables you want to collect.

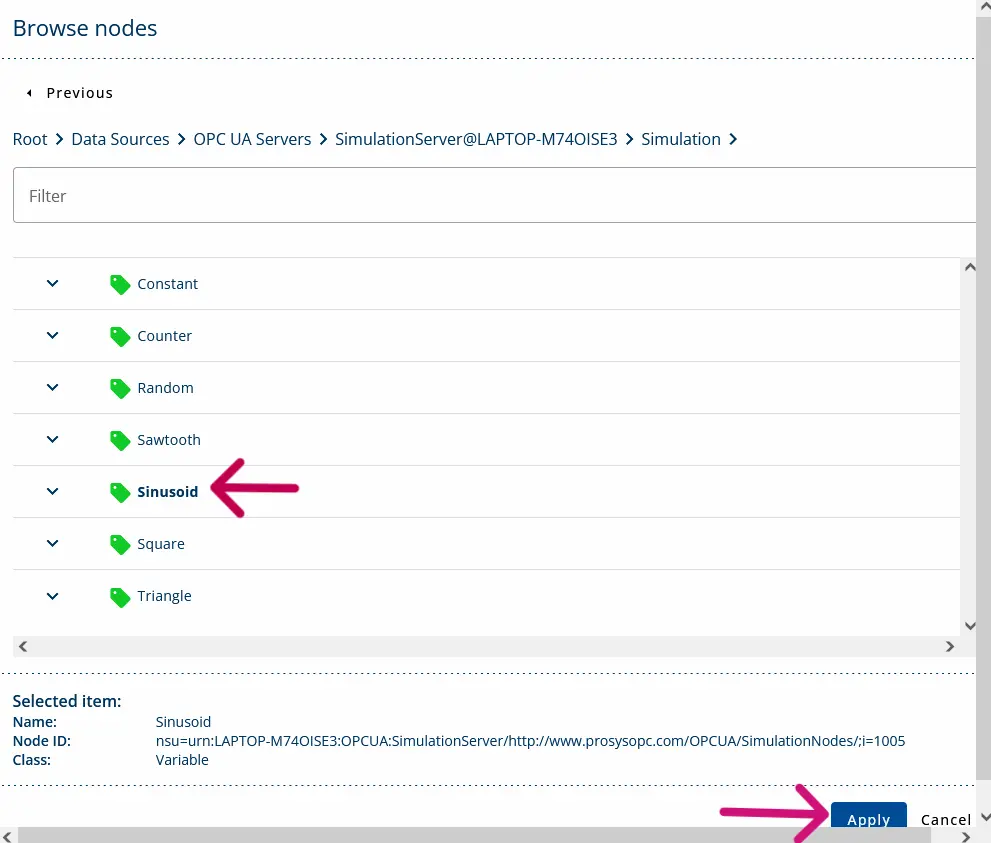
3. Search the address space for variables to collect. For this demonstration, select the Sinusoid variable found in Simulation Server and press Apply.
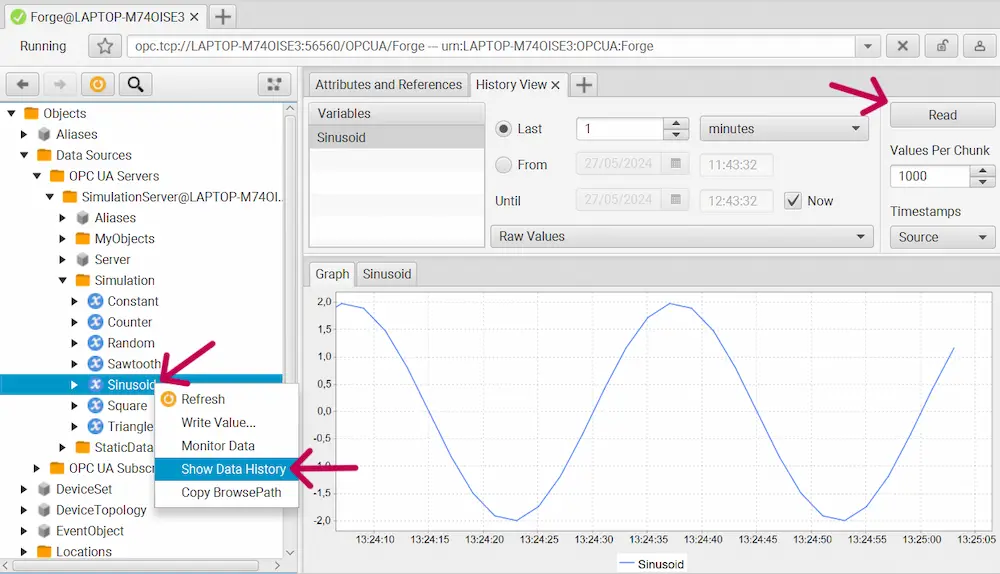
4. Using Prosys OPC UA Browser, you can read the collected history data from the selected variable. To do this, right-click the historized variable, select Show Data History, and press Read.
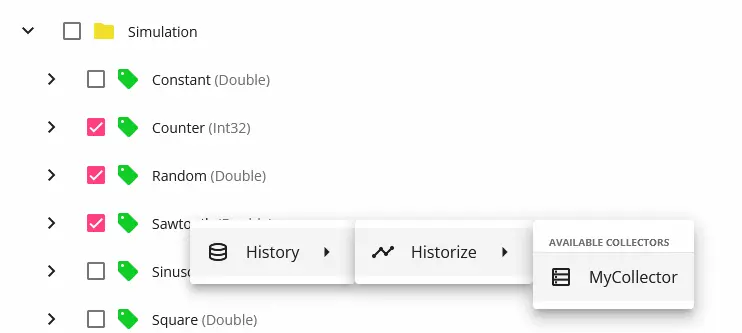
5. You can also collect history data directly from the address space by simply right-clicking a variable and selecting your collector from the History path. Multiple variables can be chosen by holding the Shift key.
Next Steps
This wraps up the 6th article of the Mastering Forge series. Here’s a recap of what we did in this article:
- Started the History Module and connected it to InfluxDB.
- Created a History Collector and added a variable for it to collect history data.
- Used Prosys OPC UA Browser to read the history data from this added variable.
In the next article, Mastering Forge #7, we will take a look at Forge’s Data Logger Module, which is used to store data from various sources for external use.
If you want to learn more about Forge and its capabilities, you can request a detailed introduction by emailing sales@prosysopc.com or using our contact form. We’d be delighted to provide tailored information about Forge that aligns with your interests and requirements.
Author Info

Iivo Yrjölä
Customer Integration & Support, Prosys OPC
Email: iivo.yrjola@prosysopc.com
