Welcome to the 16th tutorial on our series Mastering Forge.
In our previous article, Mastering Forge #15, we showed you how to update Forge and Forge’s license.
In this tutorial, we’ll learn about Forge’s role-based user management. We’ll also learn how to connect your Forge to your authentication service, such as LDAP.
If you prefer your tutorials in video format instead, you can watch our tutorial on Forge’s role-based user management on our YouTube channel.
During this tutorial, we’ll be using the following products:
- Prosys OPC UA Forge
- You can download an evaluation version through the request form
Connect to LDAP
Forge enables integration with authentication services like LDAP, allowing you to leverage existing credentials. This simplifies your architecture by minimizing the need for additional user credential management.
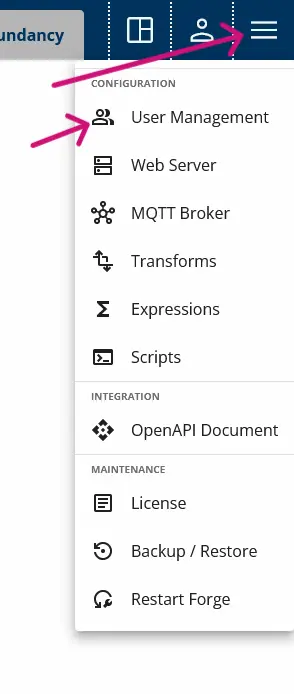
1. Navigate to Advanced Menu > User Management > Providers and click + Add Provider.

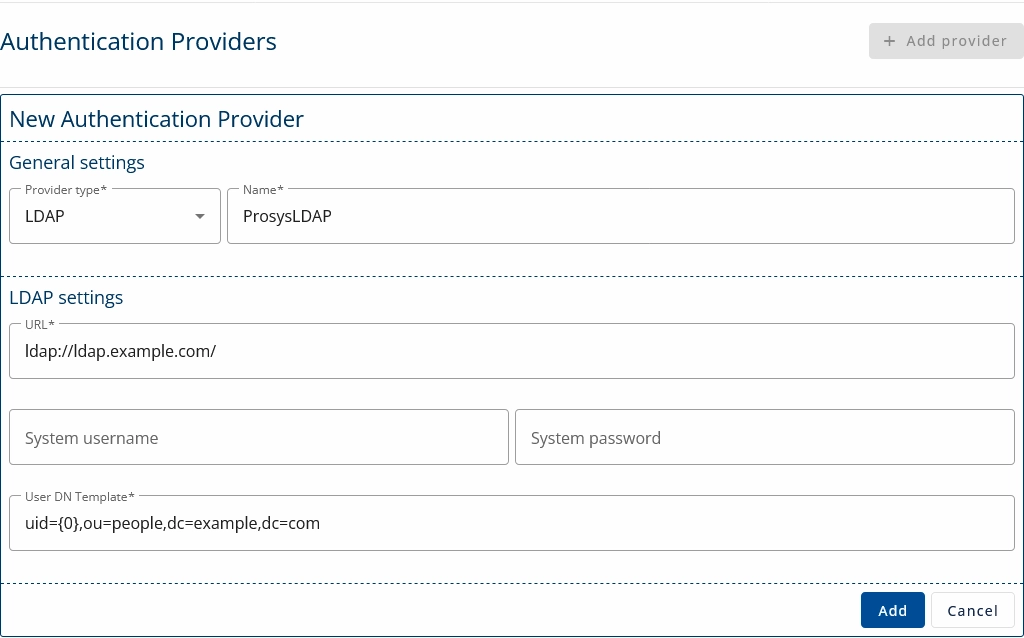
2. Enter the details of your authentication provider and click Add.
Enable Role-Based User Management
Create user groups to manage and organize permissions. Assign users to these groups to ensure controlled access to your data. We’ll begin by restricting global permissions to ensure only users with the appropriate roles can access specific functionalities.
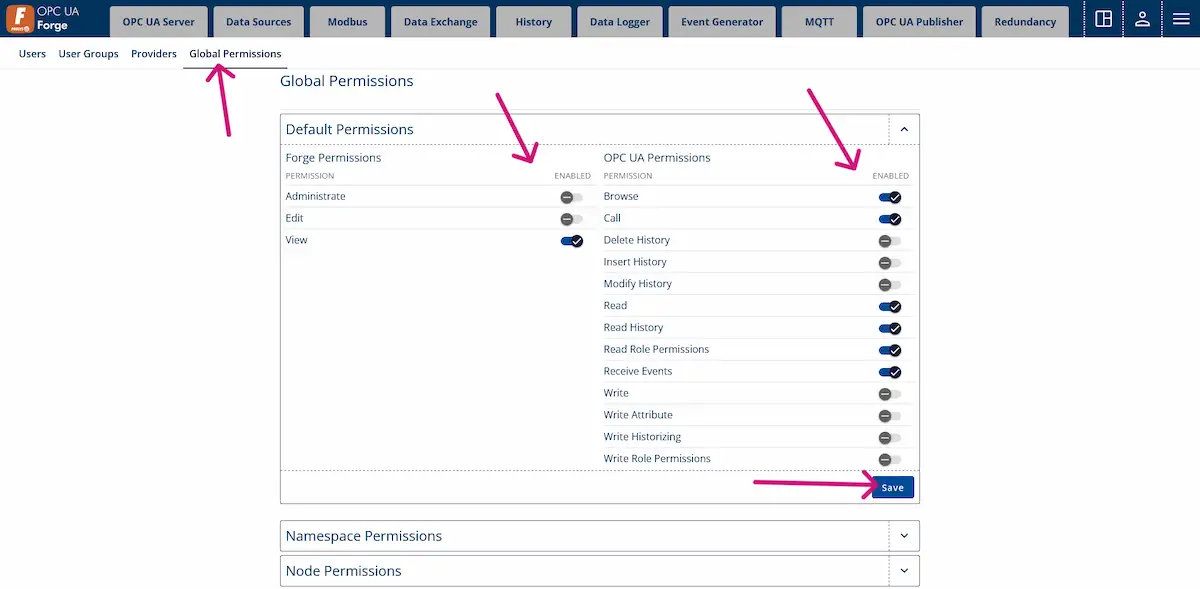
1. Navigate to Advanced Menu > User Management > Global Permissions.
2. Disable the permissions as shown in the figure.
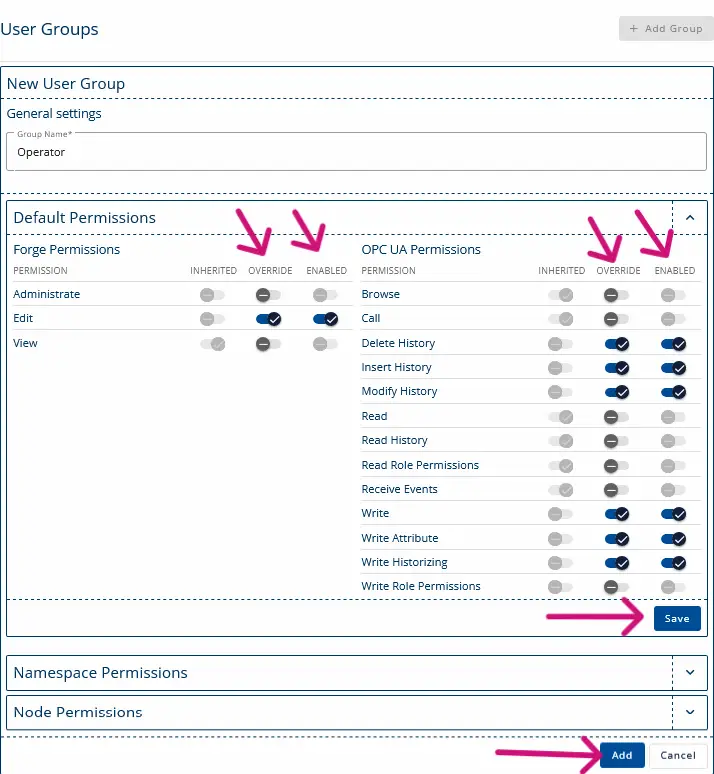
3. Navigate to Advanced Menu > User Management > User Groups and click + Add Group.

4. Name the group “Operator” and enable the permissions shown in the following image.
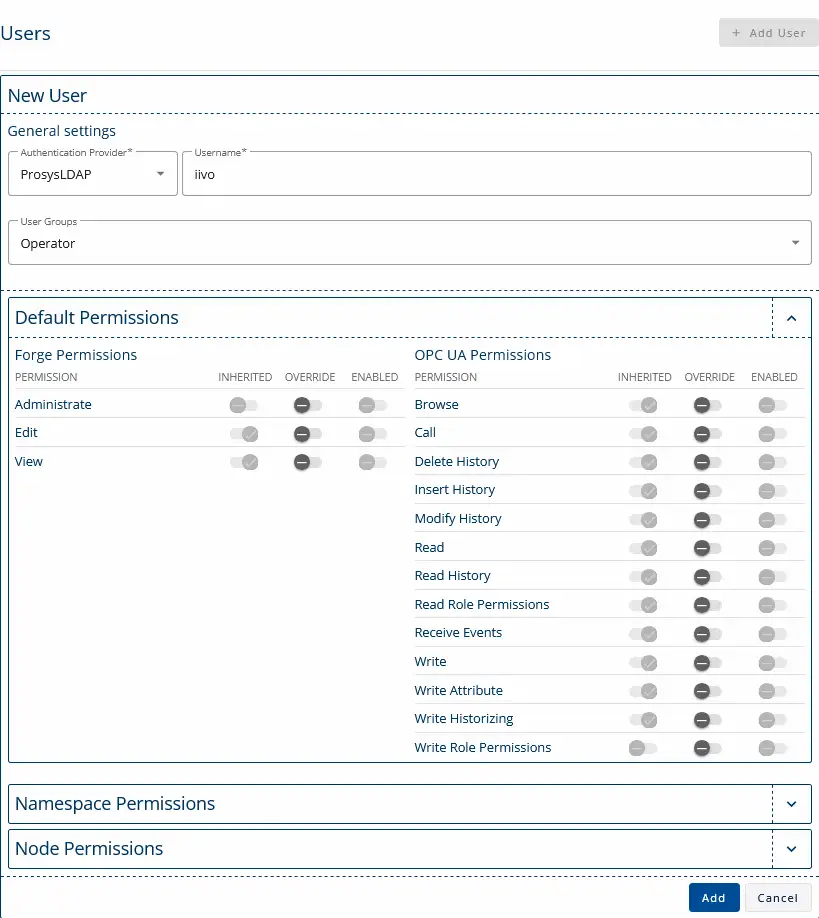
5. Next, we’ll create a user for the Operators group. Navigate to Advanced Menu > User Management > Users and click + Add User.

6. Select the group and enter the username of the LDAP user you wish to add. The user’s permissions will be inherited from the group’s assigned permissions.
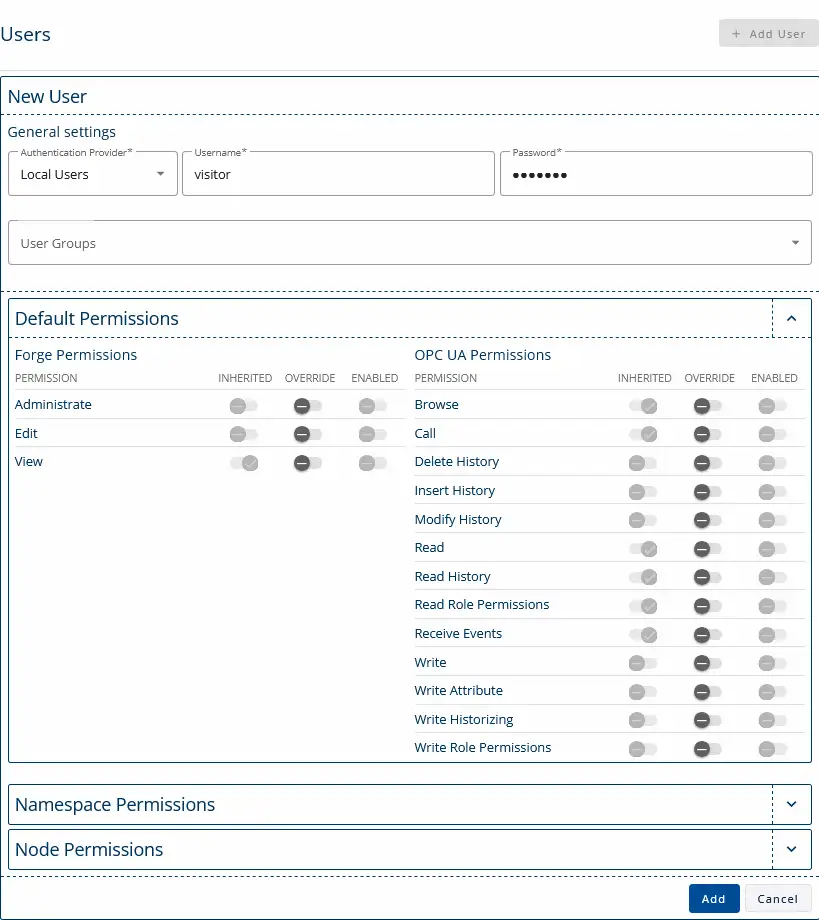
7. You can also create a Local User by specifying a username and password. If the user is not assigned to any group, they will automatically inherit the global permissions.
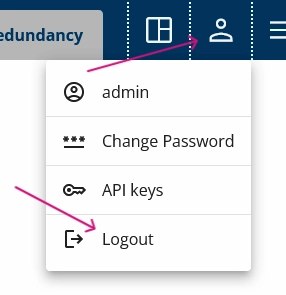
8. You can now log out of Forge and log back in using a different user account.
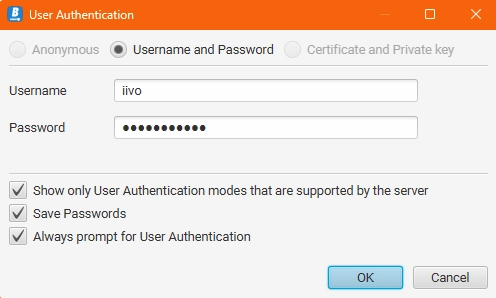
9. These user credentials can also be used to log in with an OPC UA client, such as Prosys OPC UA Browser.
Next Steps
This wraps up the 16th article of the Mastering Forge series. Here’s a recap of what we did in this tutorial:
- We connected Forge to LDAP.
- We created a User Group to manage permissions.
- We set up a user with restricted access.
In the next article Mastering Forge #17, we’ll explore the Event Mapper feature, which allows you to access data from OPC UA events.
If you want to learn more about Forge and its capabilities, you can request a detailed introduction by emailing sales@prosysopc.com or using our contact form. We’d be delighted to provide tailored information about Forge that aligns with your interests and requirements.
Author Info

Iivo Yrjölä
Customer Integration & Support, Prosys OPC
Email: iivo.yrjola@prosysopc.com
