Welcome to the third tutorial on our series Mastering Forge.
As a quick recap, in our previous article, Mastering Forge #2, we added data sources to Forge. We did this by connecting to an external OPC UA server.
In this article, we will first take a look at Forge’s security settings. After that, we will establish a secure connection to Forge with an OPC UA client. For this, we will use Prosys OPC UA Browser, which you can download for free.
Also, if you prefer your tutorials in video format instead, you can watch our video about creating a secure connection with an OPC UA client on YouTube.
During this tutorial, we’ll be using the following products:
- Prosys OPC UA Forge
- You can download an evaluation version through the request form.
- Starting stage: Initialized and running
- Prosys OPC UA Browser
- You can download the free version through the product’s request form.
- Starting stage: Running
OPC UA Security settings
First, we will change the OPC UA server security settings so that the OPC UA clients are required a secure connection with authentication.
1. Navigate to OPC UA Server > Server Settings.

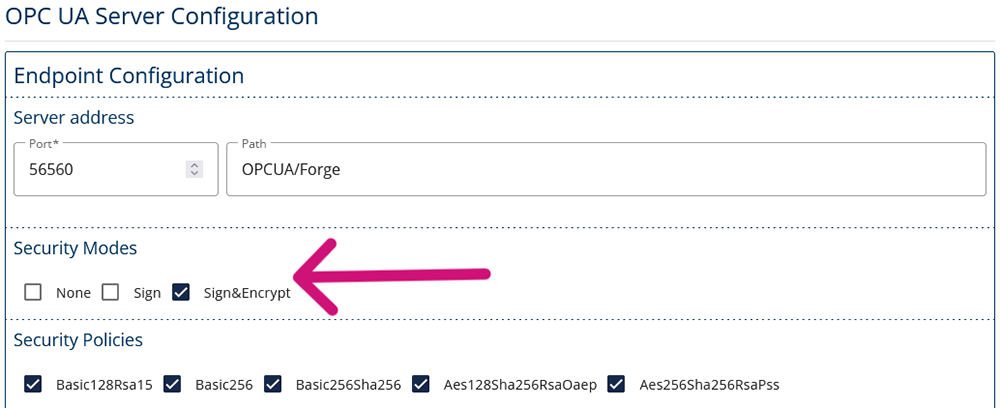
2. Under Security Modes, select only Sign&Encrypt. This will allow only secured connections to Forge.
3. Under User Authentication, select only Username and Password. With this setting, Forge will require user authentication from the OPC UA client to be able to connect.
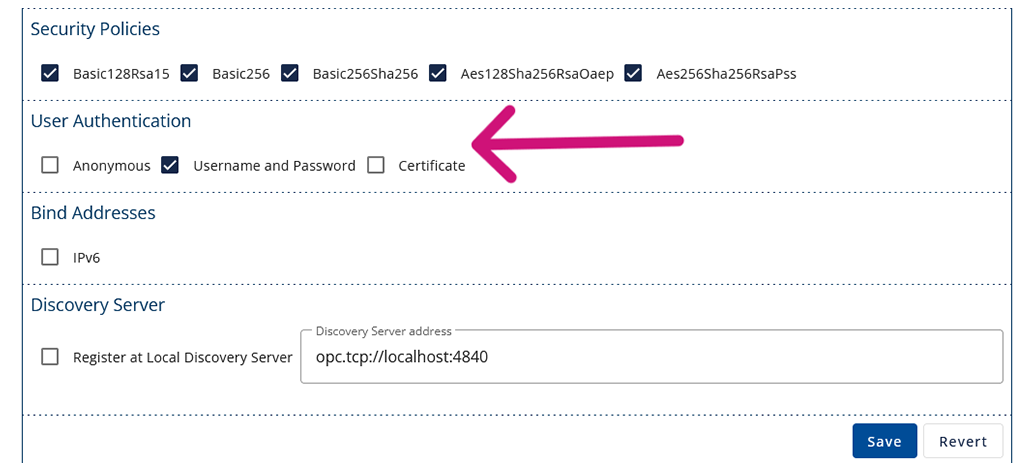
4. Press Save to save the changes.
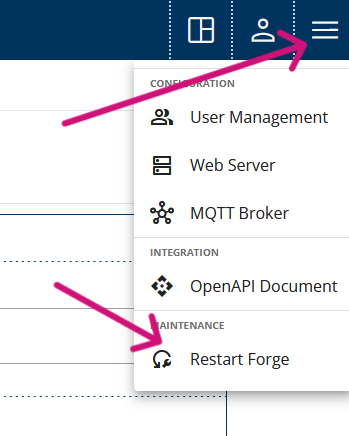
5. Restart Forge from the top right menu button. Confirm the restart.
Establish a Secure Connection With an OPC UA Client
1. In Forge’s Dashboard, copy the connection address.

2. Open Prosys OPC UA Browser and paste the connection address to the address bar.
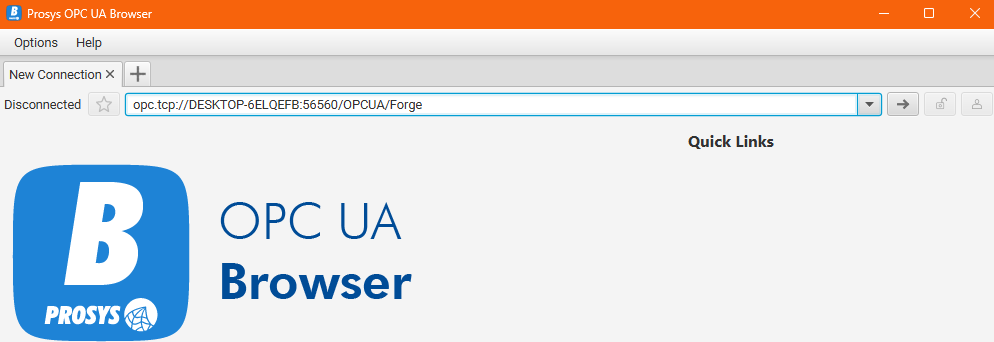
3. Browser will prompt the Security Settings from which we can see that only Sign&Encrypt is allowed. Press OK.
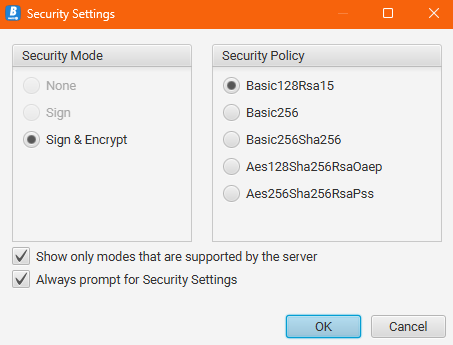
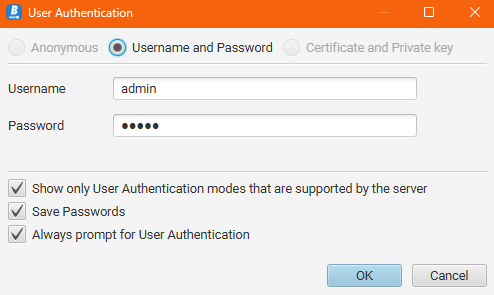
4. Next, Browser will prompt the User Authentication. For simplicity, we’ll use the credentials created in the initialization process in the Mastering Forge #1 article. Press OK.
Note: To add security, we should create a new user for our specific client through User Management from the top right menu button. However, we will go through that process in a future article and use the initial user for now.
5. Press Accept Permanently or Accept Once, upon your preference. The connection cannot be established yet because Forge needs to trust the client’s certificate first.
6. Go back to Forge and navigate to OPC UA Certificates under OPC UA Server > Certificates.
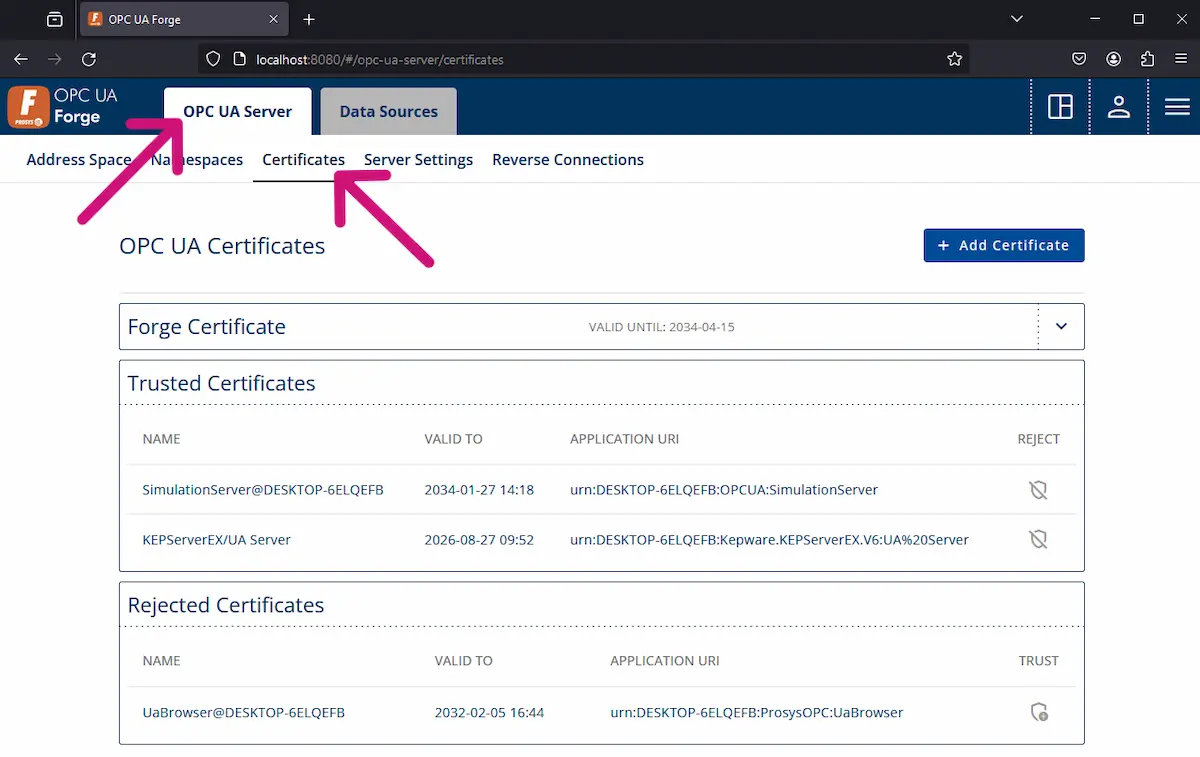
7. Trust the “UaBrowser” certificate by clicking the shield button. This will move the certificate from Rejected Certificates to Trusted Certificates.

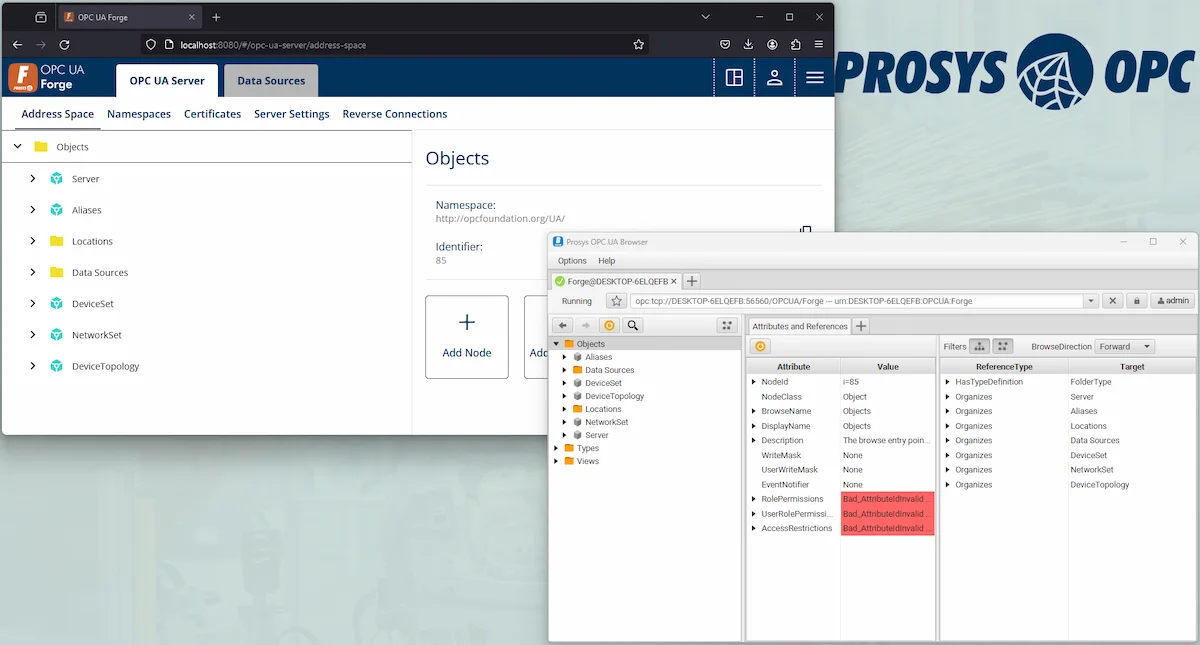
8. Now, you can repeat steps 2-5 with Browser, and the secure connection will be established.
Next Steps
This wraps up the third article of our Mastering Forge series. To recap, we
- Updated Forge’s security settings to require secure connections from all connecting OPC UA clients.
- Next, we connected to Forge with Prosys OPC UA Browser. This process consisted of trusting the Browser’s certificate with Forge before the connection was successful.
Now, you can easily connect any number of OPC UA clients to Forge. This opens up a world of possibilities for you to browse Forge with an OPC UA client, giving you more control over your data integration.
In our next article, Mastering Forge #4, we’ll dive into the exciting world of data harmonization. We’ll walk through the process of importing information models and creating instances that accurately reflect your system. Then, we’ll look at how to map data to these newly created models. This essential step will not only streamline your data integration but also significantly improve your overall system efficiency. Get ready for a game-changer!
If you want to learn more about Forge and its capabilities, you can request a detailed introduction by emailing sales@prosysopc.com or using our contact form. We’d be delighted to provide tailored information about Forge that aligns with your interests and requirements.
Author Info

Iivo Yrjölä
Customer Integration & Support, Prosys OPC
Email: iivo.yrjola@prosysopc.com
