Welcome to the fourth tutorial on our series Mastering Forge.
As a quick recap, in our previous article, Mastering Forge #3, we provided a step-by-step guide on configuring the security settings of Forge’s OPC UA server and establishing a secure connection with an OPC UA client.
In this article, we will explore Forge’s capabilities in data harmonization, focusing on OPC UA information models and data mapping.
To follow along with this tutorial, you need to have a valid NodeSet file. For example, you can download one from the OPC Foundation’s online references. In this example, we are going to use the CommercialKitchenEuipment Node Set.
Also, if you prefer your tutorials in video format instead, you can watch our video about mapping your data with Forge on YouTube.
During this tutorial, we’ll be using the following products:
- Prosys OPC UA Forge
- You can download an evaluation version through the request form.
- Prosys OPC UA Simulation Server
- You can download the free version through the product’s request form.
- Prosys OPC UA Browser
- You can download it for free by using the download request form.
Import NodeSet
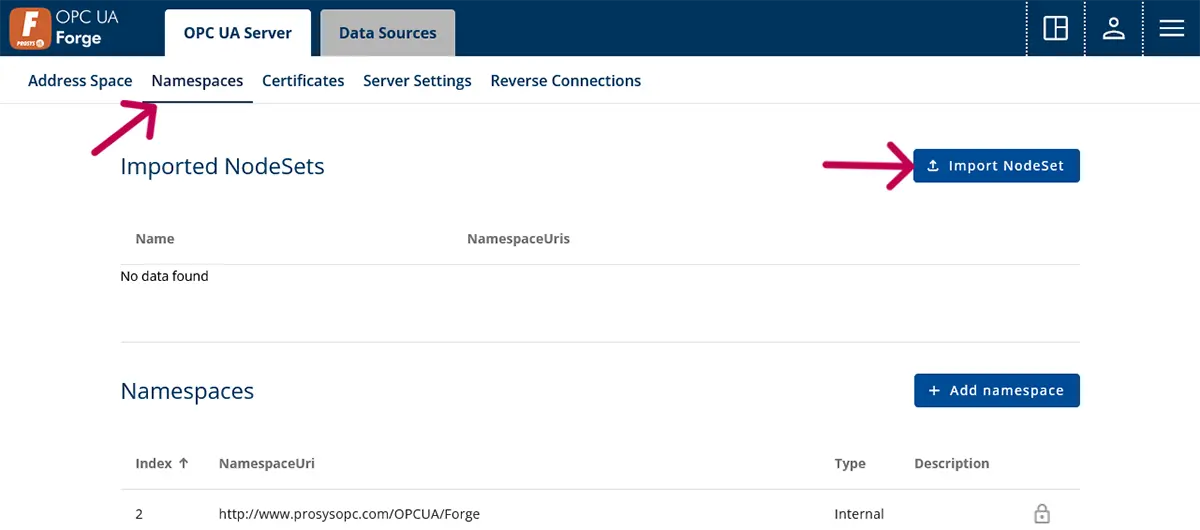
1. Navigate to OPC UA Server > Namespaces and press Import NodeSet.
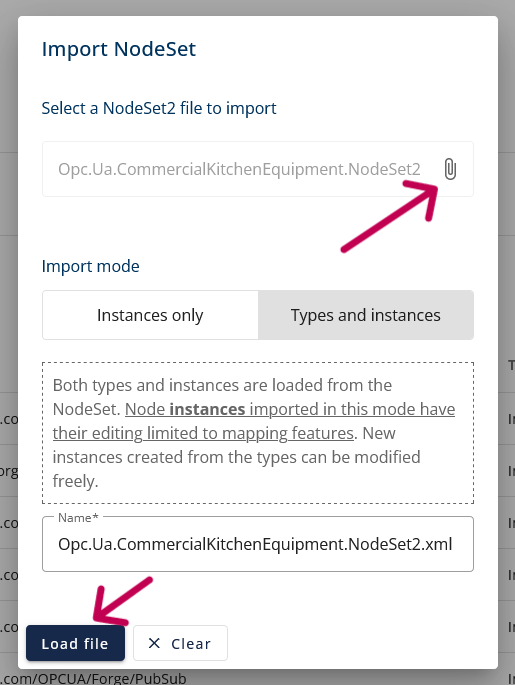
3. Select the NodeSet2 file, which is .xml type.
4. Select Types and instances and press Load file.
Create Instances
1. Navigate to Forge’s Address Space (OPC UA Server > Address Space).
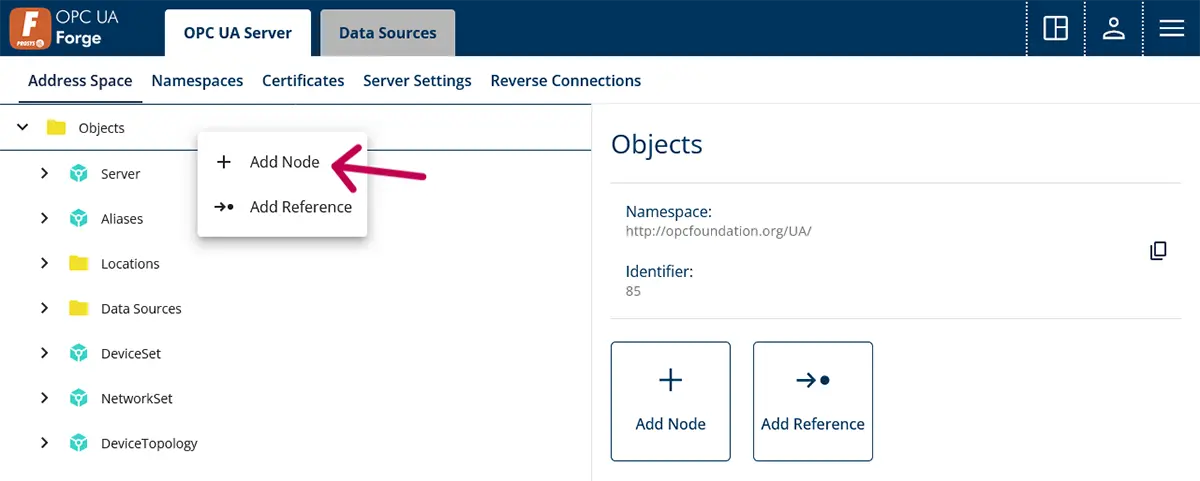
2. Right-click on the Objects and select + Add Node.
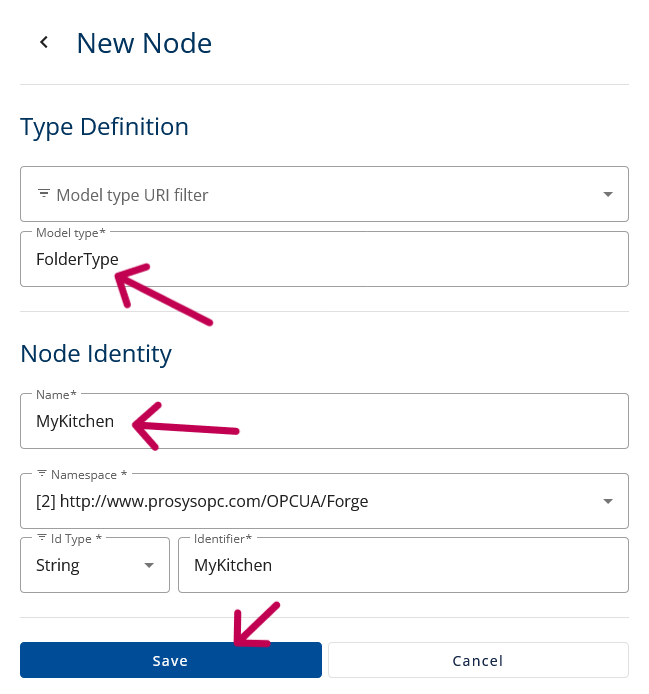
3. Create a FolderType instance by selecting FolderType from the Model Type dropdown list. Give a name for the instance. Press Save to create the instance.
4. Select the created Folder from the Address Space and click + Add Node.
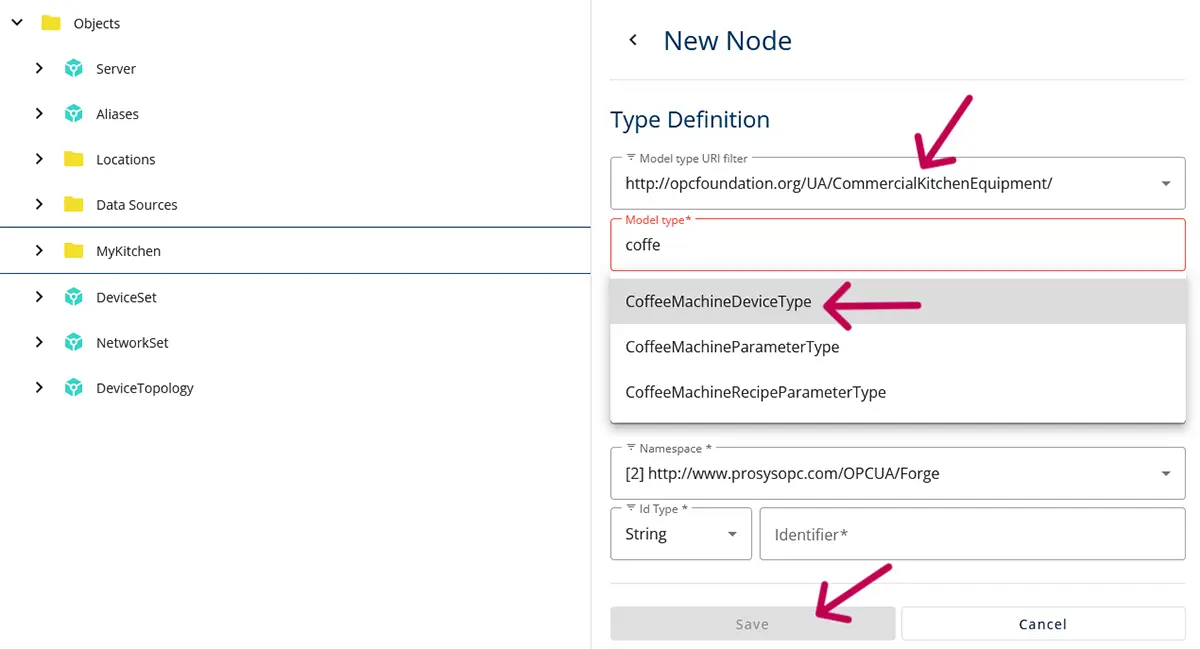
5. Select the Model type URI filter to be http://opcfoundation.org/UA/CommercialKitchenEquipment/ to filter the Model Type list.
6. Select CoffeeMachineDeviceType for the Model type. Give a name for the instance and press Save to create the instance.
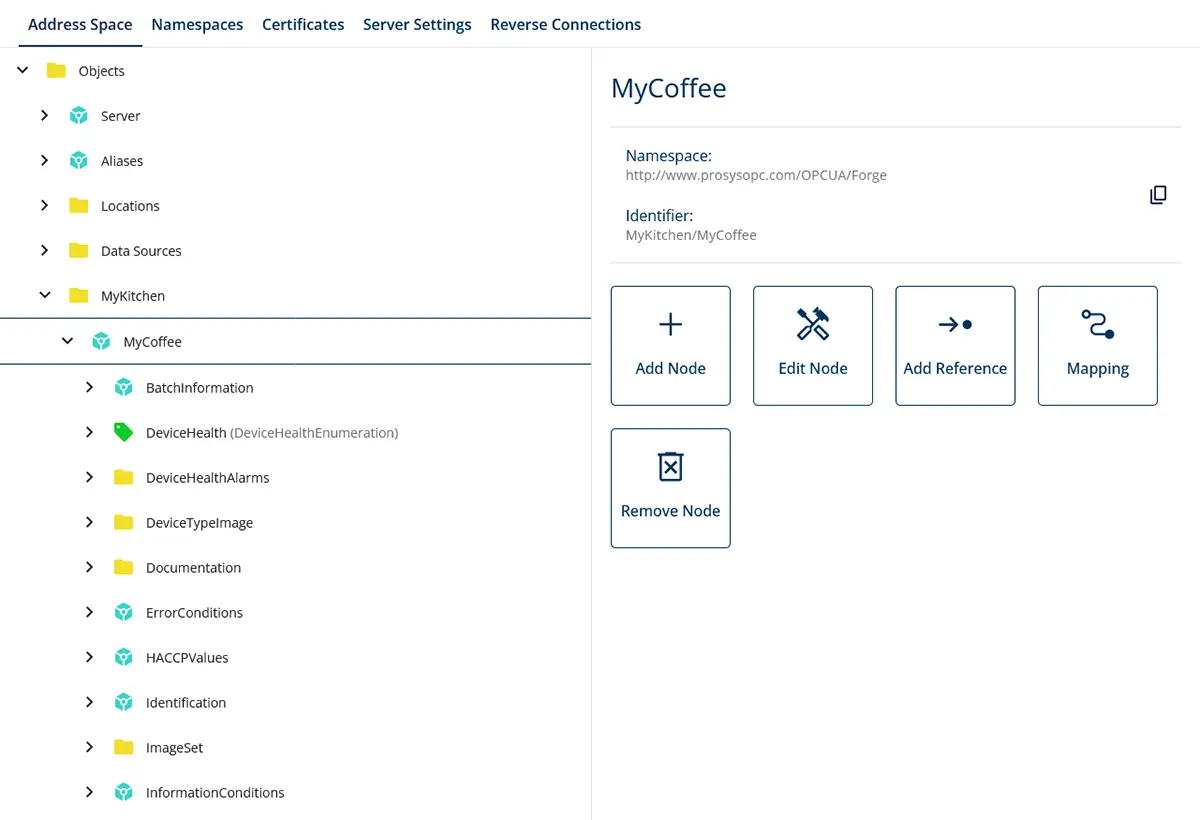
7. A full model will be created, and it can be browsed in Forge’s Address Space.
Map Data
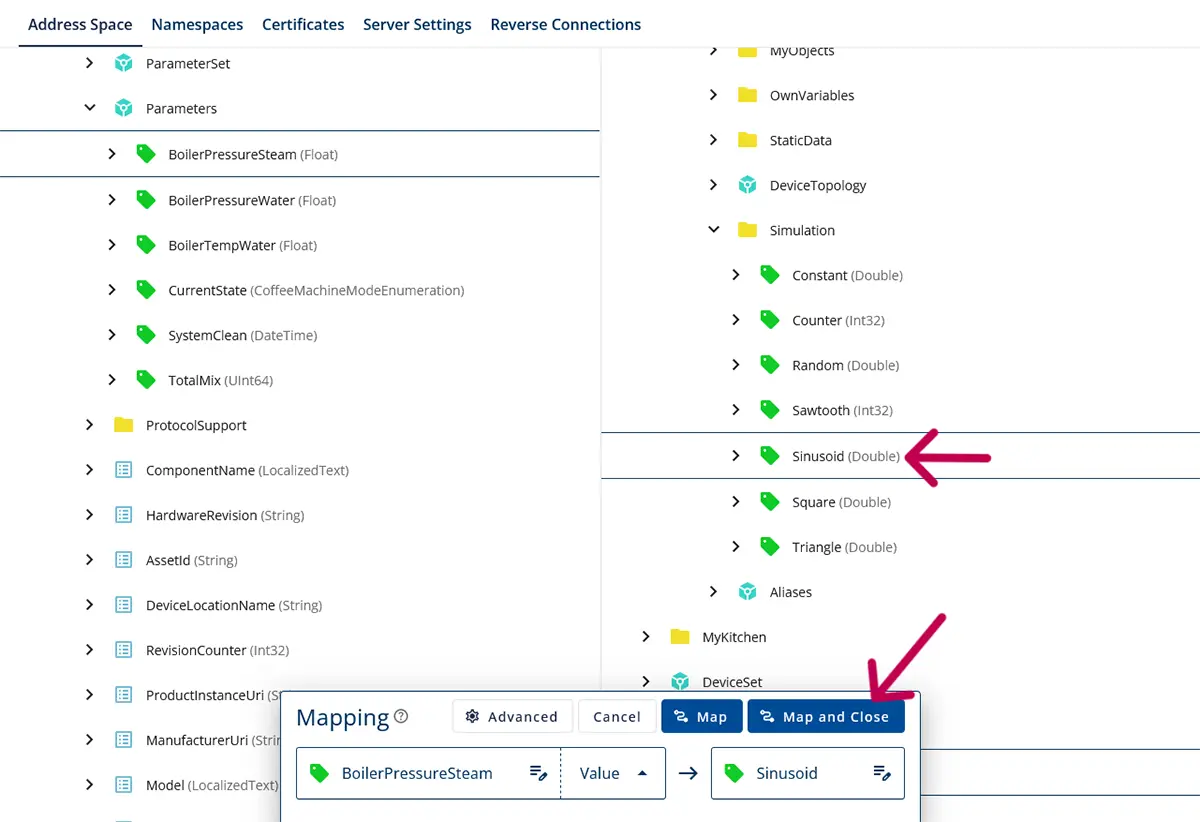
1. Select node MyKitchen/MyCoffee/Parameters/BoilerPressureSteam and press Mapping.
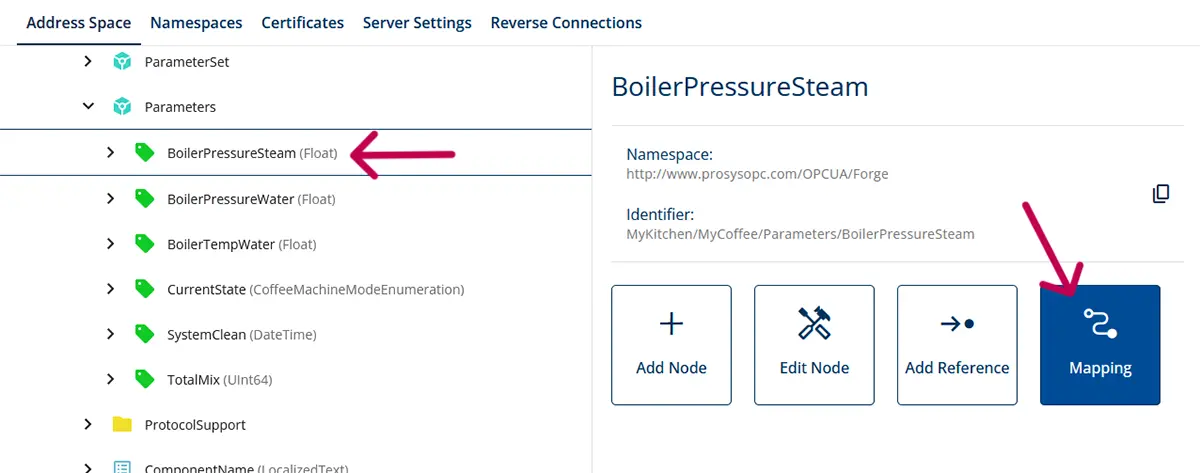
2. Select the Value attribute and Map to Node.
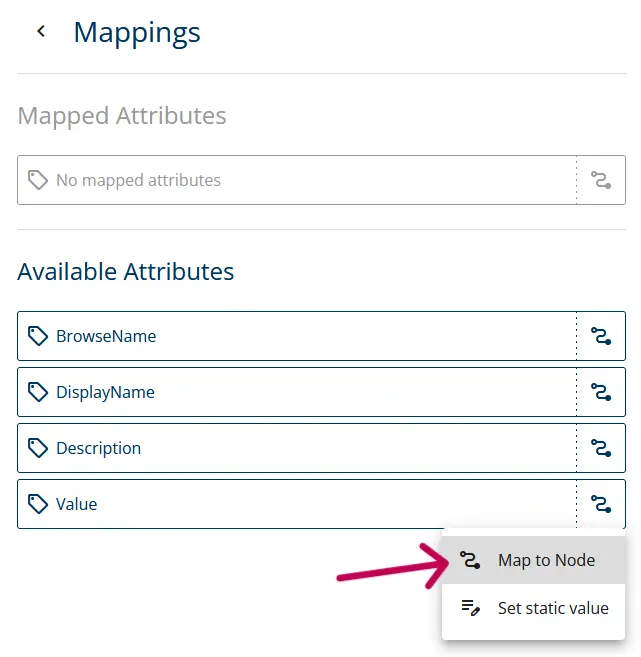
3. This will open a view with two columns. The left side shows the node which will have the information from the node that will be selected on the right side. This way, the BoilerPressureSteam variable will receive values from the node on the right side.
4. Browse to the Simulation Server address space and select a node with the same DataType.
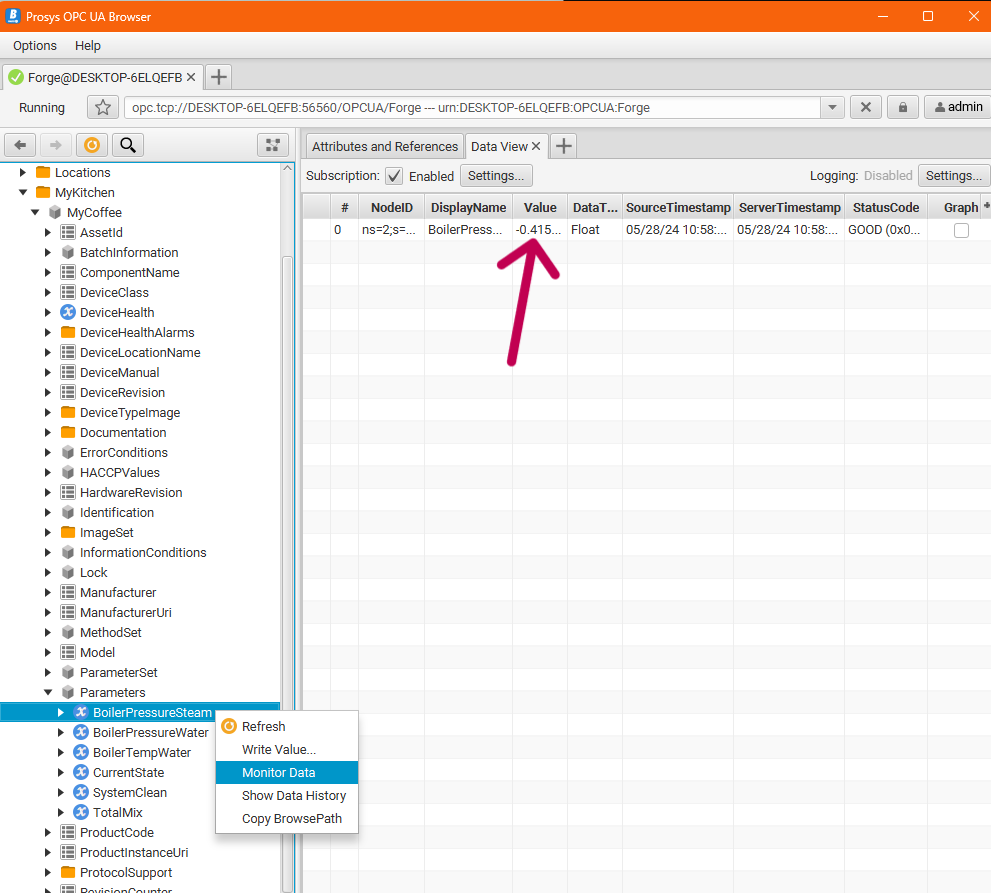
5. Open Prosys OPC UA Browser and verify that you can see the mapped variable value.
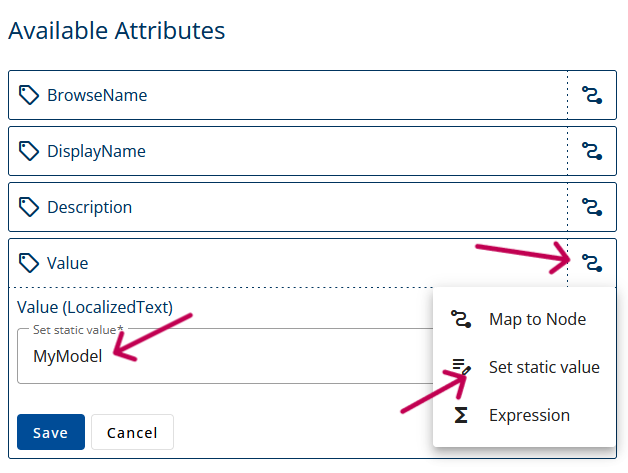
6. Optionally, you can set static values for variables and enrich the model even further.
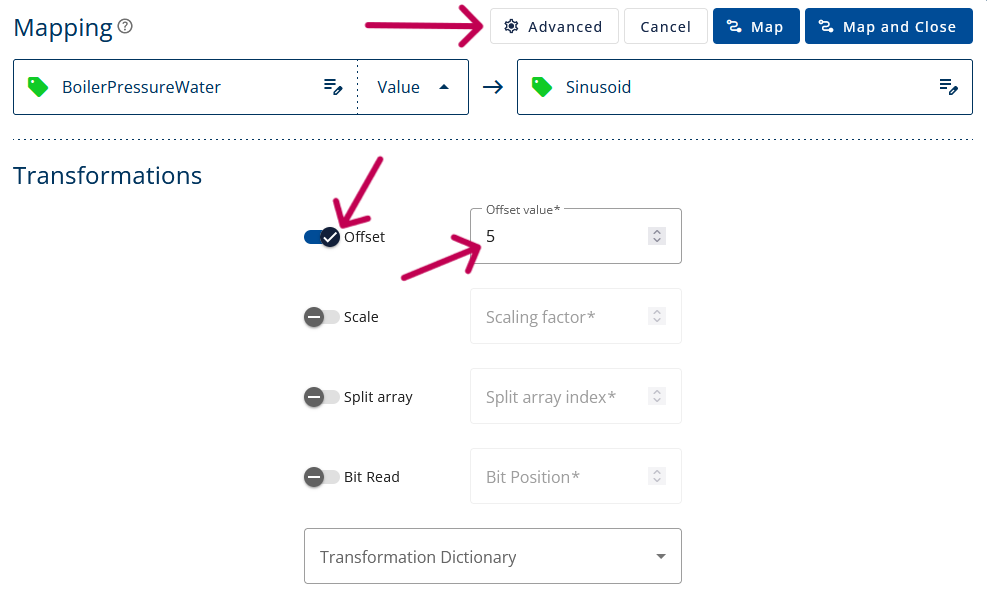
7. From Advanced Mappings, you can also define an offset or scale the mapped value. You can even select one element from an array or one bit from a byte.
Next Steps
This wraps up the fourth article of Mastering Forge. Now that the core features are covered, we can move on to other features that Forge offers. Here’s a recap of what we did in this article:
- We imported NodeSets to Forge’s namespace and created instances to the address space from them.
- Mapped data from one variable to another.
- Verified that the data was mapped correctly using Prosys OPC UA Browser.
Get ready for our next exciting topic! In the next article, Mastering Forge #5, we will delve into how to publish data with UNS structure to an MQTT broker running on Amazon Web Services (AWS) using Forge.
If you want to learn more about Forge and its capabilities, you can request a detailed introduction by emailing sales@prosysopc.com or using our contact form. We’d be delighted to provide tailored information about Forge that aligns with your interests and requirements.
Author Info

Iivo Yrjölä
Customer Integration & Support, Prosys OPC
Email: iivo.yrjola@prosysopc.com
