Welcome to the fifth article in our tutorial series, Mastering Forge!
In the previous article, Mastering Forge #4, we learned to harmonize data using NodeSets and Forge’s mapping features.
In this article, we will connect to an MQTT broker running on Amazon Web Services (AWS) using Forge. You will learn how Forge can be used to publish and subscribe to data in UNS format through this broker.
Also, if you prefer your tutorials in video format instead, you can watch our tutorial on publishing and subscribing to data through MQTT on YouTube.
During this tutorial, we’ll be using the following products:
- Prosys OPC UA Forge
- You can download an evaluation version through the request form.
- Prosys OPC UA Simulation Server
- You can download the free version through the product’s request form.
- Prosys OPC UA Browser
- You can download the free version through the product’s request form.
Connect to MQTT Broker
1. Start the MQTT Module on Forge.
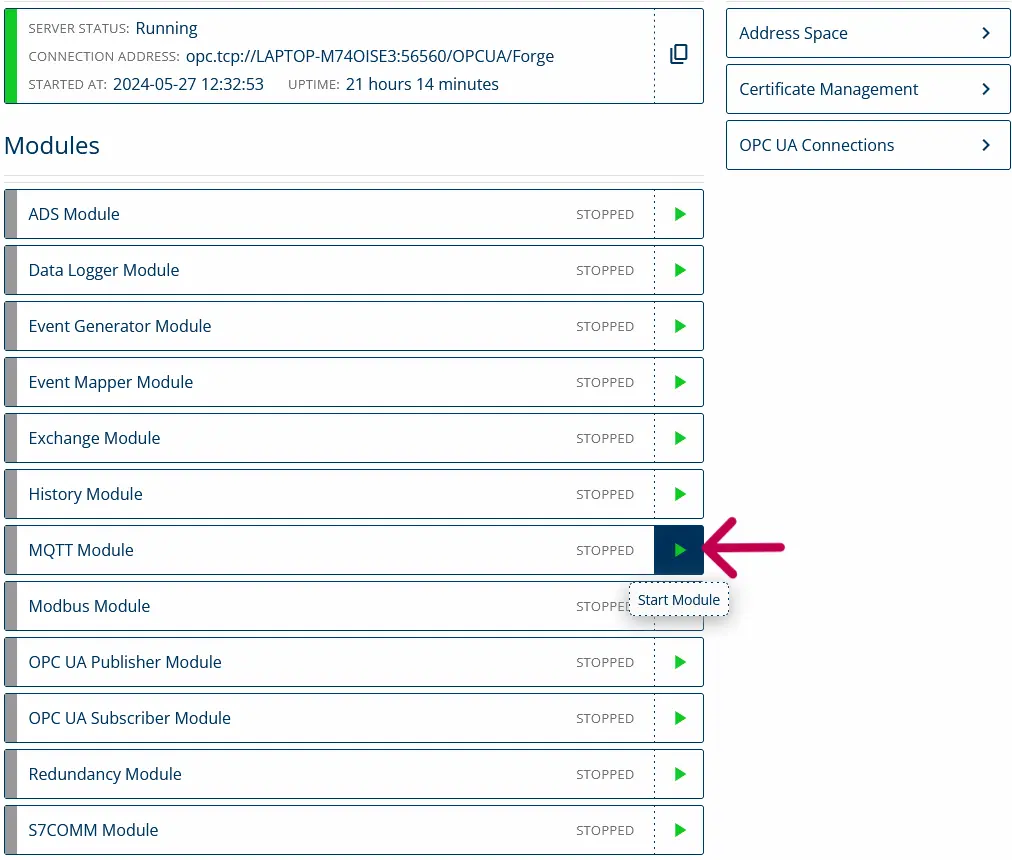
2. Navigate to MQTT > Connections and click Add Connection.

3. Here, you need to enable the connection from the top right of the window and give it a name.

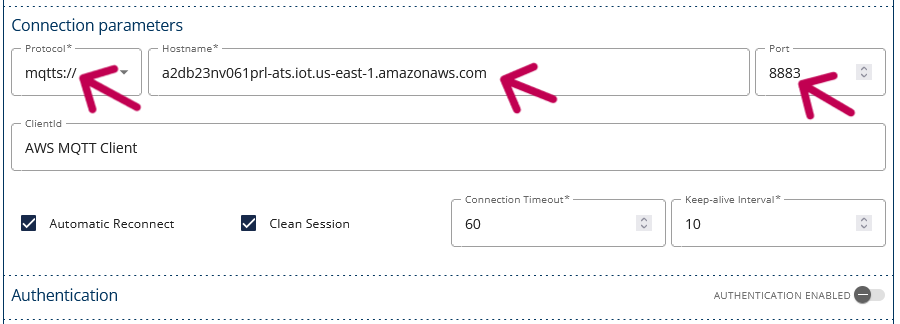
4. For a secure connection, select mqtts as the protocol. Fill in your broker’s Hostname and Port.
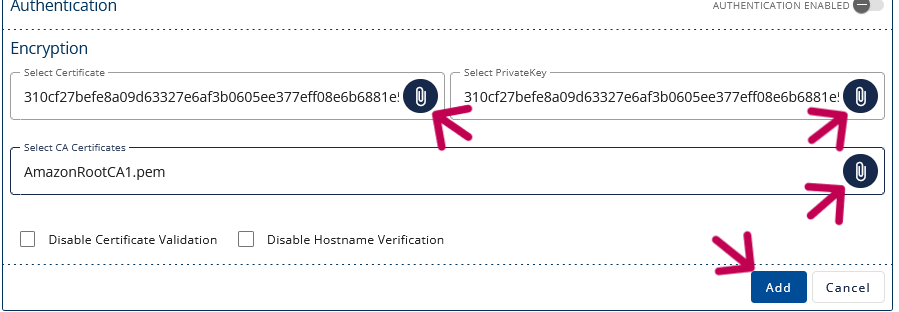
5. Forge asks for the broker’s Certificate and PrivateKey, which you can find on your AWS. Once you have filled in the information, click on the Add button.
6. After adding the connection, you can check if the connection succeeded. The green color on the left side of your connection indicates this.

Publish Data Using MQTT
NOTE: Before creating the publisher, you can create a template for your publishers and subscribers under MQTT > Templates. This makes it faster for you to create them later because you can reuse the common settings. Watch our tutorial on how to create a template on YouTube.
1. From the Publishers section, click Add Publisher and select UNS.

2. In the opened configuration view, toggle the publisher Enabled and give it a name.

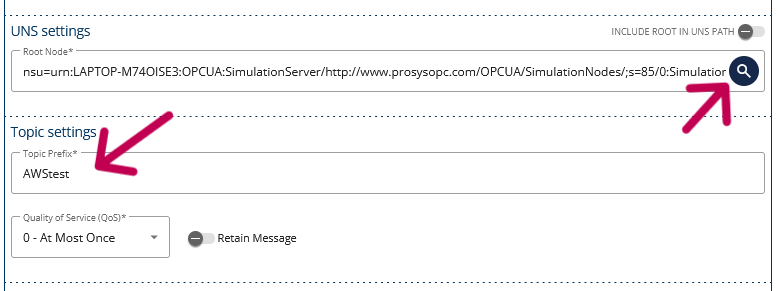
3. After that, select your Root Node for the UNS using the Browse node dialog. You can access this dialog by pressing the search icon on the right. We are using Simulation Server’s Simulation folder. Next, give your topic a name (Topic Prefix).
4. Finally, define a value path under JSON Mappings, and press Add.
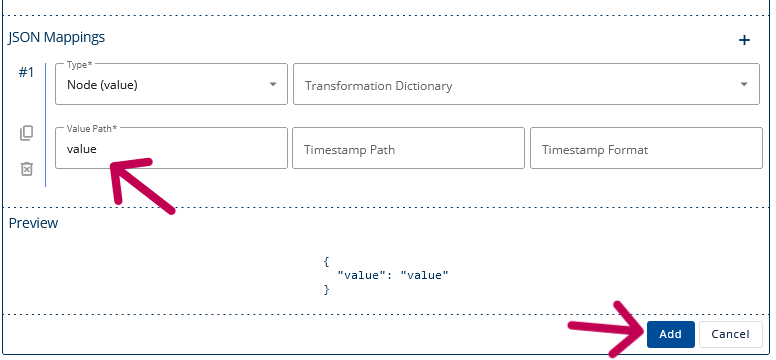
5. You should now be able to see the published data using an MQTT client of your choice.
Subscribe to Data Using MQTT
1. Under MQTT > Subscriptions, press Add Subscription.

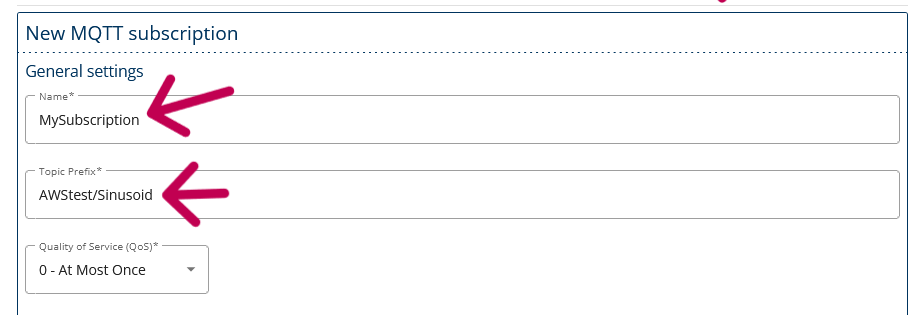
2. In the opened configuration view, give your subscription a Name and the Topic to listen to. We have selected the Sinusoid variable under the previously defined topic AWStest.
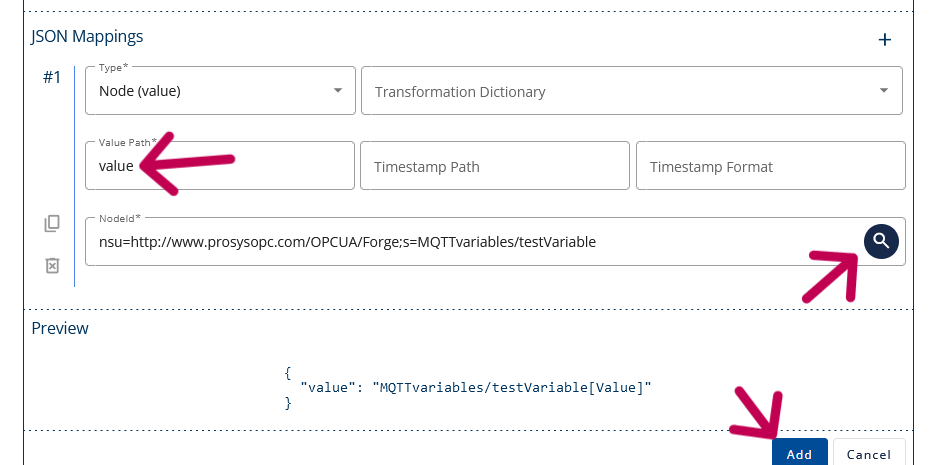
3. Enter the same name for the Value Path as previously (Publish Data Using MQTT step 4) and select any variable from Forge’s address space to subscribe to the topic. Once again, you can choose the variable from the Browse node dialog. Save the configuration by pressing Add.
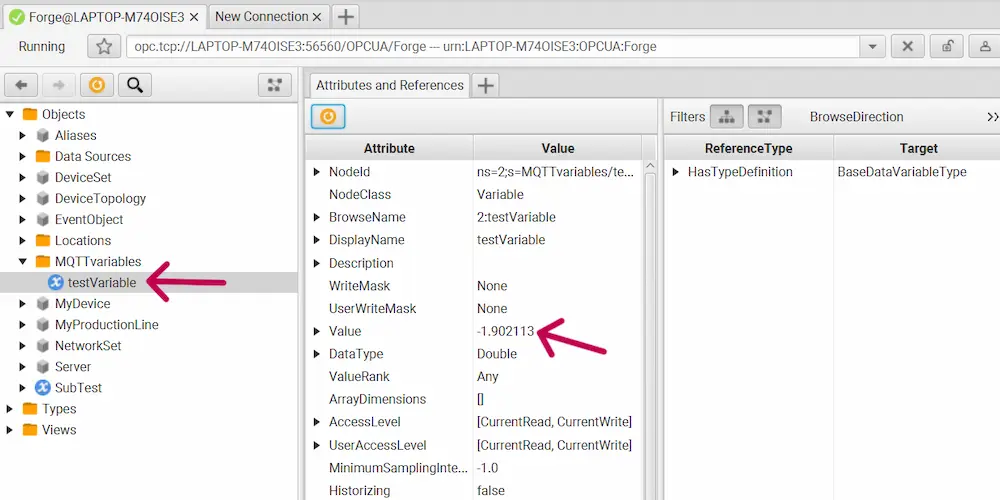
4. You can now open Prosys OPC UA Browser to validate that the variable in Forge has successfully subscribed to the topic. The value of the variable should be updated every second.
NOTE: The connection used between Browser and Forge is OPC UA Client/Server.
Next Steps
This wraps up the fifth article in our Mastering Forge series. To recap, here is what we did:
- Started the MQTT Module and connected to an MQTT broker running on AWS.
- Created a publisher that publishes data in UNS format to the MQTT broker.
- Subscribed to the MQTT broker with a variable and validated that the subscription works using Prosys OPC UA Browser.
In the next article, Mastering Forge #6, we will tackle Forge’s History Module. This module uses OPC UA’s Historical Access feature and can thus be used to collect data directly from nodes and share that data with client applications.
If you want to learn more about Forge and its capabilities, you can request a detailed introduction by emailing sales@prosysopc.com or using our contact form. We’d be delighted to provide tailored information about Forge that aligns with your interests and requirements.

Iivo Yrjölä
Customer Integration & Support, Prosys OPC
Email: iivo.yrjola@prosysopc.com
