Welcome to the 8th tutorial on our series Mastering Forge.
Our previous article, Mastering Forge #7, provided a guide to log data to different databases.
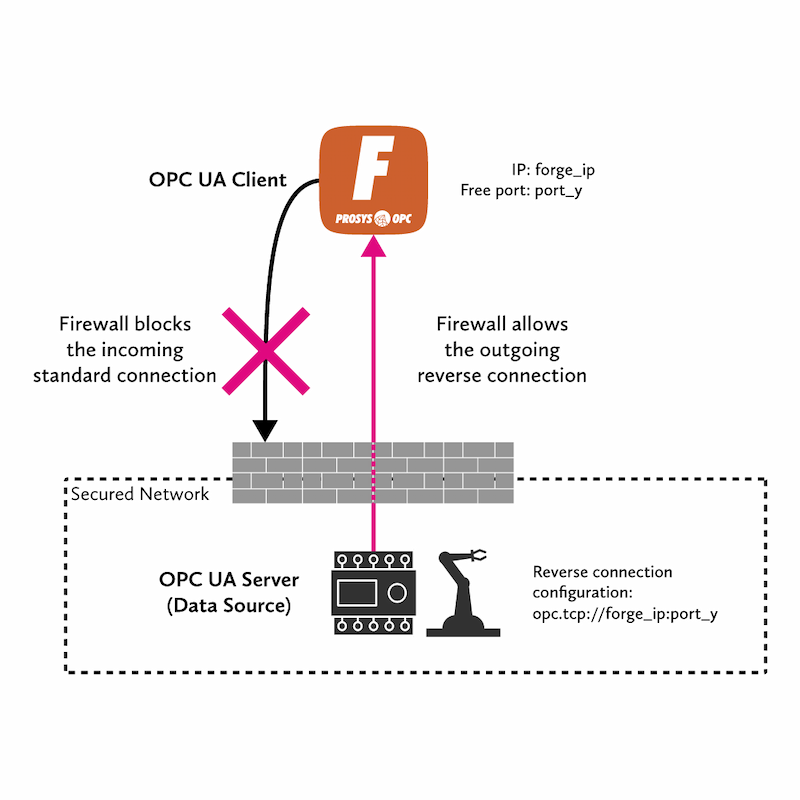
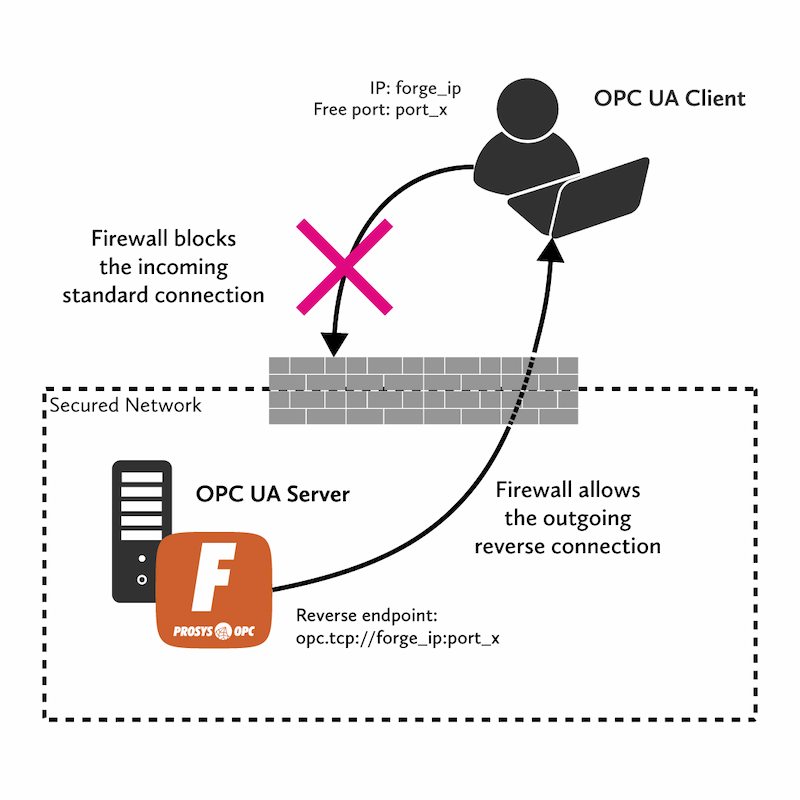
In this article, we will look at Forge’s reverse connection capabilities. A reverse connection is a feature that allows us to change the order in which the connection is established. They are a great way to avoid complex firewall rules and keep the network safe. This tutorial contains two parts:
- The reverse connection between Forge and an OPC UA server.
- The reverse connection between Forge and an OPC UA client.
If you prefer your tutorials in video format instead, you can watch our video on creating reverse connections on YouTube.
During this tutorial, we’ll be using the following products:
- Prosys OPC UA Forge
- You can download an evaluation version through the request form.
- Prosys OPC UA Simulation Server
- You can download the free version through the product’s request form.
- Prosys OPC UA Browser
- You can download the free version through the product’s request form.
Reverse Connect Forge to a Data Source
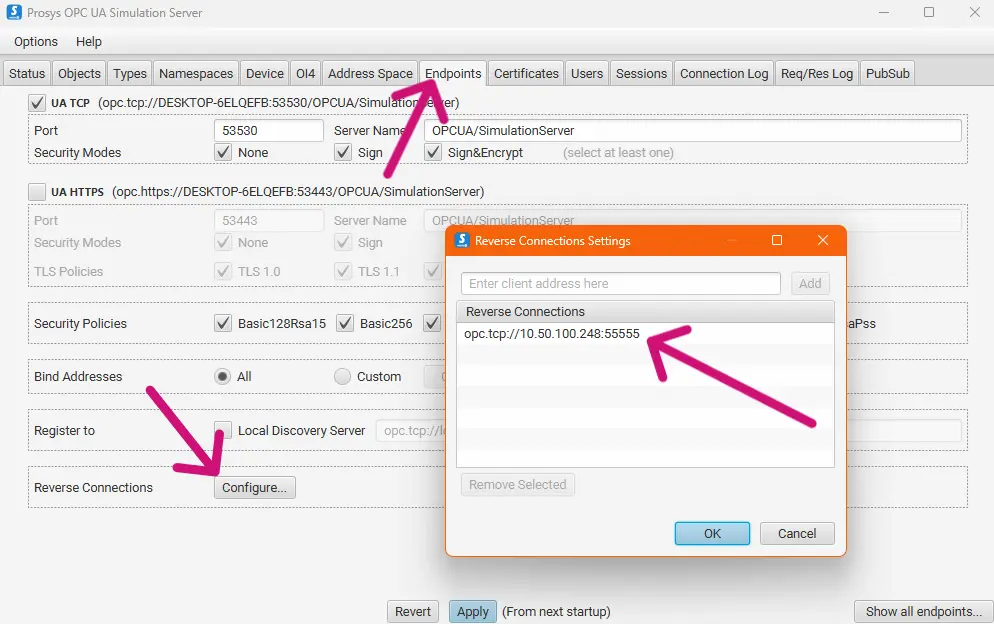
To follow this tutorial, create a reverse connection endpoint on Prosys OPC UA Simulation Server.
In this scenario, we want to connect Forge to a data source. In this situation, the connection from Forge to the data source is blocked by a firewall. However, the connection can still be established without touching the firewall settings by configuring a reverse connection address to the data source, bound to Forge’s address and an available TCP/IP port. Then, we configure Forge to listen to that port, and the connection will be ready.
1. If you haven’t already, set up Simulation Server to have one reverse endpoint configured and restart it.
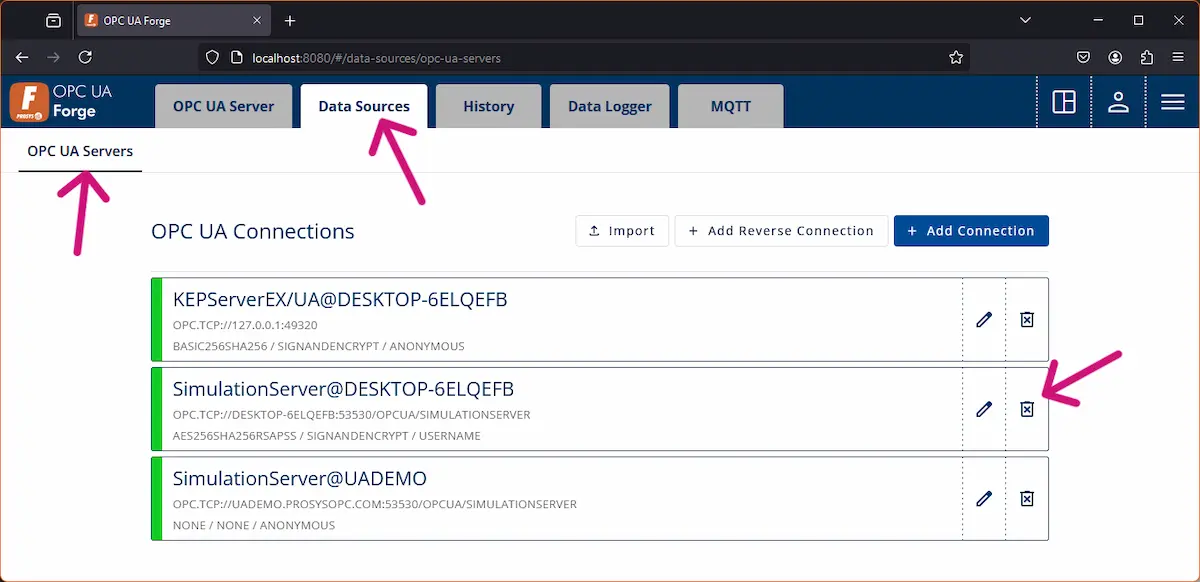
2. Navigate to Data Sources > OPC UA Servers and delete the connection to Simulation Server if you have one. We are going to change that connection to a reverse connection.
NOTE: Removing a Data Source will remove all the configurations and mappings related to that Data Source.
3. Press + Add Reverse Connection.
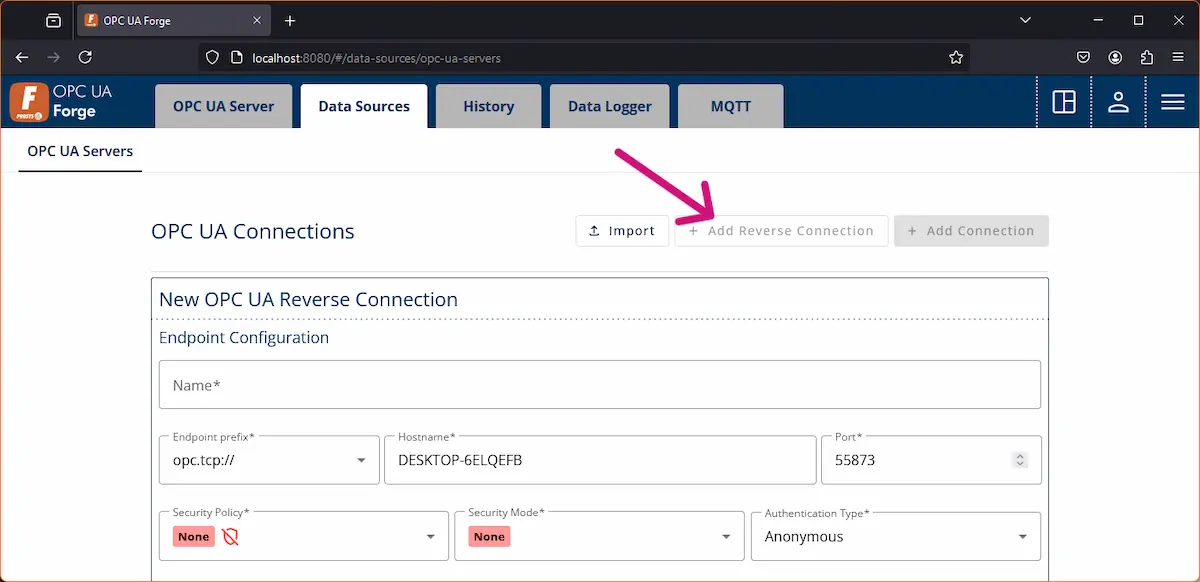
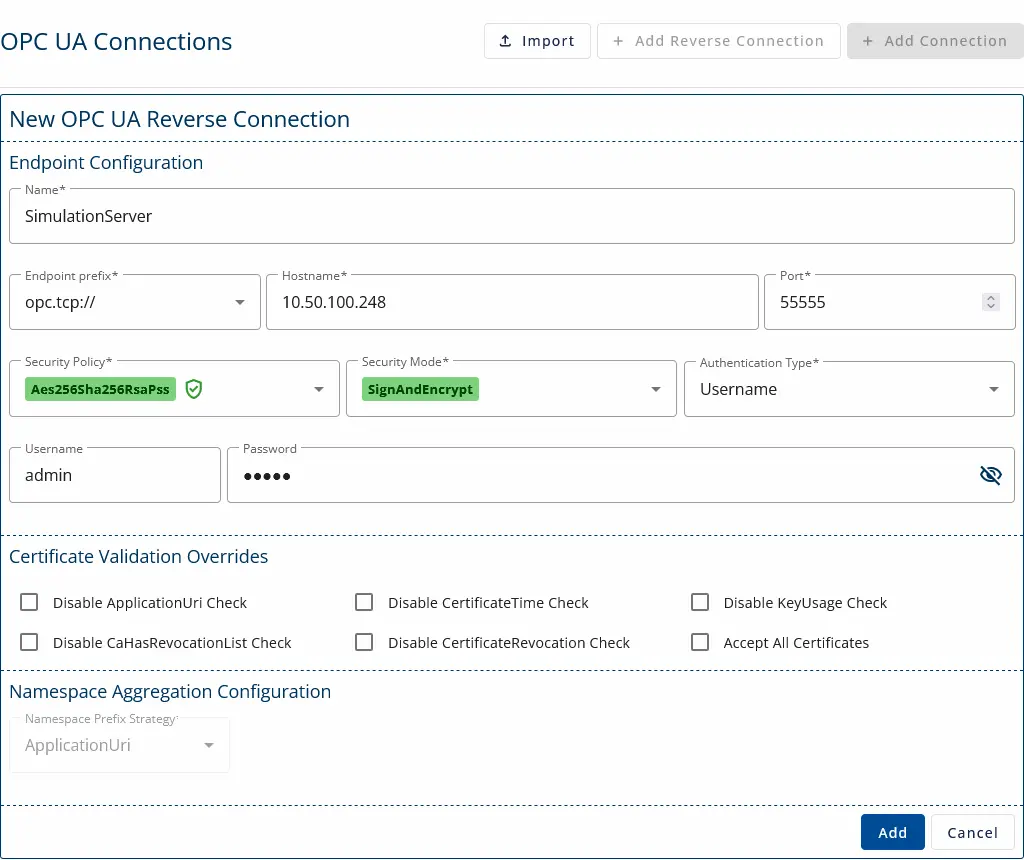
4. Configure the form:
- Use the IP address configured on Simulation Server. (should be the IP of the SimulationServer machine).
- Configure the port set in the data source’s reverse configurations.
- Select security and authentication. Make sure they are supported on the server.
- Save the form by pressing Add.
5. Trust certificates from both ends to make the connection work (see previous article on managing certificates in Forge).
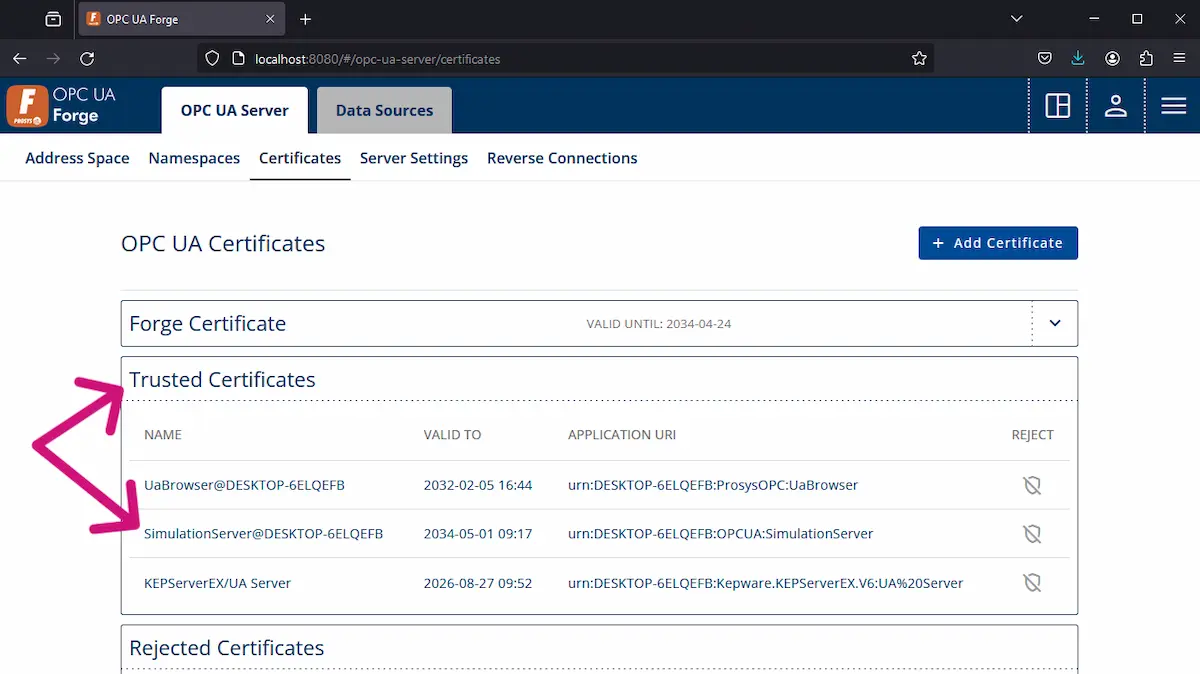

6. When both ends trust, the connection will be established.
Reverse Connect Forge to an OPC UA Client
In this scenario, Forge is in a high-security zone, and firewalls block connections. Still, we want to connect to Forge with an OPC UA client. To avoid the firewall, we can configure Forge to create a reverse connection to the client.
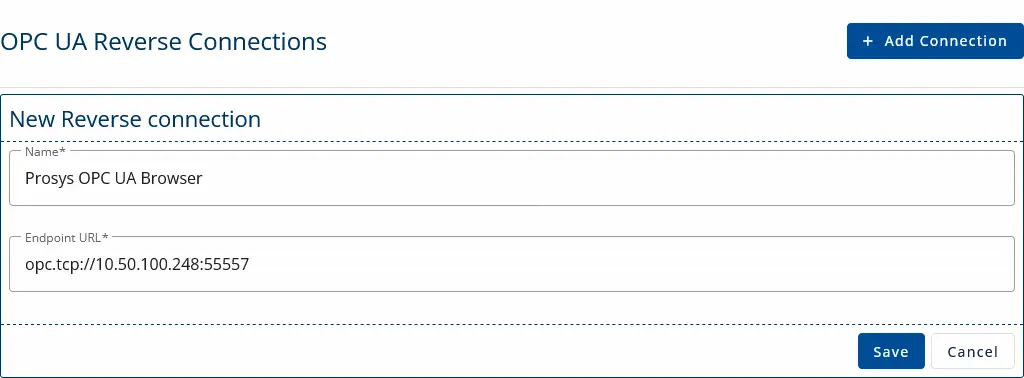
1. Navigate to OPC UA Server > Reverse Connections and press + Add Connection.
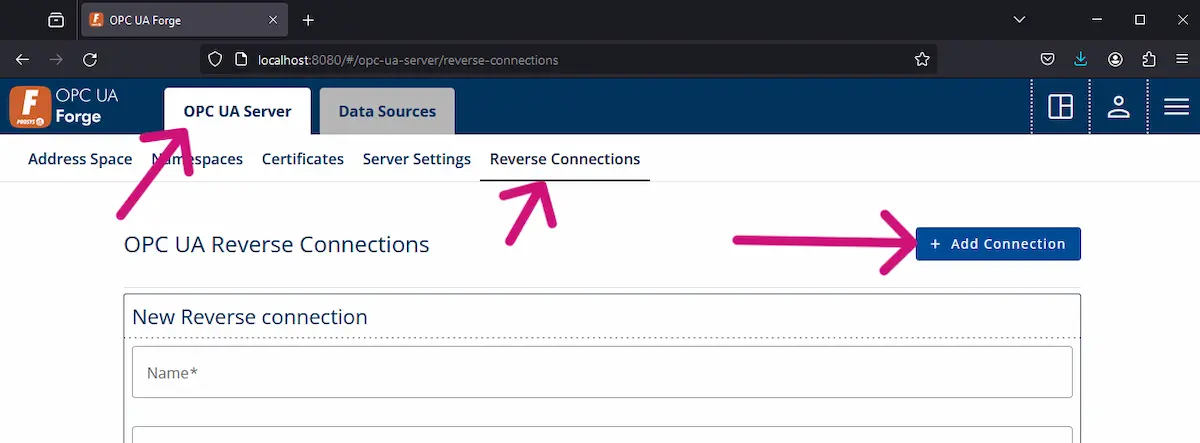
2. Configure the endpoint with client details.
- IP address of the OPC UA client
- Port number that is dedicated to this connection in the client machine.
- Press Save.
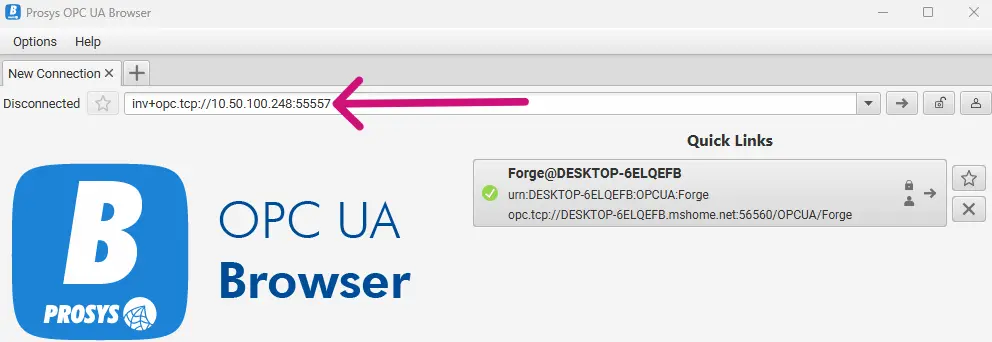
3. Open OPC UA Browser and write inv+<configured-endpoint> to the connection address bar.
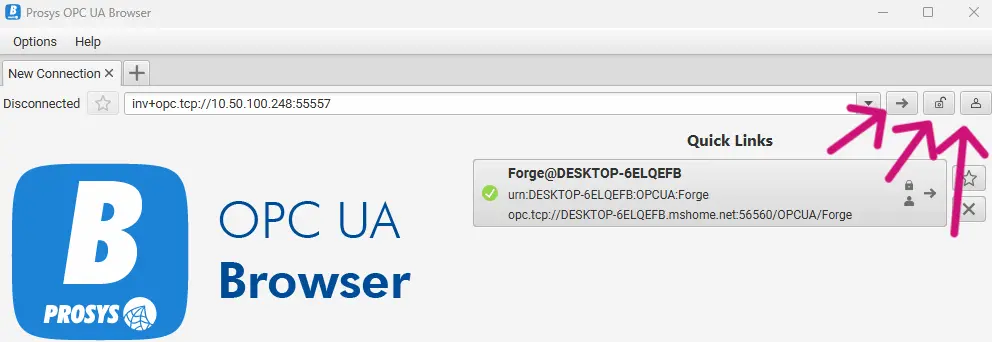
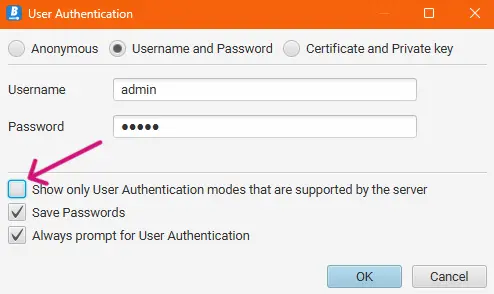
4. Configure the connection settings before connecting. Use these buttons to change the security mode and authentication.
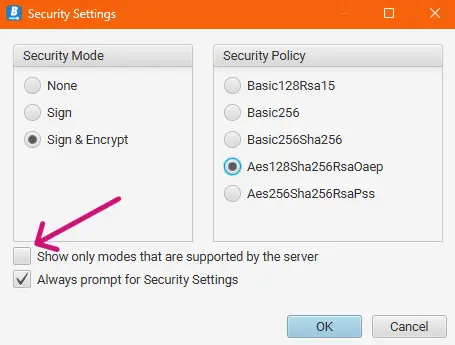
5. Uncheck the option Show only modes that are supported by the server and select an option supported by Forge.
6. The same goes for the authentication settings. With the correct settings, you can establish the connection now.
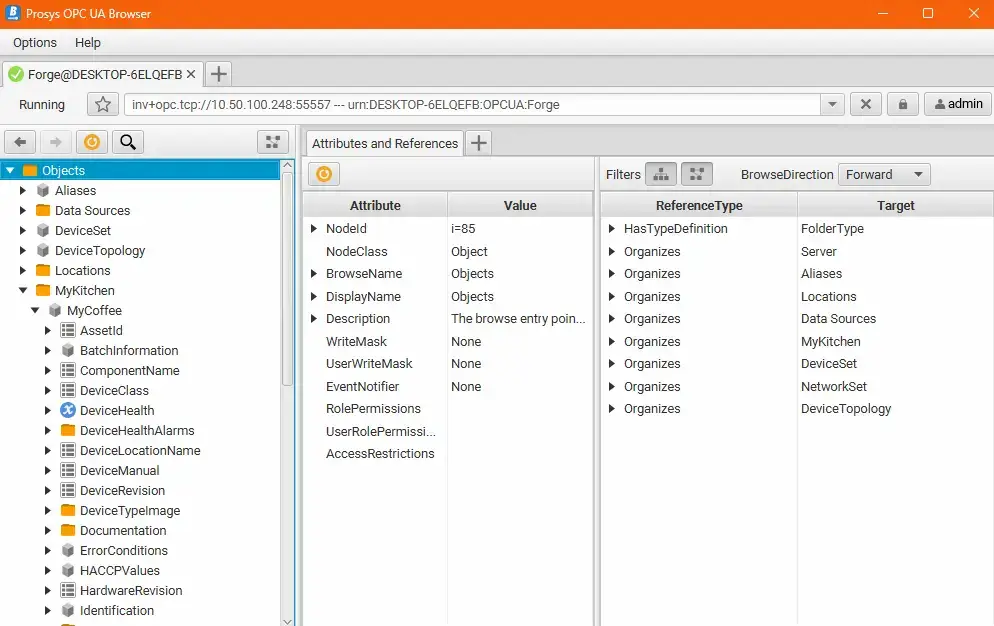
7. The connection will be established, and it works similarly to a standard client-server connection. You can browse the Address Space on the left as you usually do.
Next Steps
This wraps up the article #8 of our Mastering Forge series. Here’s a recap of what we did:
- We connected Forge to Simulation Server using a reverse connection.
- We configured a reverse endpoint in Forge and successfully connected to it using Browser.
Stay tuned for our next tutorial, Mastering Forge #9, where we demonstrate the use of Forge’s Event Generator. You can use it to create event-based messages for batches and other acyclic processes.
To learn more about Forge and its capabilities, you can request a detailed introduction by emailing sales@prosysopc.com or using our contact form. We’d be delighted to provide tailored information about Forge that aligns with your interests and requirements.
Author Info

Iivo Yrjölä
Customer Integration & Support, Prosys OPC
Email: iivo.yrjola@prosysopc.com
