Welcome to this tutorial, where we show the steps to migrate your Prosys OPC UA Modbus Server configuration to Prosys OPC UA Forge. Note that your Forge license must contain Modbus Connector to complete this tutorial.
Before we get started, here are a few tutorials you might find helpful:
- Mastering Forge #1: Install Forge.
- Mastering Forge #15: Update Forge to the latest version.
- Mastering Forge #12: Configure Modbus Connectivity and learn how to manually set up and check the parameters of your Modbus configuration.
If you prefer your tutorials in video format instead, you can watch our tutorial on migrating your Modbus Server configuration to Forge on our YouTube channel.
During this tutorial, we’ll be using the following products:
- Prosys OPC UA Forge
- You can download an evaluation version through the request form
- Prosys OPC UA Modbus Server
- Legacy product
Migrate Configurations
The migration process uses SwaggerUI and requires just one method to complete. All you need is access to the original Modbus Server configuration files.
1. Start the Modbus module.
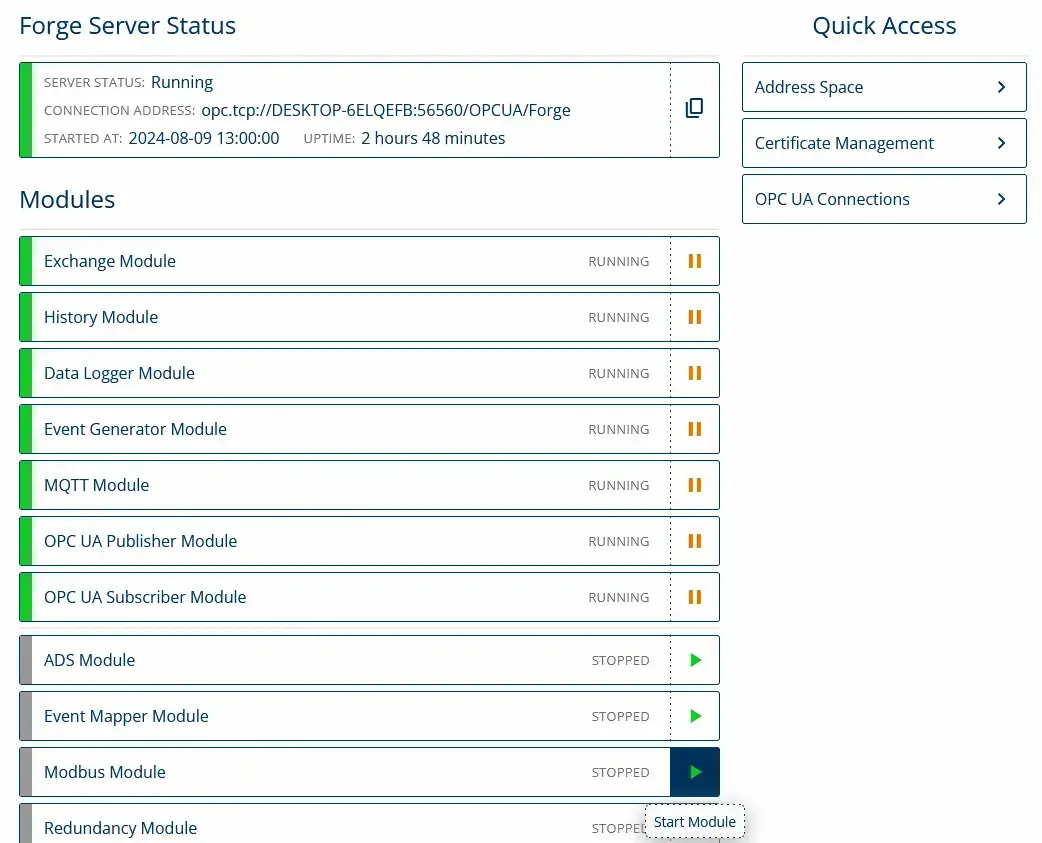
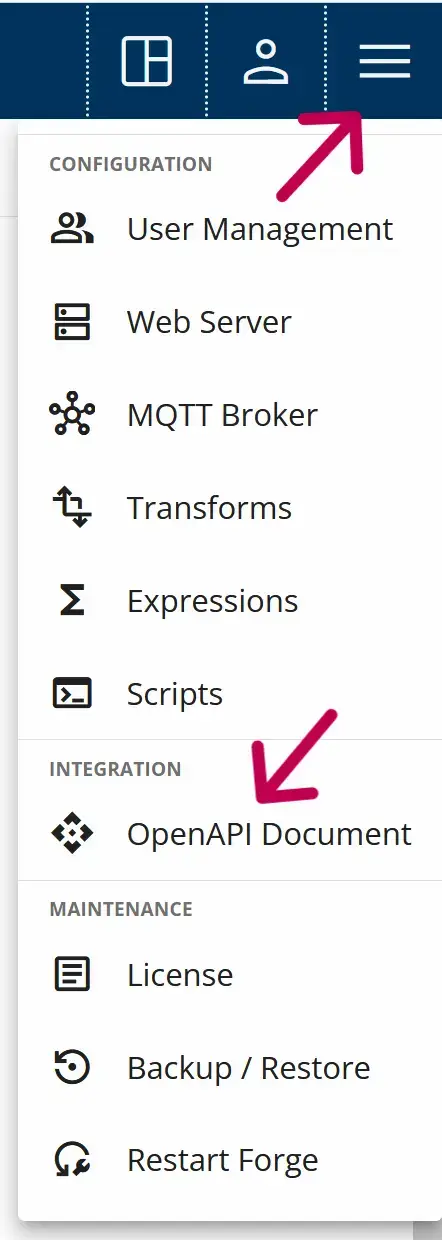
2. Open SwaggerUI from the Advanced Menu – OpenAPI Document.
3. Switch to the Forge Modbus Server API.

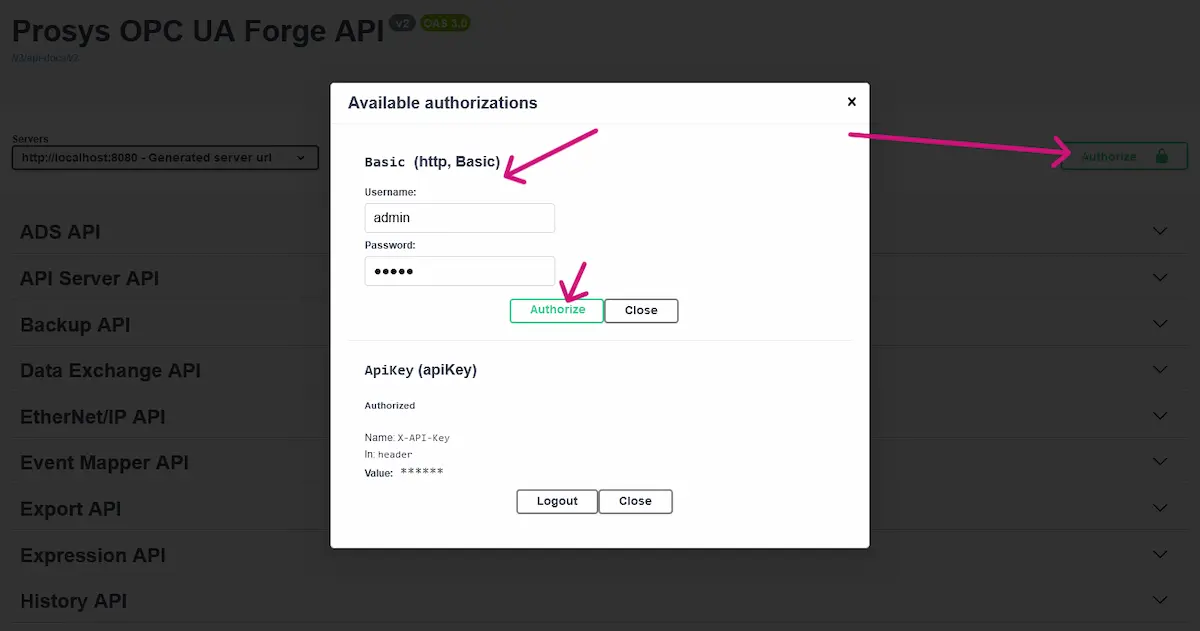
4. Authorize SwaggerUI with Forge’s user credentials.
5. Locate the following POST method in the Modbus Server API:
/api
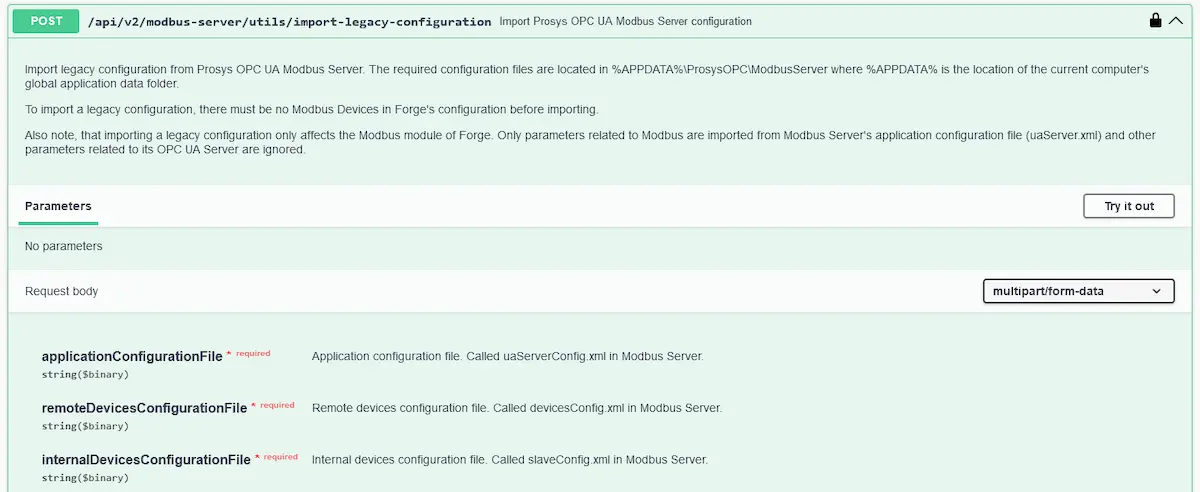
6. Follow the method’s instructions and upload the necessary configuration files. If you need help with Swagger, refer to the Mastering Forge #13 tutorial.
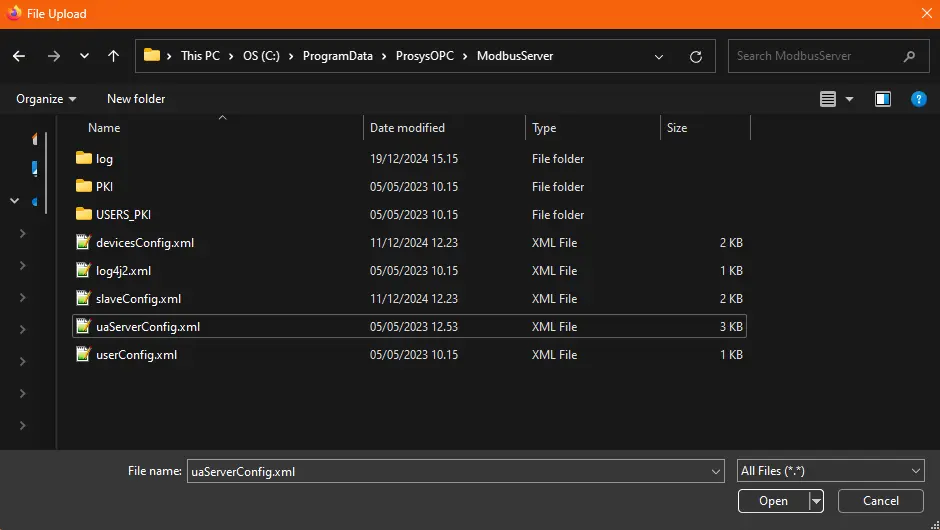
7. Code 200 indicates a successful method execution.
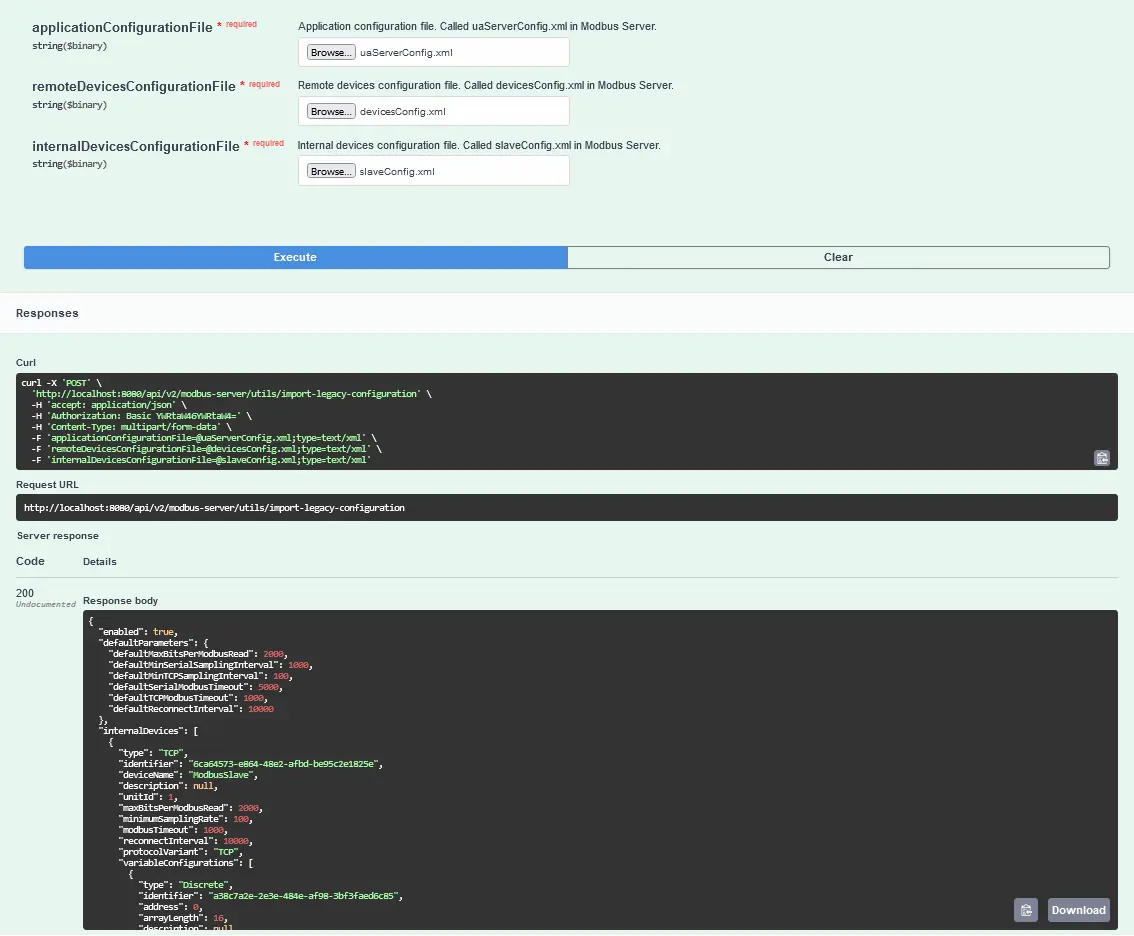
8. Once completed, navigate to the Modbus module in Forge to review the imported configuration.

Next Steps
This wraps up the tutorial. In this tutorial, we imported the legacy Prosys OPC UA Modbus server’s configurations into Forge.
See the Mastering Forge tutorial series for more information on Forge.
To learn more about Forge and its capabilities, you can request a detailed introduction by emailing sales@prosysopc.com or using our contact form. We’d be delighted to provide tailored information about Forge that aligns with your interests and requirements.
Author Info

Iivo Yrjölä
Customer Integration & Support, Prosys OPC
Email: iivo.yrjola@prosysopc.com
