Welcome to the 13th tutorial on our series Mastering Forge.
In our previous article, Mastering Forge #12, we showed you how to use Forge’s Modbus Module to communicate with Modbus systems.
In this article, we’ll explore how to use Forge’s open REST interface. We’ll guide you through authentication, accessing documentation, and testing methods with SwaggerUI. Forge’s REST APIs provide powerful functionality, including the ability to import configurations, exchange data, and manage the address space. With these features, you can:
- Automate configuration processes
- Seamlessly exchange data with external systems using standard methods
- Dynamically manage the address space through integration with external systems
If you prefer your tutorials in video format instead, you can watch our tutorial on using REST API with Forge on our YouTube channel.
During this tutorial, we’ll be using the following products:
- Prosys OPC UA Forge
- You can download an evaluation version through the request form.
- Prosys OPC UA Browser
- You can download the free version through the product’s request form.
Authenticate the SwaggerUI
In this tutorial, we’ll use SwaggerUI to interact with the REST API methods. Accessible directly through Forge’s UI, SwaggerUI provides comprehensive documentation for each method and offers a user-friendly interface to easily test them.
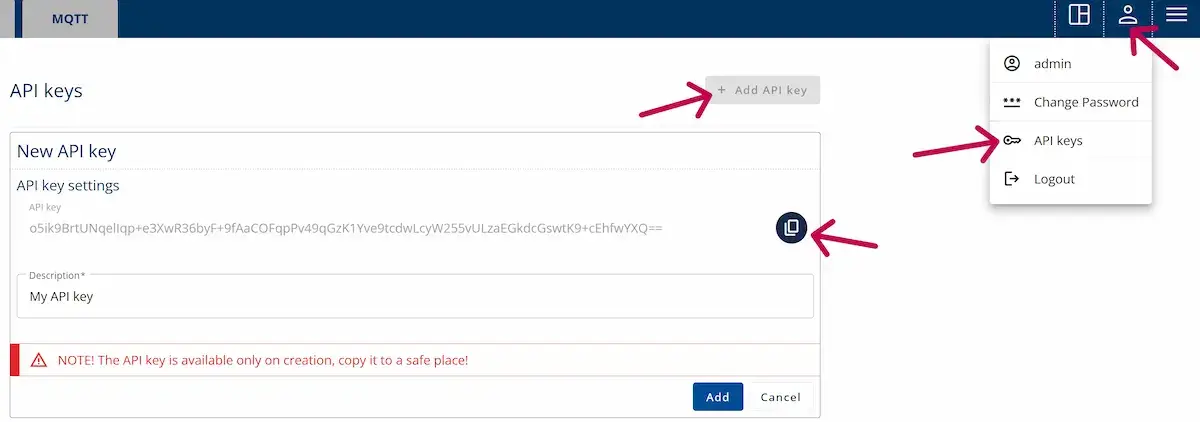
1. To authenticate in the SwaggerUI, we recommend using the API key. First, create an API key in Forge. Click API keys from the user menu. Then, select Add API key and copy the key. Finally, give the key a short description and click Add.
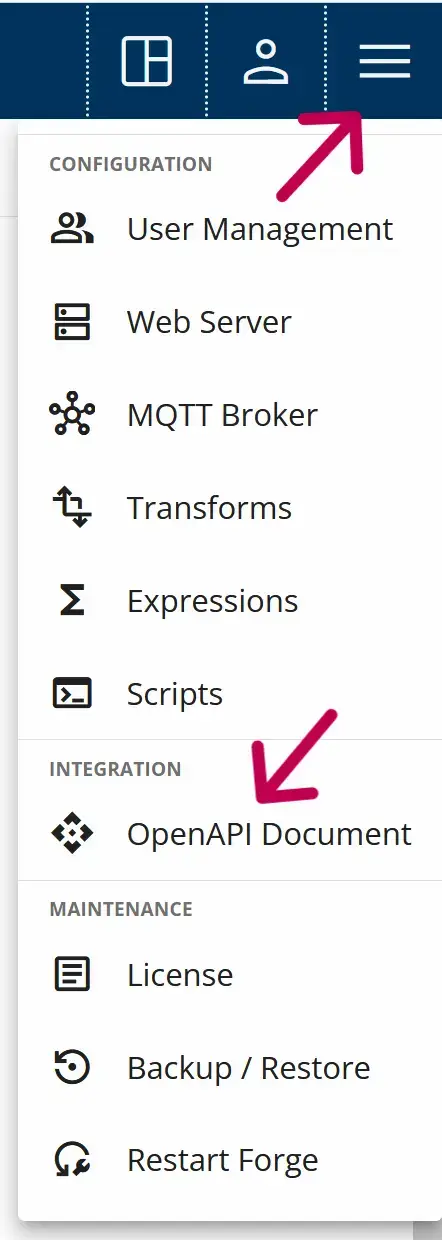
2. Open the SwaggerUI by clicking OpenAPI Document from Forge’s drop-down menu.
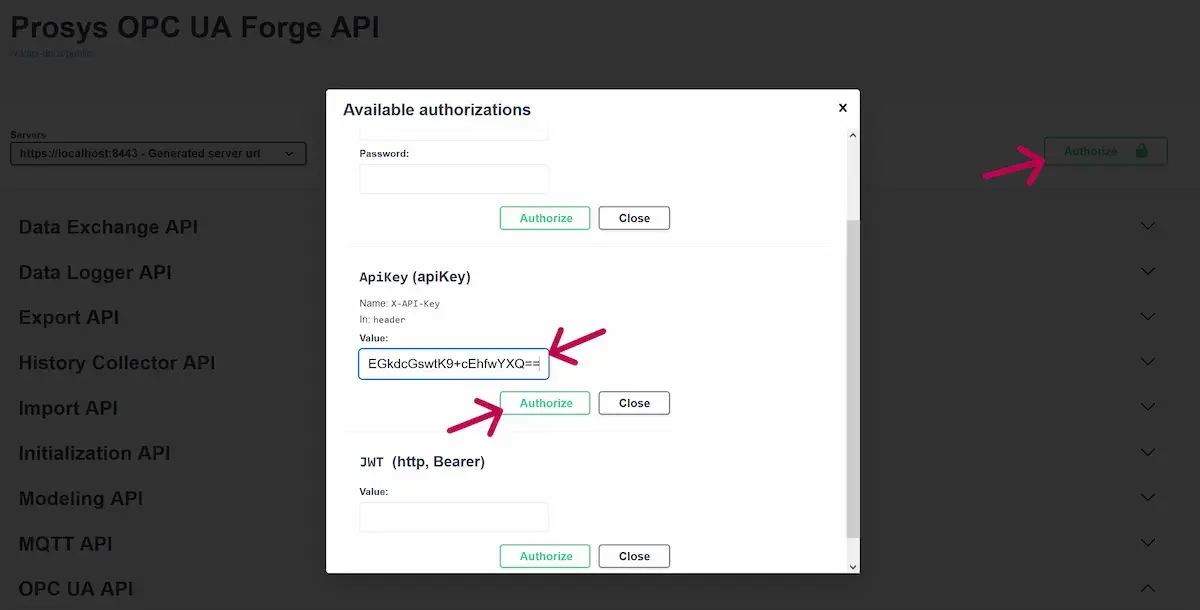
3. From the SwaggerUI, press Authorize in the top-right of the page. Paste the copied key in the ApiKey section and click Authorize.
Import Nodes With the REST API
Now, we are ready to call the REST API methods. We will start by importing some nodes to Forge’s address space. This is done by downloading the import CSV file template, editing it and finally uploading it in the SwaggerUI.
1. Browse to Modelling API > /api/import/node-models/csv/header and click Try it out.
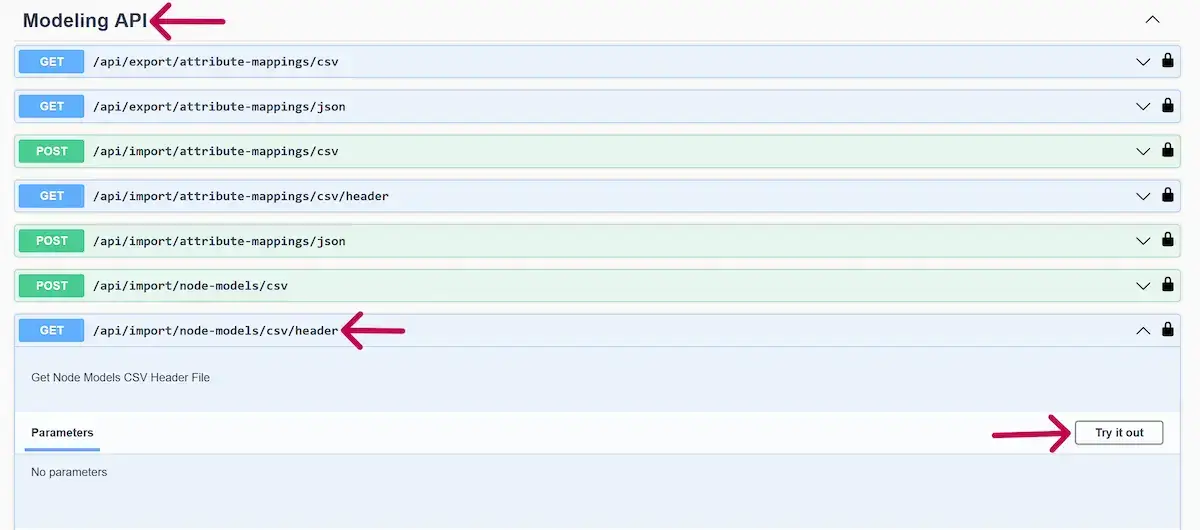
2. Click Execute and then Download to get the template CSV File that contains the fields.
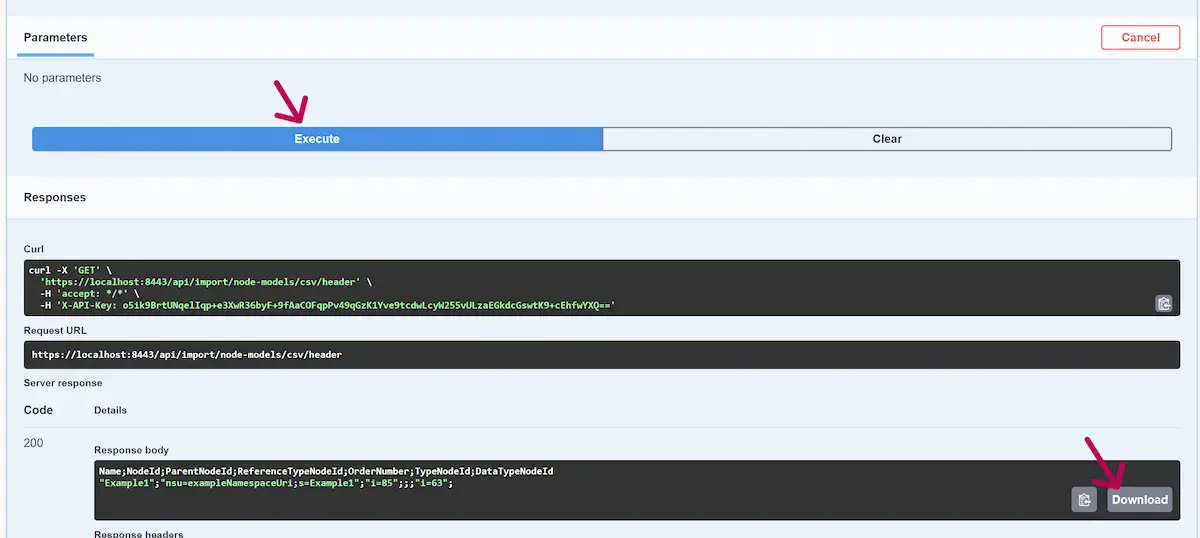
3. Open the downloaded CSV file using a program like Excel. Create three variables with the data type double, as shown in the image below, and then save the CSV file. The ParentNodeId refers to the object to which these variables will be added—in this case, the Objects folder. The NodeIds for variable types, reference types, and data types are specified by the OPC UA specification (e.g., i=63 for BaseDataVariableType and i=11 for Double).

4. Go to Modeling API > /api/import/node-models/csv and click Try it out.
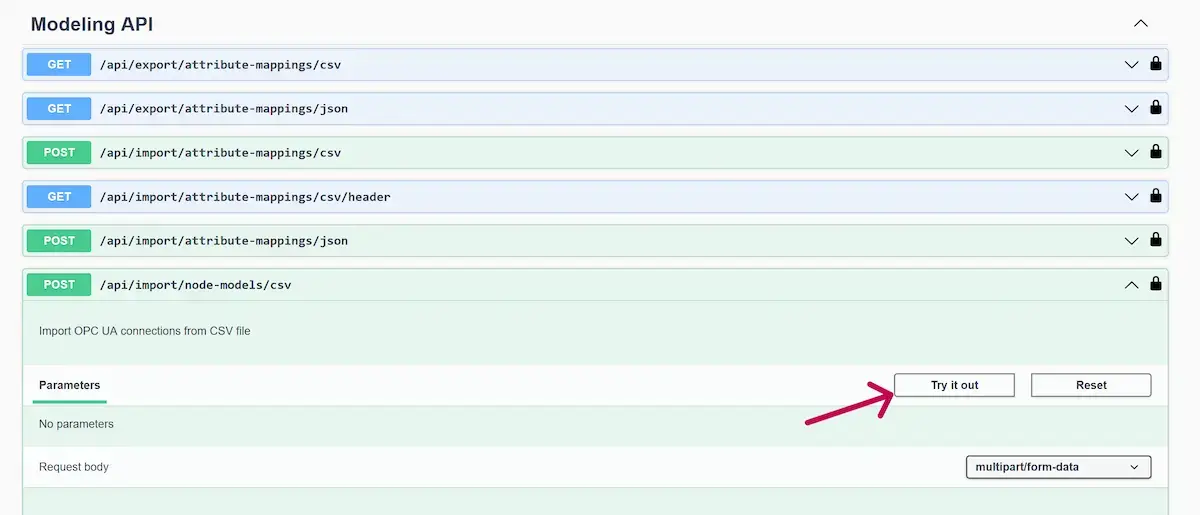
5. Click Browse… and select the previously saved CSV file. Then, press Execute to import the nodes to Forge.

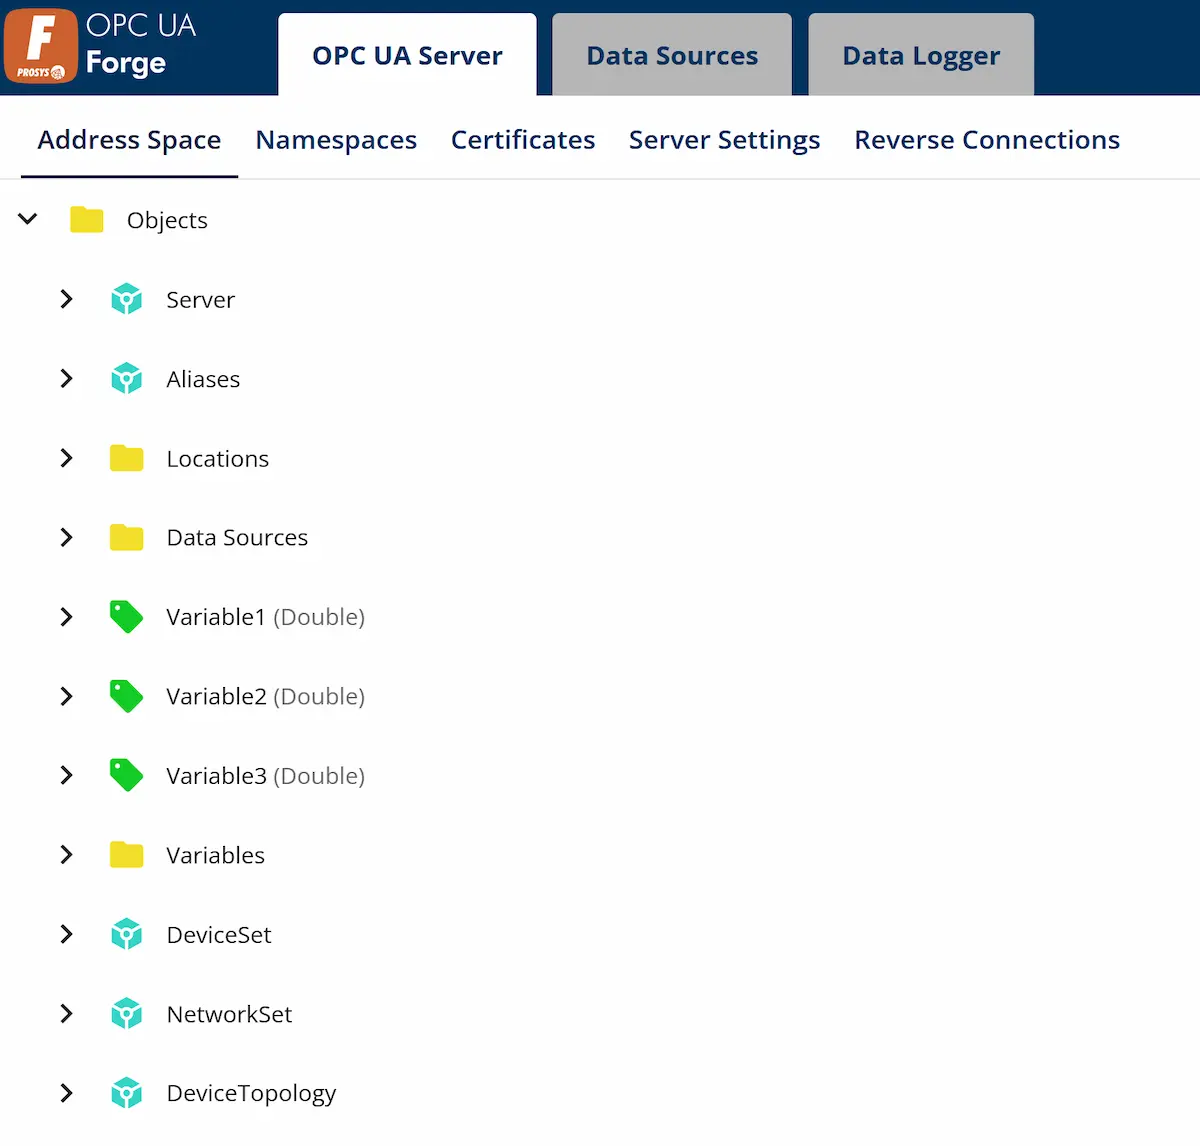
6. You can now find the imported variables in Forge’s address space.
Use the OPC UA API
Next, we will test two simple OPC UA API methods with the previously created variables. These are the write and read methods.
1. We’ll start by writing a value to one of the variables we imported in previous steps. Go to OPC UA API > /api/opc-ua/write and click Try it out.
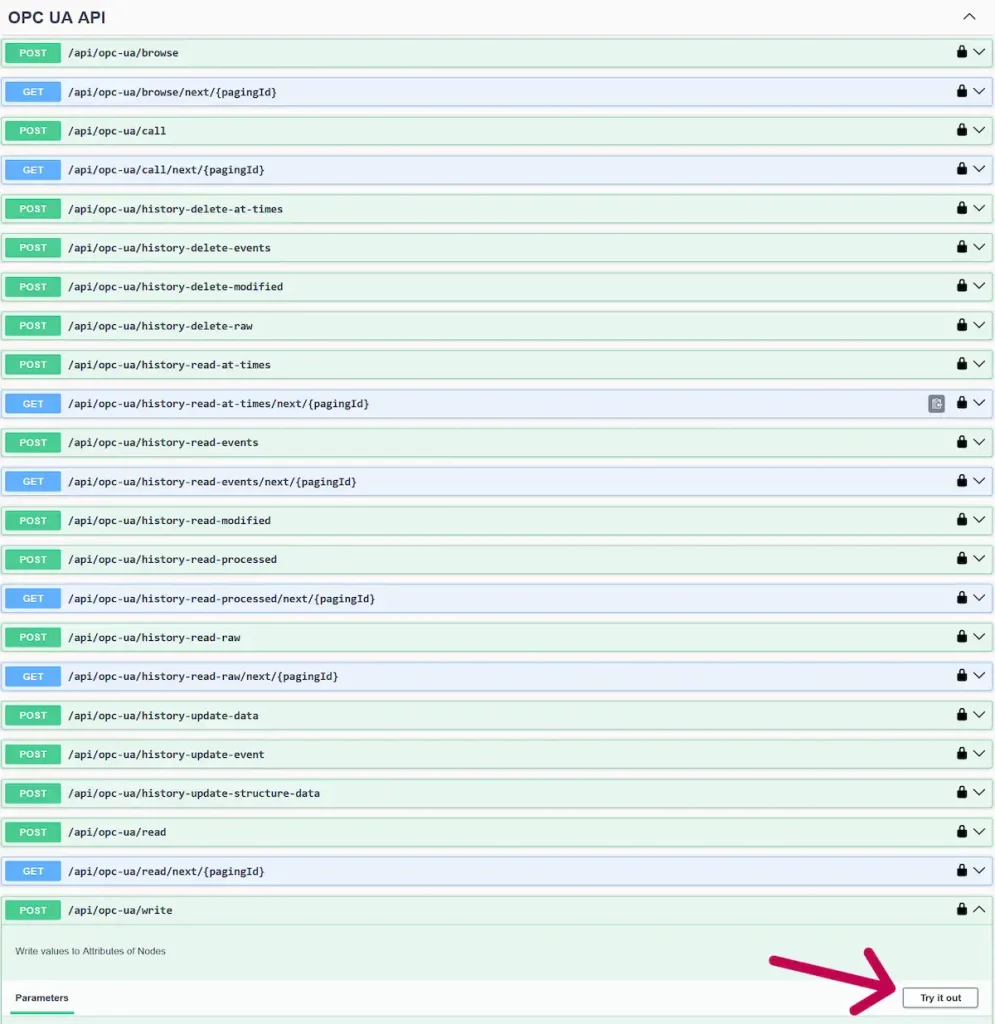
2. The OPC UA write method will be called in JSON format. Copy and paste the JSON object below to the text edit field and click Execute. This will write value 5.5 (data type double‘s id is 11) to Variable1.
					{
  "nodesToWrite": [
    {
      "nodeId": "nsu=https://prosysopc.com/OPCUA/Forge;s=Variable1",
      "attribute": "Value",
      "value": {
        "value": {
          "Type": "11",
          "Body": 5.5,
          "Dimensions": [
            0
          ]
        }
      }
    }
  ]
}
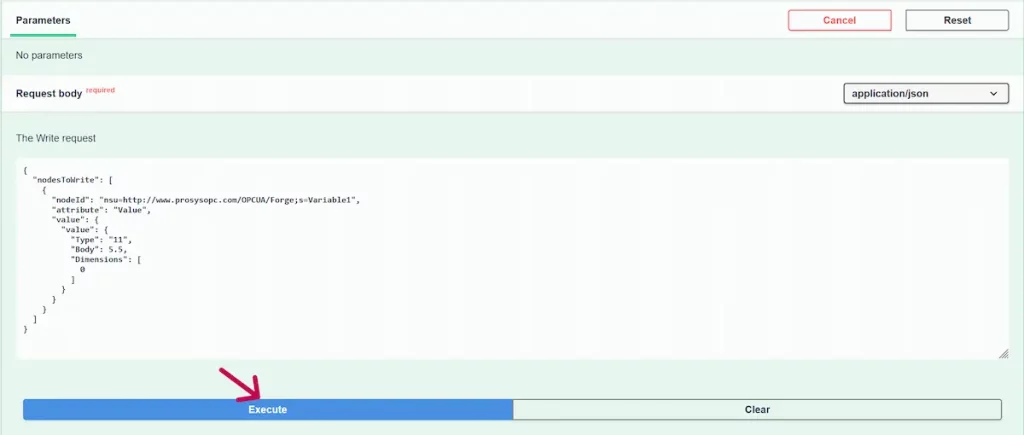
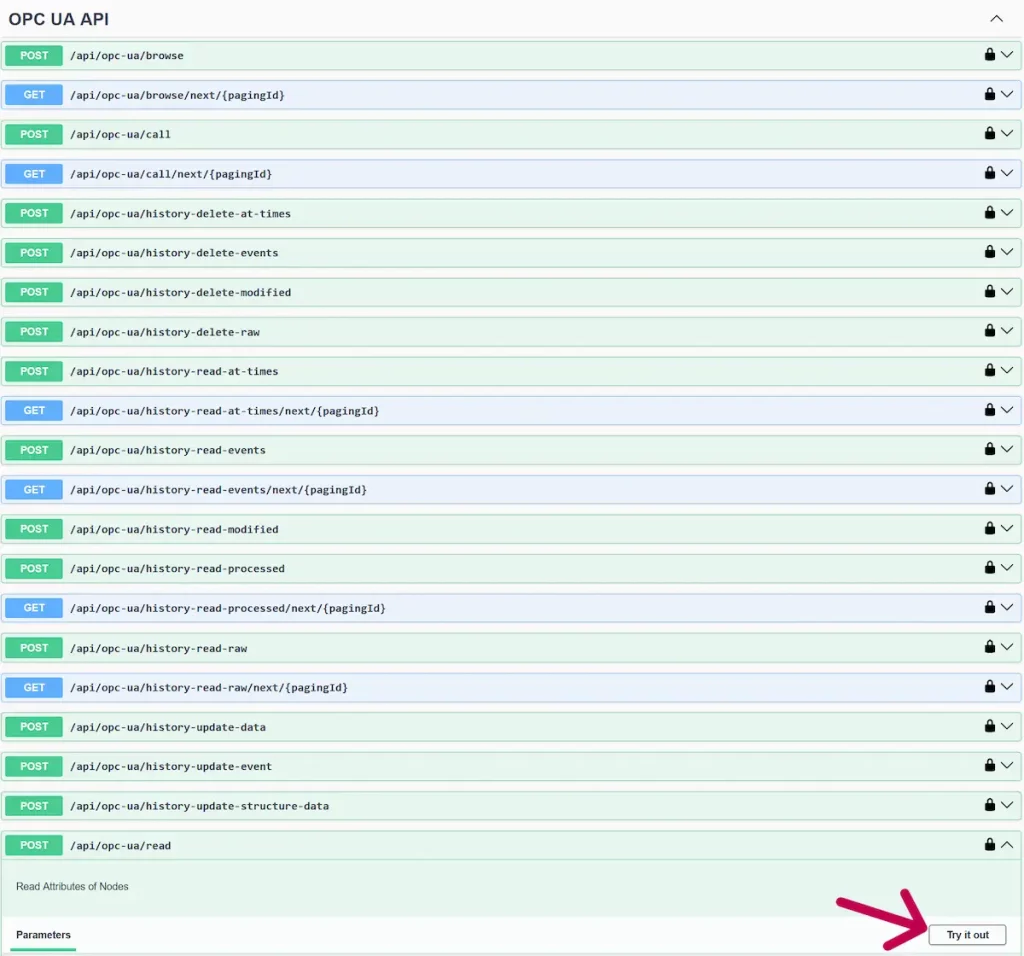
3. Finally, we’ll read the previously written value using the read method. Find the method from OPC UA API > /api/opc-ua/read and click Try it out.
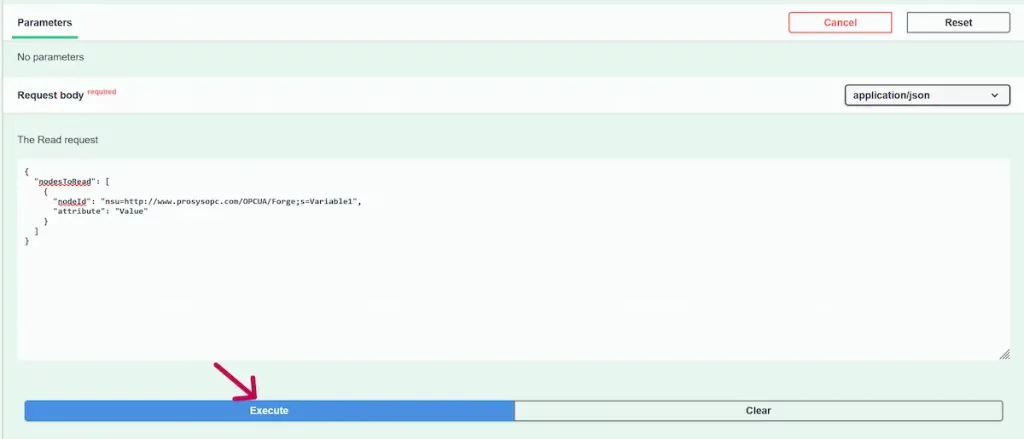
4. Similarly to the write method, copy the JSON object below and paste it into the text field as you did previously. At the end, click Execute.
					{
  "nodesToRead": [
    {
      "nodeId": "nsu=https://prosysopc.com/OPCUA/Forge;s=Variable1",
      "attribute": "Value"
    }
  ]
}
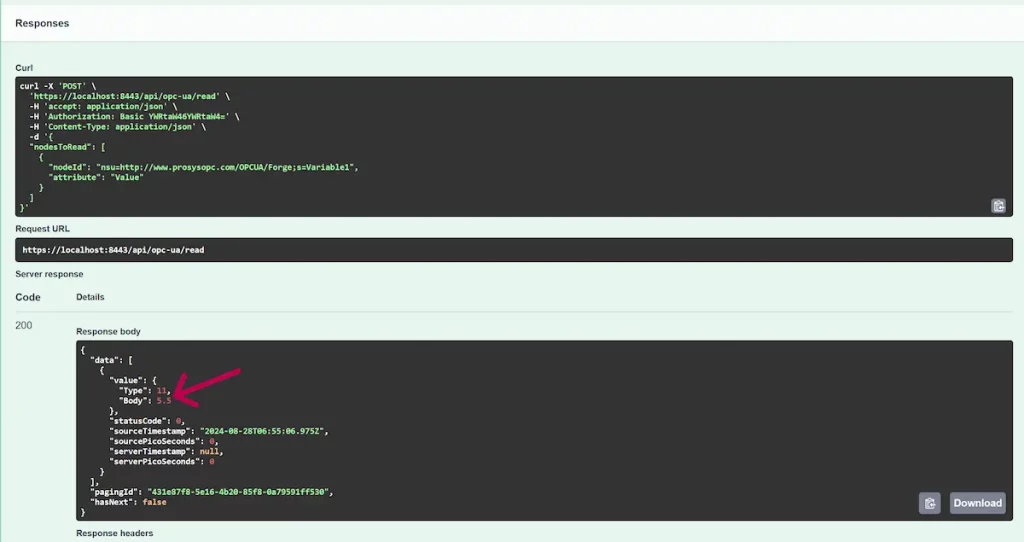
5. You can find the read value from the response.
Additional Information
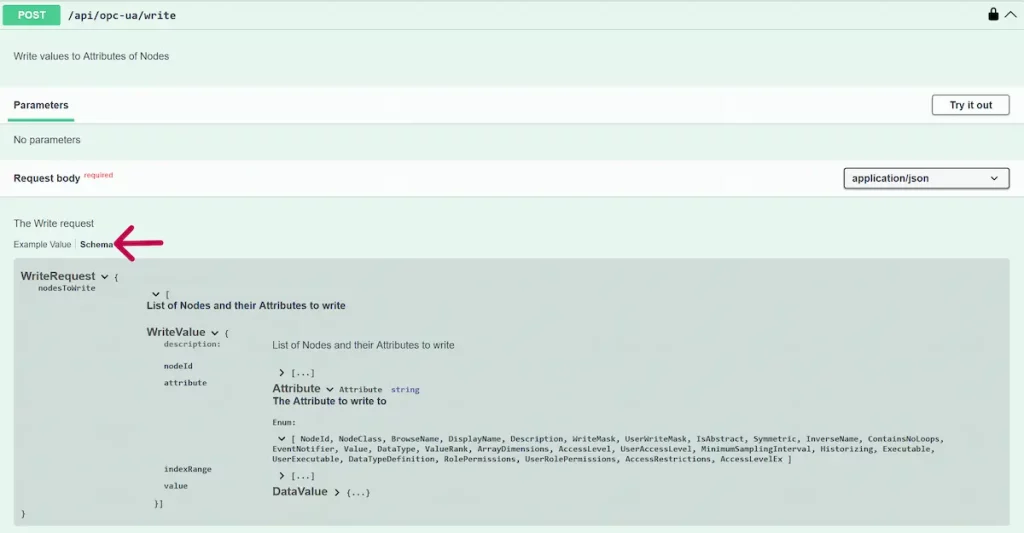
The Schema tab provides more information about the JSON fields of API methods, including their data types and available enumerations.
You can use Swagger Codegen to generate client libraries, server stubs, and more from the API specification. To get started, download the OpenAPI document by clicking the link indicated by the arrow below.

If you use timestamps in your API calls, remember that REST API uses timestamps in format YYYY-MM-DDTHH:MM:SS.sssZ (e.g. 2024-09-20T08:10:50.885Z).
Next Steps
This wraps up the 13th article of the Mastering Forge series. Here’s a recap of what we did in this article:
- Authenticated to SwaggerUI, where the REST API methods are called.
- Created new variables in Forge’s address space using the node import method.
- Wrote and read a value of a node with OPC UA over REST.
In the next article, Mastering Forge #14, we will take a look at Forge’s redundancy module.
If you want to learn more about Forge and its capabilities, you can request a detailed introduction by emailing sales@prosysopc.com or using our contact form. We’d be delighted to provide tailored information about Forge that aligns with your interests and requirements.
Author Info

Iivo Yrjölä
Customer Integration & Support, Prosys OPC
Email: iivo.yrjola@prosysopc.com
