Welcome to the 10th tutorial on our series Mastering Forge.
In our previous article, Mastering Forge #9, we used the Event Generator to create new events in Forge, enabling event-based communication.
In this article, we will configure Pub Sub communication. We’ll start by publishing variables and events using the OPC UA Publisher module, and then we’ll demonstrate how to receive Pub Sub messages using the OPC UA Subscriber module.
If you prefer tutorials in video format, you can watch our video tutorial on configuring OPC UA publishers and subscribers with Forge on our YouTube channel.
During this tutorial, we’ll be using the following products:
- Prosys OPC UA Forge
- You can download an evaluation version through the request form.
- Prosys OPC UA Simulation Server
- You can download the free version through the product’s request form.
- Prosys OPC UA Browser
- You can download the free version through the product’s request form.
Configure OPC UA Publisher
To follow this tutorial, create an object in Forge’s address space with a variable mapped to Prosys OPC UA Simulation Server’s Sinusoid variable.
OPC UA Publisher – Connections-related terminology to help you follow this tutorial:
- Writer Group: Defines common headers and settings for all included Data Set Writers.
- Data Set Writer: Writes the data in the selected Data Set to the Pub Sub message with additional headers defined in the Data Set Writer configuration.
- Data Set: Two types are supported.
- Variable Data Set: Cyclic messages of Variable nodes.
- Event Data Set: Acyclic messages with event property data.
- Data Set: Two types are supported.
- Data Set Writer: Writes the data in the selected Data Set to the Pub Sub message with additional headers defined in the Data Set Writer configuration.
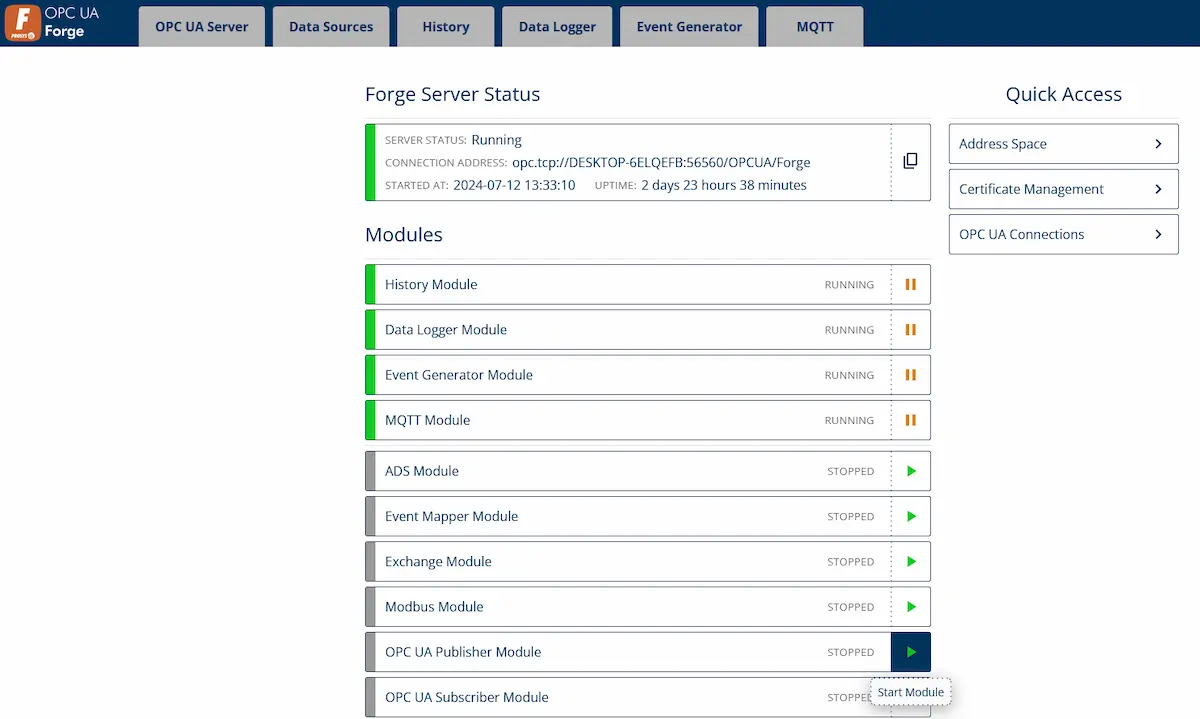
1. From the Dashboard, start the OPC UA Publisher Module.
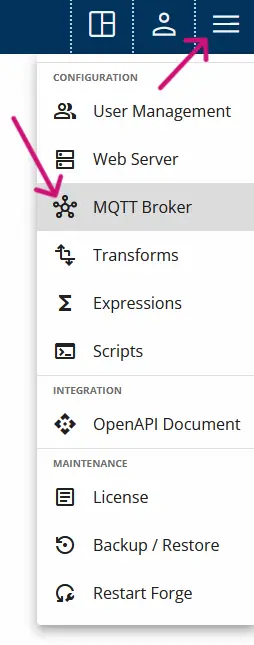
2. Start Forge’s internal MQTT broker. Click the menu icon (≡) on the top right corner and select MQTT Broker.
3. Enable the configuration to start the internal broker. To change the status, click the toggle at the top right corner of MQTT Broker settings.

Configure Variable Data Set
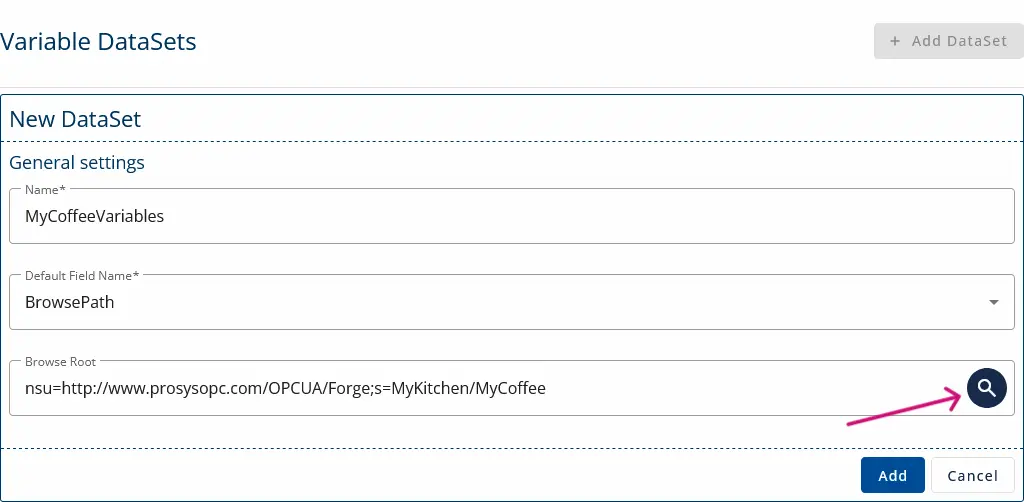
1. Navigate to OPC UA Publisher > Variable Data Sets and click + Add DataSet.

2. Here, you will create a group for the variables you want to publish in the same message. Start by giving the DataSet a name. Optionally, select a root node for the variables added to this DataSet by selecting a node for Browse Root.
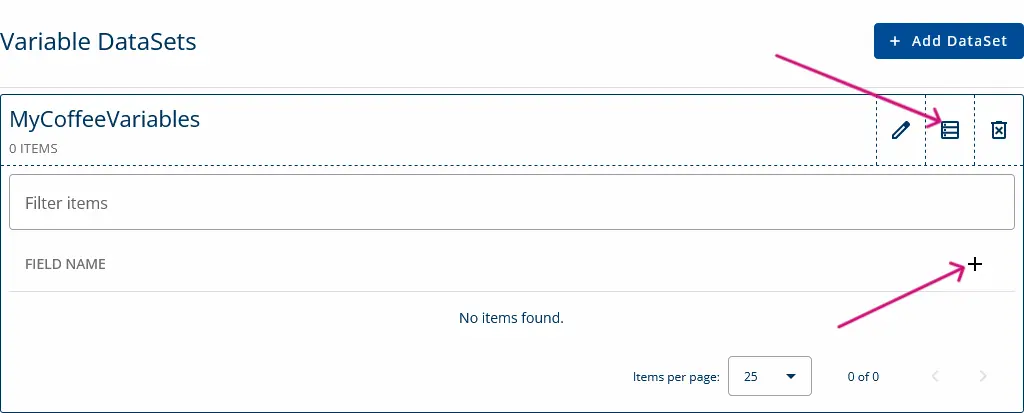
3. Finally, add the variables you want to include in the DataSet. Click the list icon and then the plus icon to search for a node.
Configure Event Data Set
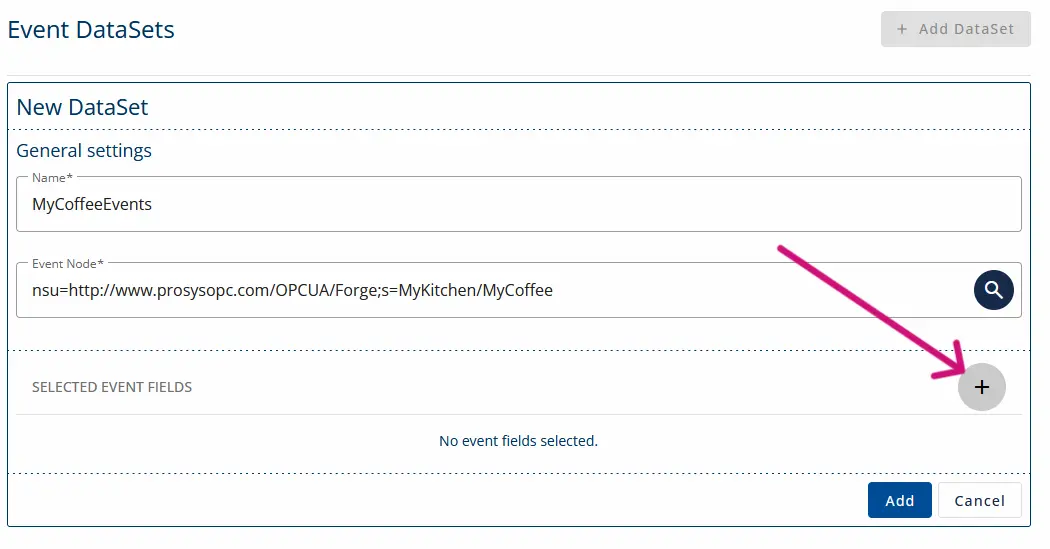
1. Next, we are going to configure a new Event DataSet. Navigate to OPC UA Publisher > Event Data Sets and click + Add DataSet.

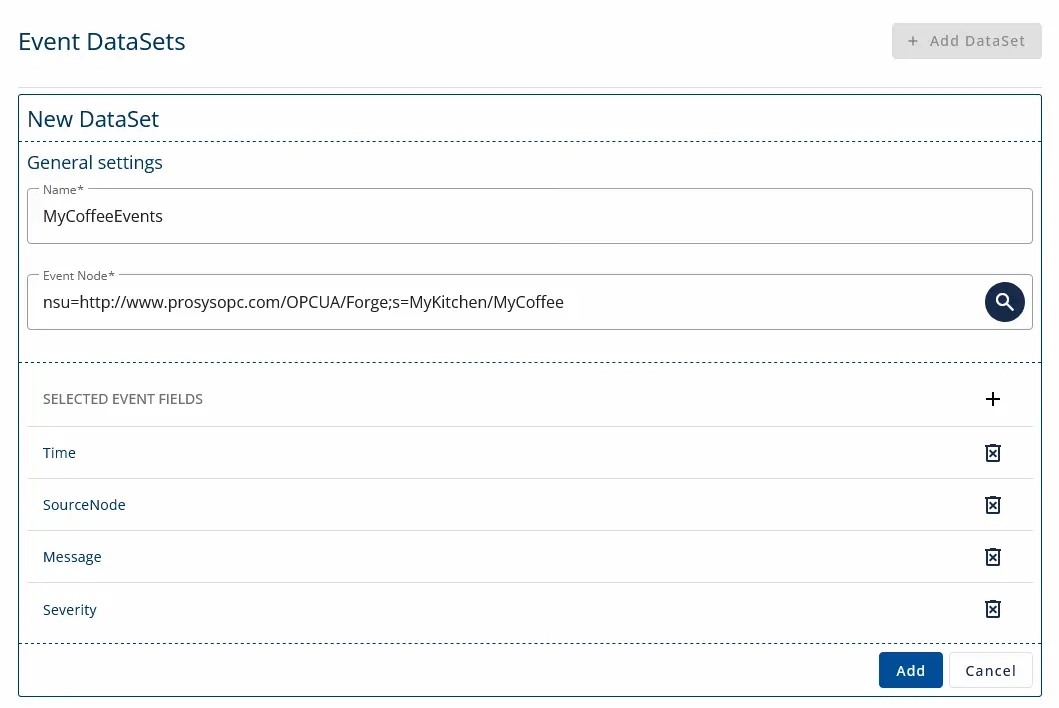
2. Enter a name for the DataSet.
3. For Event Node, choose the object node containing the events you want to publish.
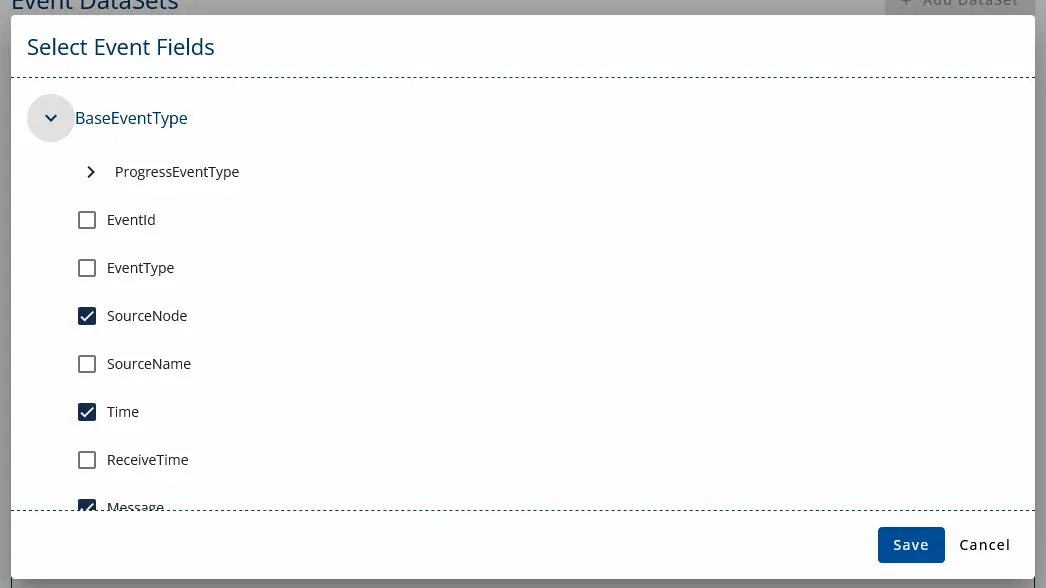
4. Add the event fields you want to include in the message. By clicking the plus icon, you will get a dialog where you can browse and select the fields.
5. Select the fields from this dialog and click Save.
6. Finally, click Add to save the event dataset configuration.
Configure Connection
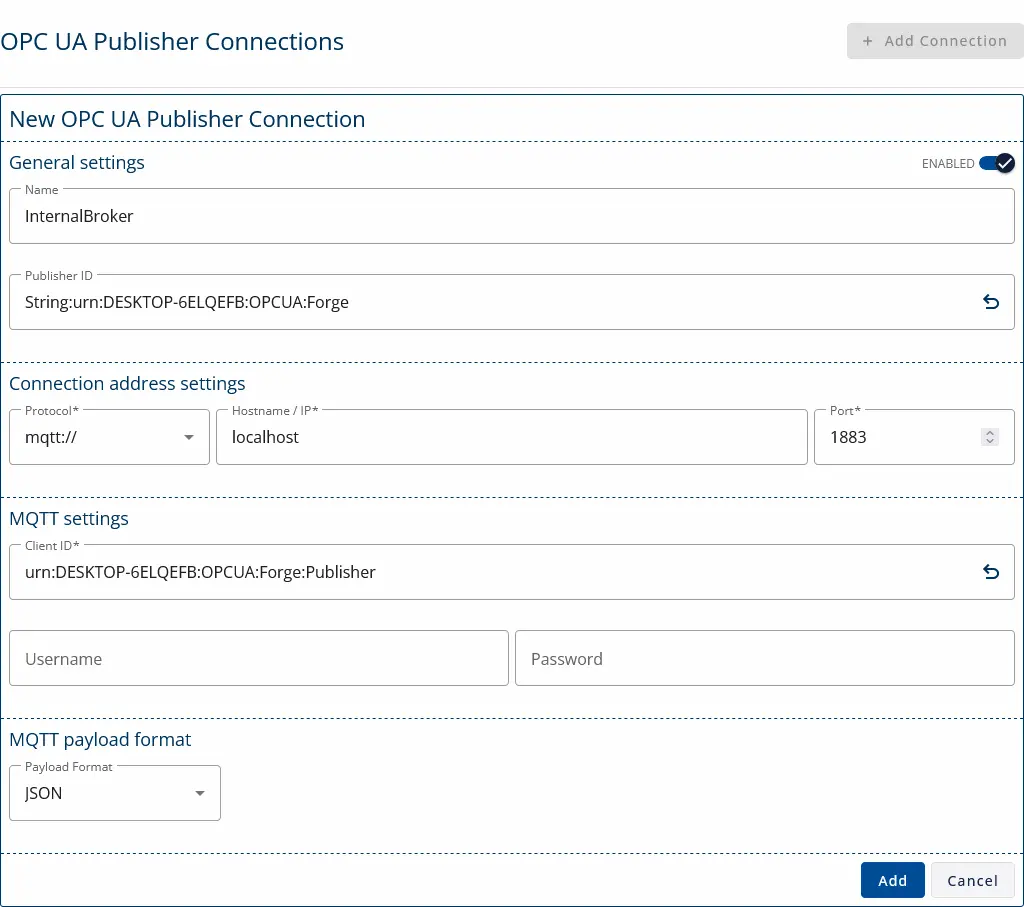
1. Navigate to OPC UA Publisher > Connections and click + Add Connection.

2. Provide a name for the connection.
3. Under Connection address settings, select mqtt:// from the dropdown. The connection details will default to the internal broker. Click Add.
Configure Writer Group
1. Navigate to OPC UA Publisher > Writer Groups and click + Add Writer Group.
2. Name the Writer Group and set the Publishing Interval to 1000 ms. Click Save.

3. Click the list icon, then click the plus icon to add a new Data Set Writer.
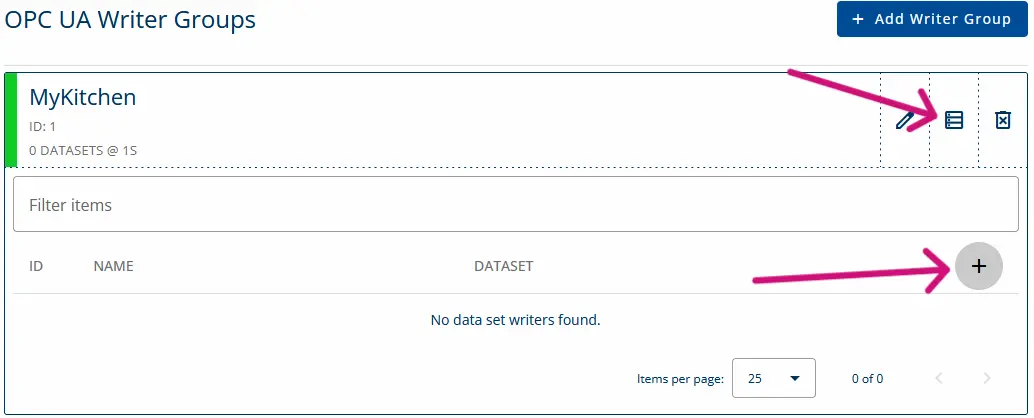
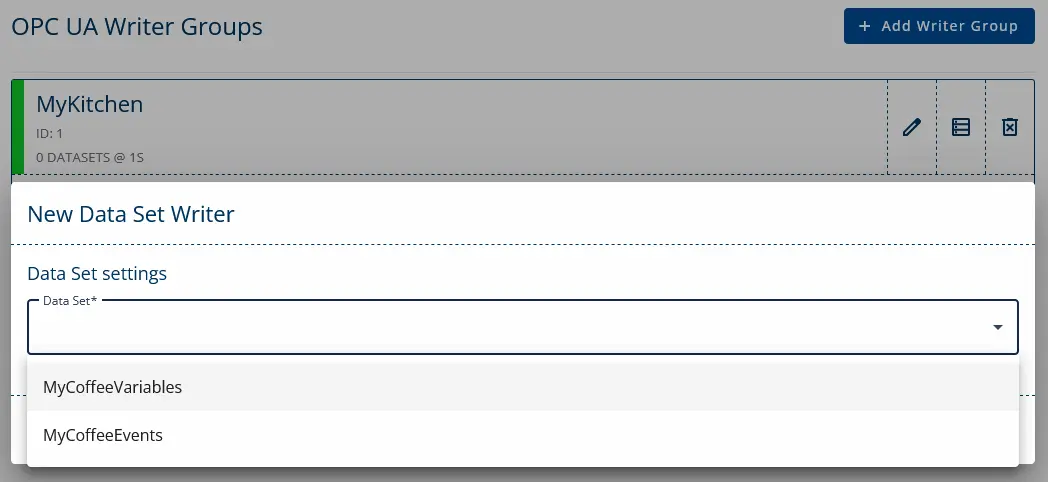
4. Select the created Data Set from the dropdown list.
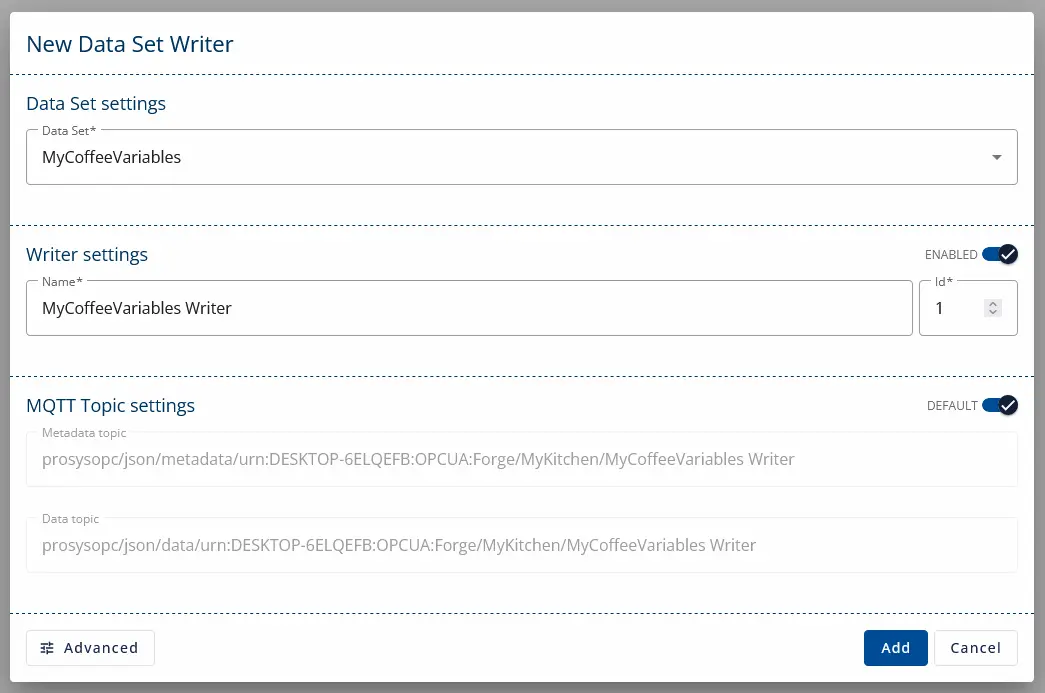
5. Click Add with the default configuration values.
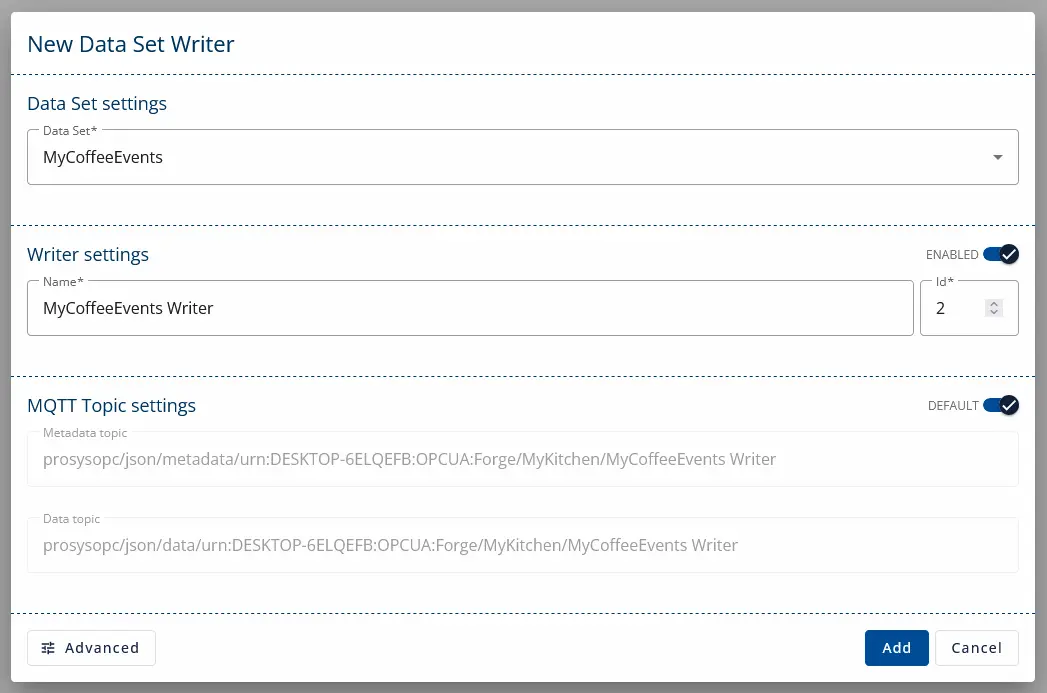
6. Follow the same steps to add the event Data Set Writer.
Subscribe with Prosys OPC UA Browser
1. Open Prosys OPC UA Browser.
2. Write the connection address mqtt://localhost:1883 to Browser’s address bar and start connecting.

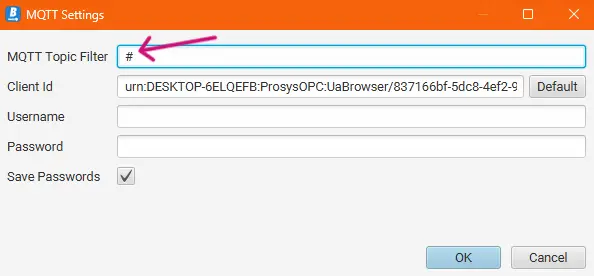
3. Set MQTT Topic Filter to # and click OK.
4. Check the PubSub tab for parsed messages and the Log tab for raw messages in Browser.

Configure OPC UA Subscriber
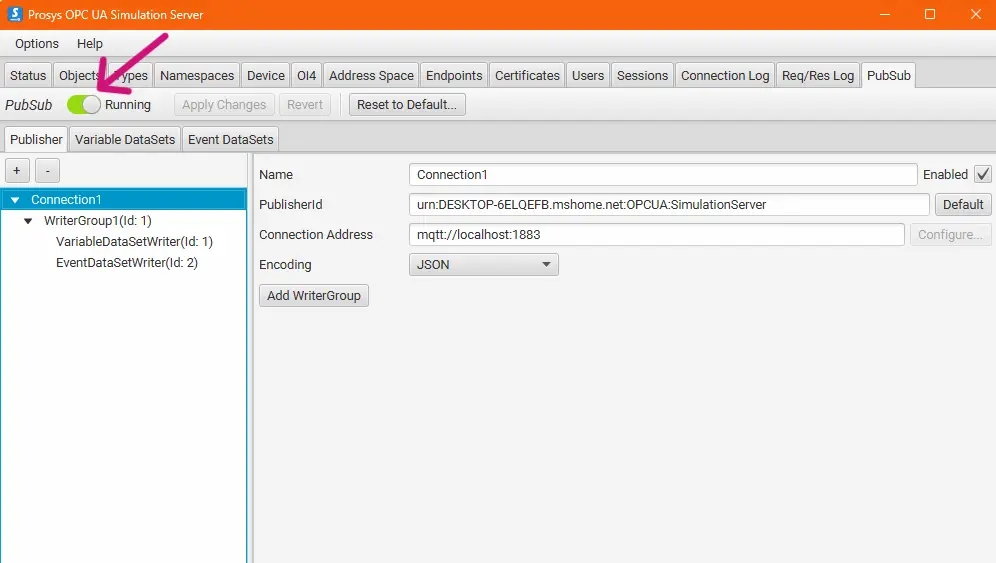
1. Start the default OPC UA publisher from Simulation Server. You must use Expert Mode (Options > Switch to Expert Mode) to access the PubSub tab.
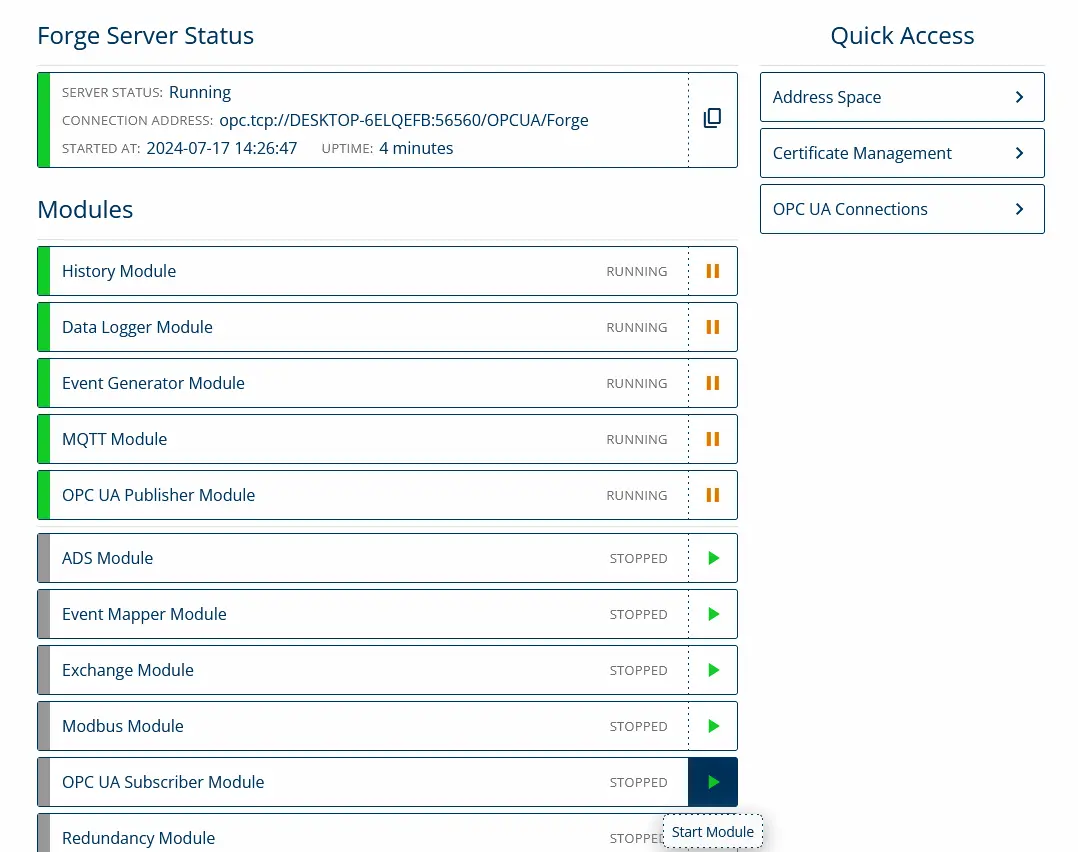
2. From the Dashboard, start the OPC UA Subscriber Module.
3. Go to Data Sources > OPC UA Subscriber and click + Add Subscriber.

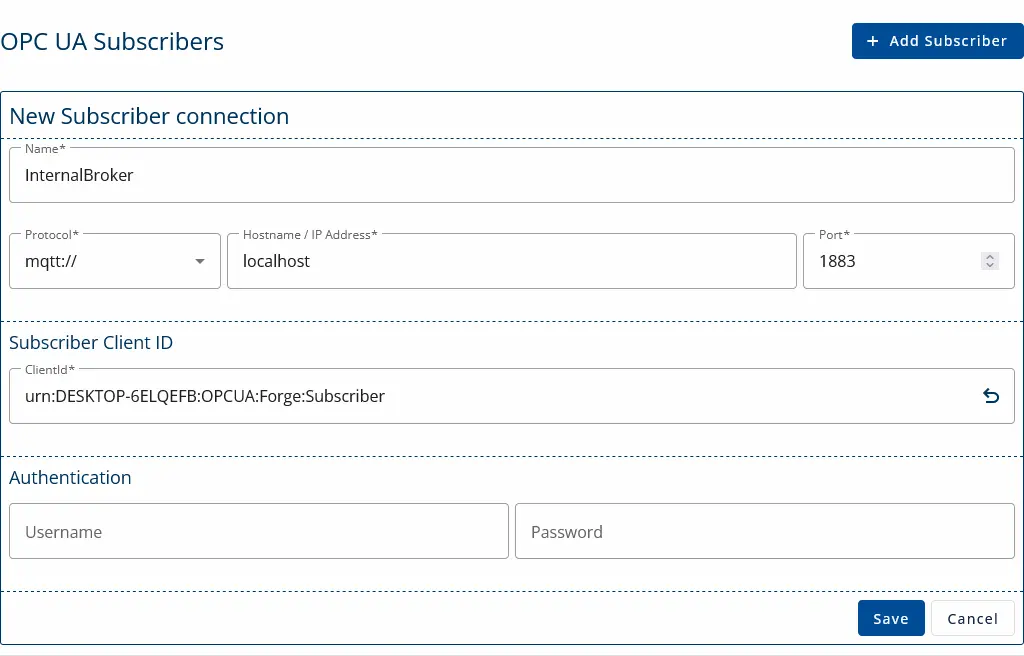
4. Update the settings for the subscriber.
- Provide a name for the subscriber.
- Select mqtt:// from the Protocol dropdown list.
- Set localhost to the Hostname field.
- Use port number 1883.
- Click Save.
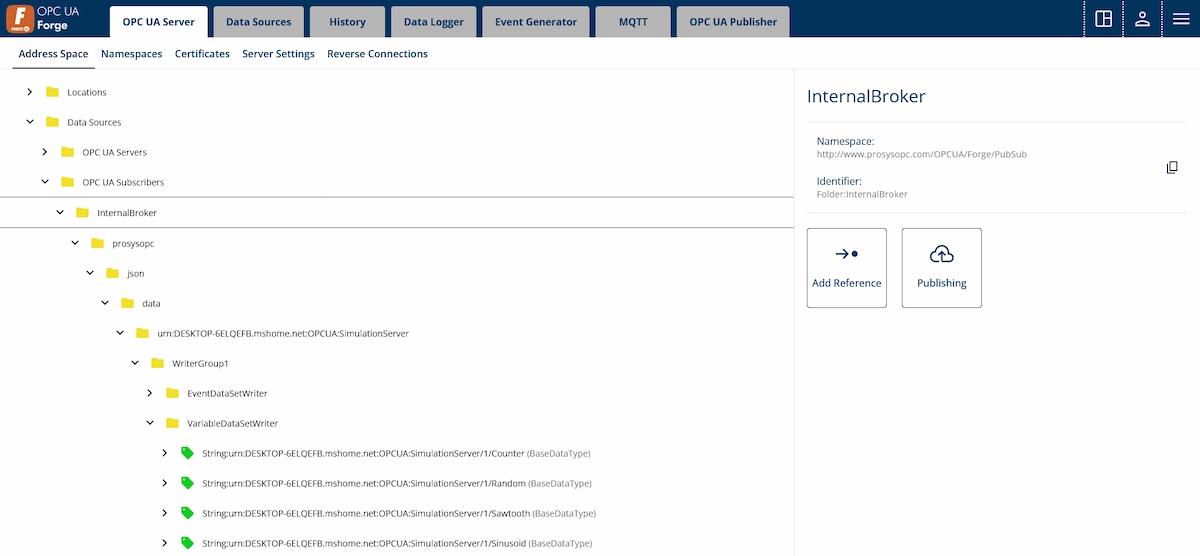
5. Navigate to OPC UA Server > Address Space.
6. Browse Data Sources > OPC UA Subscribers to see the variables received from the broker. Your subscriber is successfully configured if you can find the variables.
Next Steps
This wraps up the 10th article of the Mastering Forge series. Here’s a recap of what we did in this tutorial:
- Started Forge’s internal MQTT broker.
- Configured an OPC UA publisher (that will publish over MQTT).
- Configured an OPC UA subscriber and used it to Receive data over MQTT.
In our next article, Mastering Forge #11, we’ll use Forge’s Exchange module, which is used to actively exchange data between servers.
If you want to learn more about Forge and its capabilities, you can request a detailed introduction by emailing sales@prosysopc.com or using our contact form. We’d be delighted to provide tailored information about Forge that aligns with your interests and requirements.
Author Info

Iivo Yrjölä
Customer Integration & Support, Prosys OPC
Email: iivo.yrjola@prosysopc.com
