Welcome to the 11th tutorial on our series Mastering Forge.
In our previous article, Mastering Forge #10, we used OPC UA Publish and Subscribe Modules to configure OPC UA publishers and subscribers. We also tested publishing and receiving data through MQTT messages.
In this article, we will look at Forge’s Exchange Module, which is used to transfer data from server to server, for example. This module actively synchronizes values by reading from a source node and writing them to a target node. As a result, the values become available on the target node of the respective server. In this tutorial, you’ll learn how to configure Data Exchange that actively exchanges data between servers.
If you prefer your tutorials in video format, you can watch our video on how to configure data exchange using Forge on our YouTube channel.
During this tutorial, we’ll be using the following products:
- Prosys OPC UA Forge
- You can download an evaluation version through the request form.
- Prosys OPC UA Simulation Server
- You can download the free version through the product’s request form.
- Prosys OPC UA Browser
- You can download the free version through the product’s request form.
Configure Data Exchange
In this tutorial, we will use two data sources for Forge:
- A local Simulation Server
- Prosys OPC’s public UADEMO Server
Connect Forge to UADEMO Server with Security Policy and Security Mode as None using the address opc.tcp://UADEMO.prosysopc.com:53530/OPCUA/SimulationServer. Instructions for connecting to an OPC UA Server can be found in Mastering Forge #2.
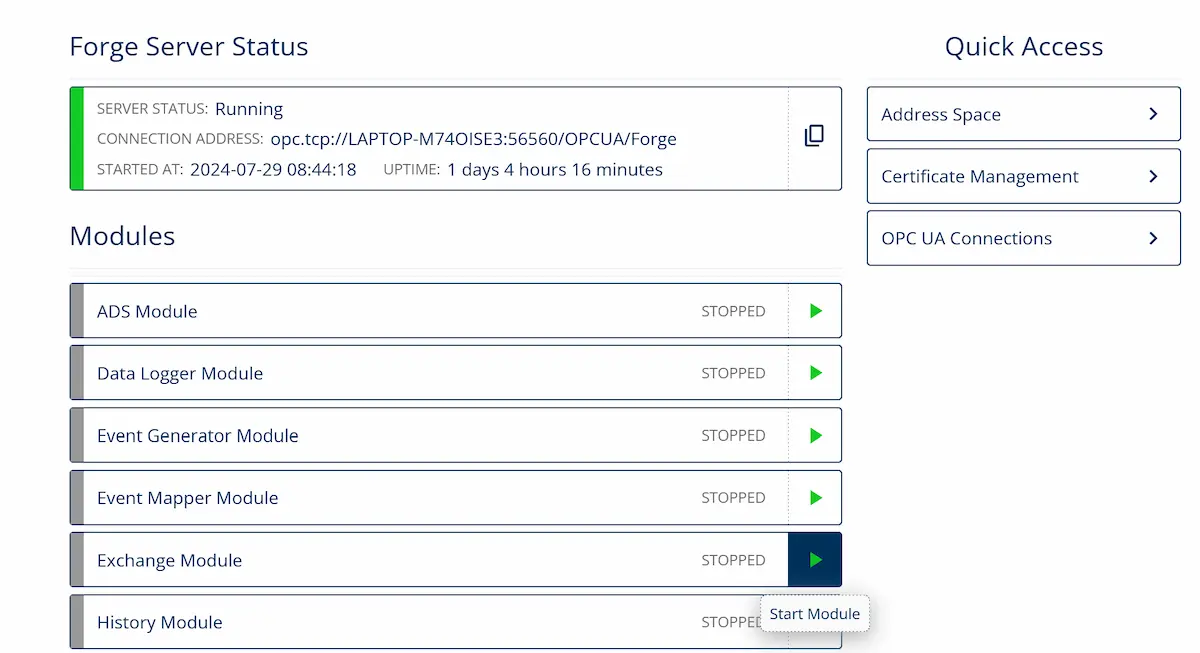
1. From the Dashboard, start the Exchange Module.
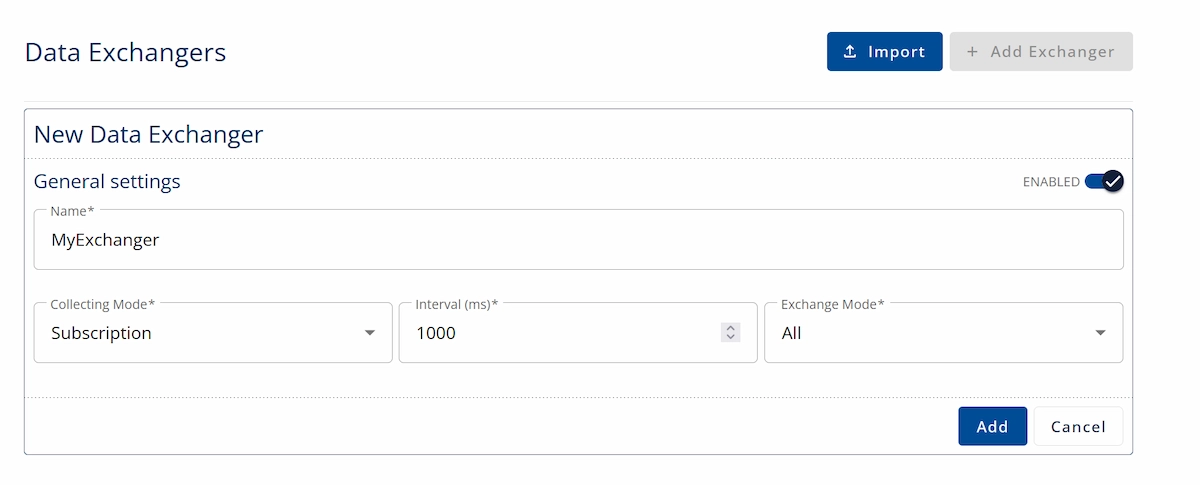
2. Navigate to Data Exchange and click + Add Exchanger.

3. Give the Data Exchanger a name and keep the default settings. Then, click Add.
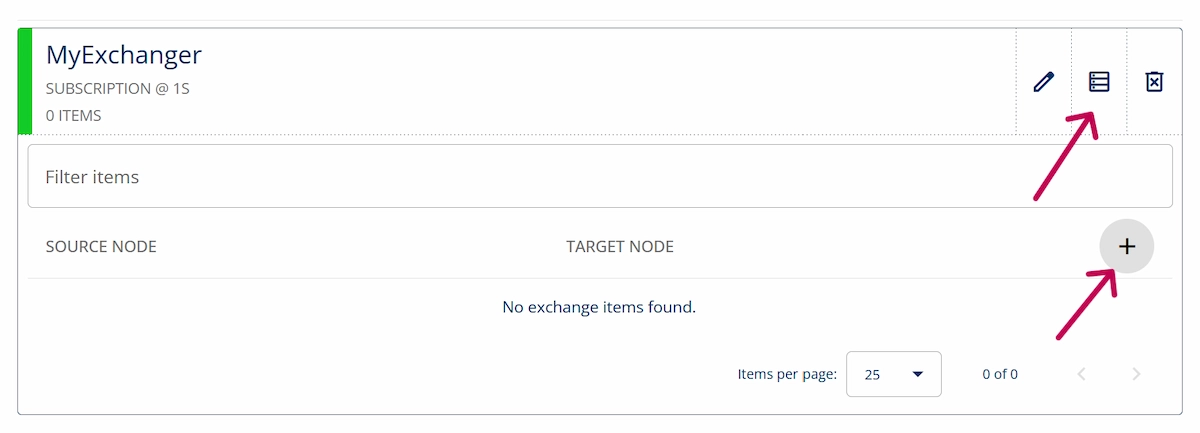
4. To add nodes to the Data Exchanger, open the dropdown menu and click +.
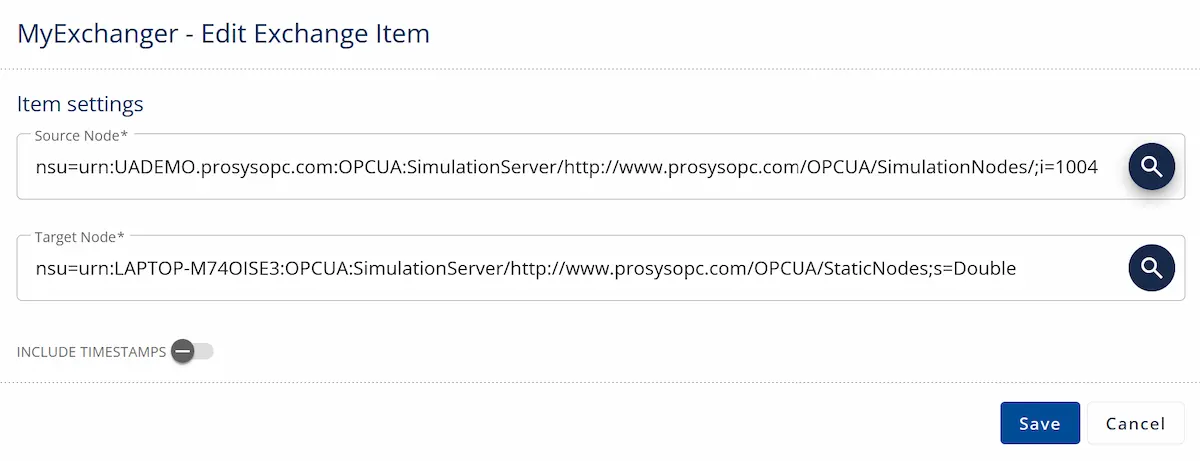
5. The Source Node is where the data will be sent from. Browse a UADEMO Server variable from Root > Data Sources > OPC UA Servers > @SimulationServer@UADEMO > Simulation > Sinusoid.
The Target Node will receive the sent value. Select a static variable from your own Prosys OPC UA Simulation Server from the path Root > Data Sources > OPC UA Servers > SimulationServer@YourHostname > StaticData > StaticVariables > Double.
NOTE: Alternatively, you can configure these items in Forge’s Address Space view. See the video version of this tutorial.
6. Finally, we verify that the configuration is working. Open Prosys OPC UA Browser and find the Source Node and the Target Node from the previous step. Monitor these two nodes by right-clicking them and selecting Monitor Data. You will notice that the target value updates to match the source value whenever the exchange interval cycles.
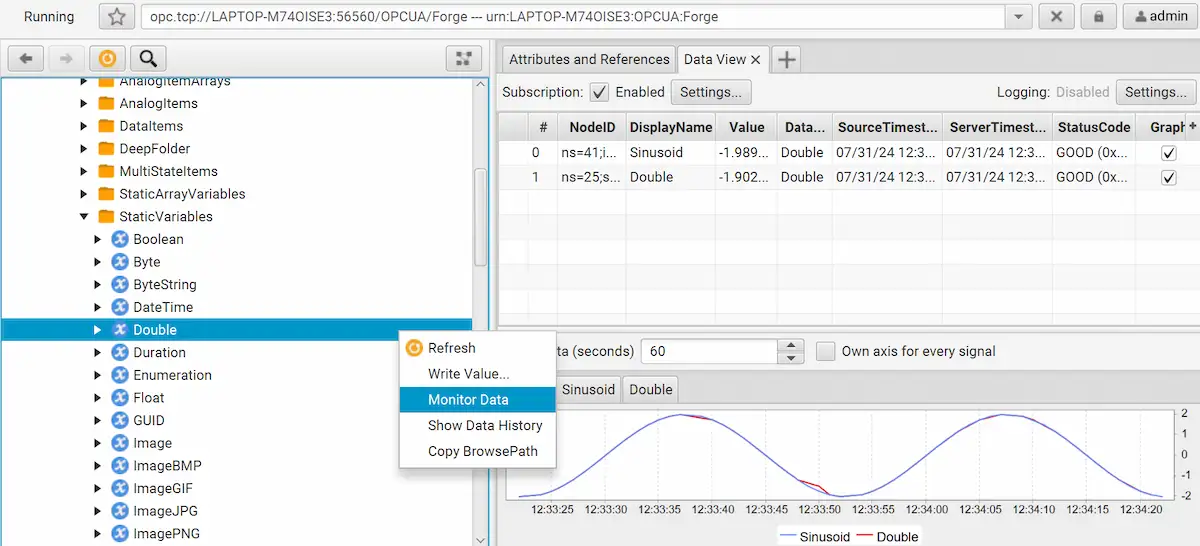
You can create multiple Data Exchangers, each with many nodes. They can be toggled on and off, which allows seamless and easily configurable data transfer between multiple servers.
Next Steps
This wraps up the 11th article of the Mastering Forge series. Here’s a recap of what we did in this article:
- Started the Data Exchange Module and created a Data Exchanger.
- Added two variables from different servers to the Exchanger (one as a source and another as a target).
- Used Browser to check that the target node received the value from the source node.
In the next article, Mastering Forge #12, we will take a look at Forge’s Modbus Module, which allows it to receive data from Modbus devices or function as a Modbus server.
If you want to learn more about Forge and its capabilities, you can request a detailed introduction by emailing sales@prosysopc.com or using our contact form. We’d be delighted to provide tailored information about Forge that aligns with your interests and requirements.
Author Info

Iivo Yrjölä
Customer Integration & Support, Prosys OPC
Email: iivo.yrjola@prosysopc.com
