Welcome to the 15th tutorial on our series Mastering Forge.
In our previous article, Mastering Forge #14, we learned to use the redundancy module.
In this tutorial, we’ll be learning some Forge essentials:
- How to update Forge
- How to update your license
- How to update your license manually
If you prefer your tutorials in video format instead, you can watch our tutorial on how to update Forge and your license on our YouTube channel.
During this tutorial, we’ll be using the following products:
- Prosys OPC UA Forge
- You can download an evaluation version through the request form
Update Forge
Updating Forge is straightforward and closely resembles the installation process, but without the need for initialization.
NOTE: while you can always update to a newer version, rolling back to an older version may cause conflicts.
You don’t need to shut down Forge before starting the update; however, the application will automatically shut down during the process. Once the update is complete, you’ll need to restart Forge. All your existing configurations will remain unchanged.
Follow the quick steps below to update Forge, or refer to Mastering Forge #1, starting from Step 2, for a detailed, step-by-step walkthrough.
1. When you receive an update link, navigate to the download page and download the version of Forge that is compatible with your operating system.
2. Run the installer for the downloaded version. During the installation process, Forge will automatically shut down.
3. Follow the steps in the installation wizard to finish the update.
When prompted, select “Yes, update the existing installation.”
4. Once the installation is complete, start the Forge service.
After the update, Forge will retain its previous state, so you can continue from where you left off.
Update the License
You can update Forge’s license through the UI. Common reasons include upgrading your license to add new modules or renewing it before expiration.
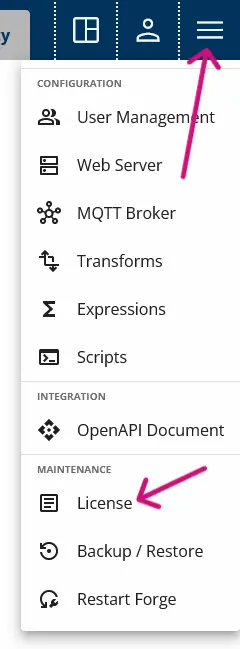
1. Open the advanced menu from the top right corner of Forge’s web UI.
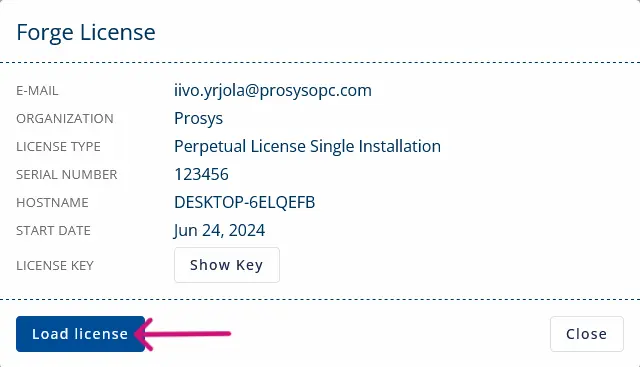
2. Press Load license and then select the new license file from your file system.
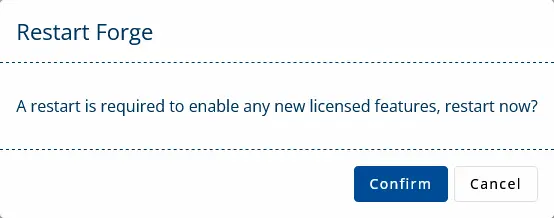
3. Click Confirm on the Update License dialog.

4. Successful license upload will automatically prompt Restart Forge. Press Confirm to restart Forge and apply the new license.
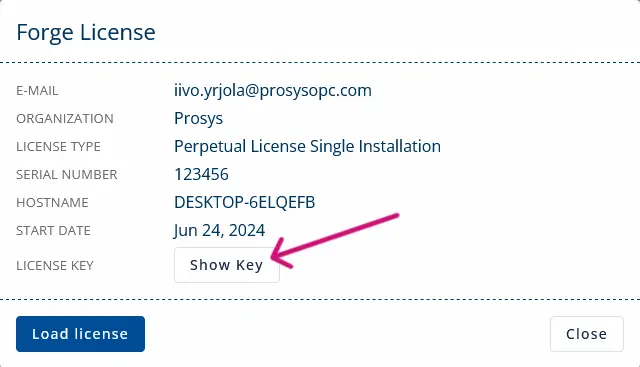
5. Check that the license key got updated from the same license dialog. Press Show Key to see the current key.
Update the License Manually
Alternatively, you can update the license file manually without the UI.
1. Shut down Forge. Stop the service to ensure a smooth license update process.
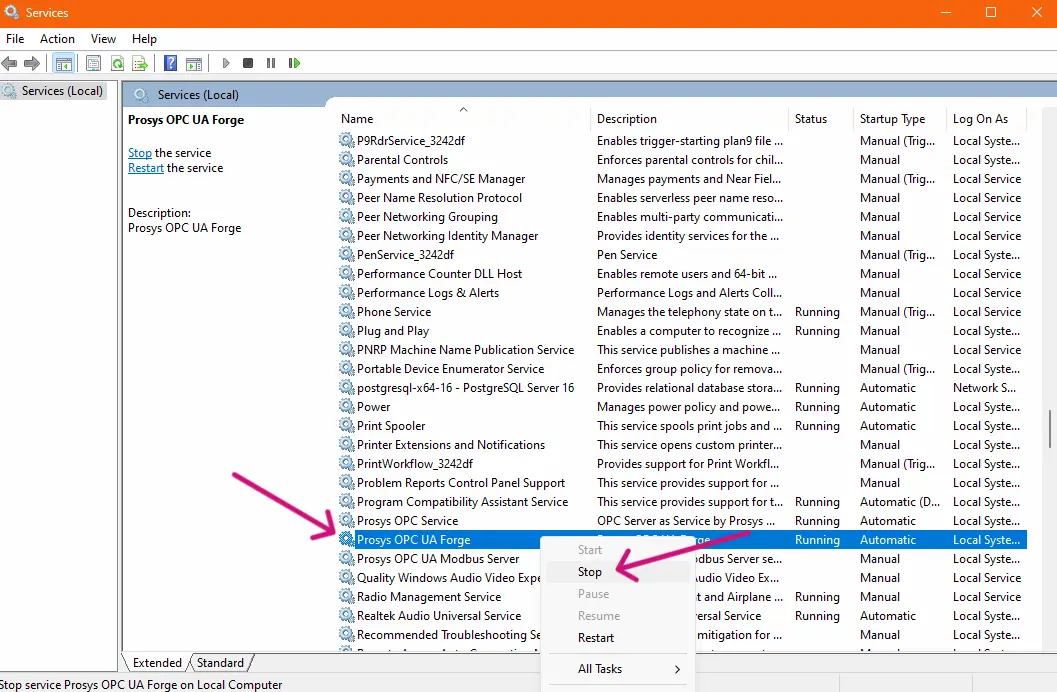
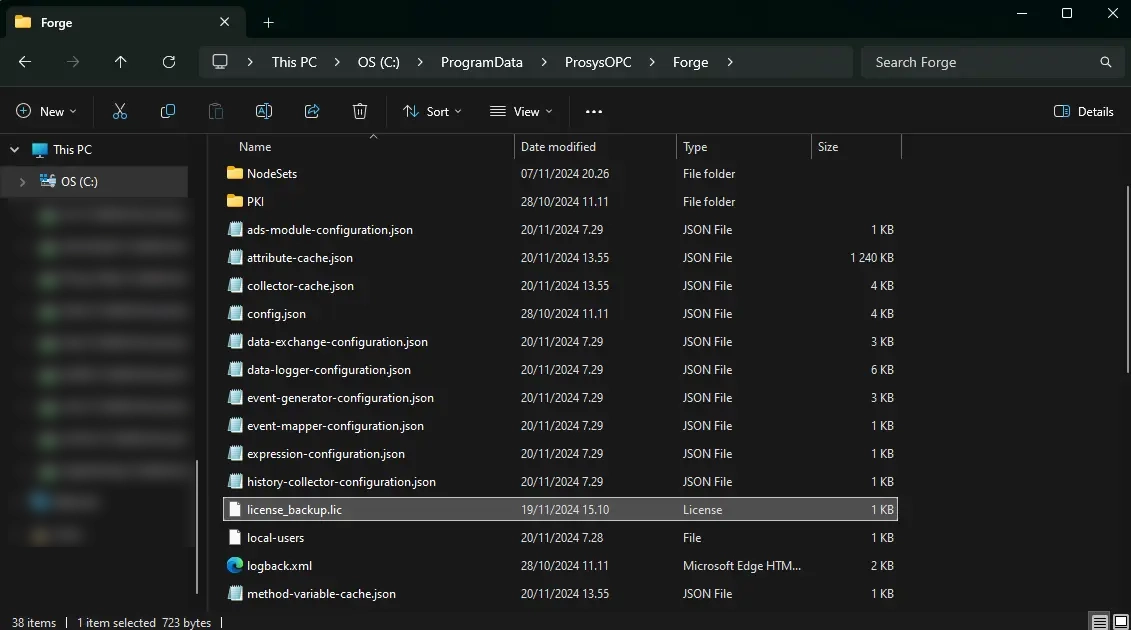
2. Rename your existing license file. Navigate to C:\ProgramData\ProsysOPC\Forge, locate the license.lic file, and rename it (e.g., license_backup.lic).
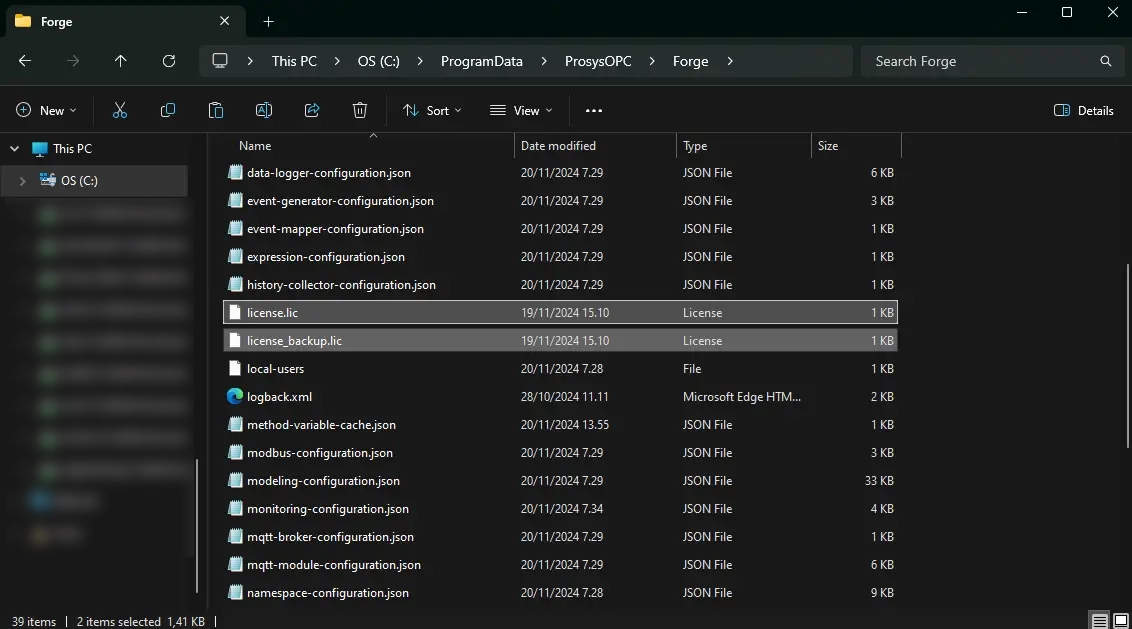
3. Add the new license file. Copy your new license file into the same folder and name it license.lic.
4. Restart Forge. Launch Forge and resume your work with the updated license.
Looking for User-Manual or Logs?
From the download page, you can access the user manual corresponding to the version you’re downloading.
After installation, the user manual is located at the following default path on Windows:
C:\Program Files\ProsysOPC\Prosys OPC UA Forge\doc\Prosys_OPC_UA_Forge_UserManual.
If you need to access the application logs, you can find them at the following location: C:\ProgramData\ProsysOPC\Forge\log\prosys-opc-ua-forge
Next Steps
This wraps up the 15th article of the Mastering Forge series. Here’s a recap of what we did in this tutorial:
- We updated Forge to a new version.
- We updated Forge’s license in two different ways.
- We listed the essential file locations.
In the next article, Mastering Forge #16, we’ll dive into Forge’s role-based user management, where you can define users and roles with varying levels of permissions. We’ll also show you how to integrate Forge’s authentication with your LDAP credentials for streamlined access control.
If you want to learn more about Forge and its capabilities, you can request a detailed introduction by emailing sales@prosysopc.com or using our contact form. We’d be delighted to provide tailored information about Forge that aligns with your interests and requirements.
Author Info

Iivo Yrjölä
Customer Integration & Support, Prosys OPC
Email: iivo.yrjola@prosysopc.com
