Welcome to the second tutorial on our series Mastering Forge.
As a quick recap, in our previous article, Mastering Forge #1, we introduced Forge and guided you through the installation and initialization process for Windows. This set the stage for using Forge effectively in your projects.
In this article, we will continue from where we left off in the previous article. The next step is to add data sources from your system. We can do this by connecting to an external server (your device, for example) and aggregating it with Forge’s server. In other words, we will add the contents of our external server to Forge’s server. For this tutorial, we will use our Prosys OPC UA Simulation Server as the data source to which we create a secured connection.
Also, if you prefer your tutorials in video format instead, you can watch our video about creating a secure connection to another OPC UA server on YouTube.
During this tutorial, we’ll be using the following products:
- Prosys OPC UA Forge
- You can download an evaluation version through the request form.
- Starting stage: Initialized and running
- Prosys OPC UA Simulation Server
- You can download the free version through the product’s request form.
- Starting stage: Running
Configure OPC UA server as Data Source
1. Navigate to Data Sources and press Add Connection.

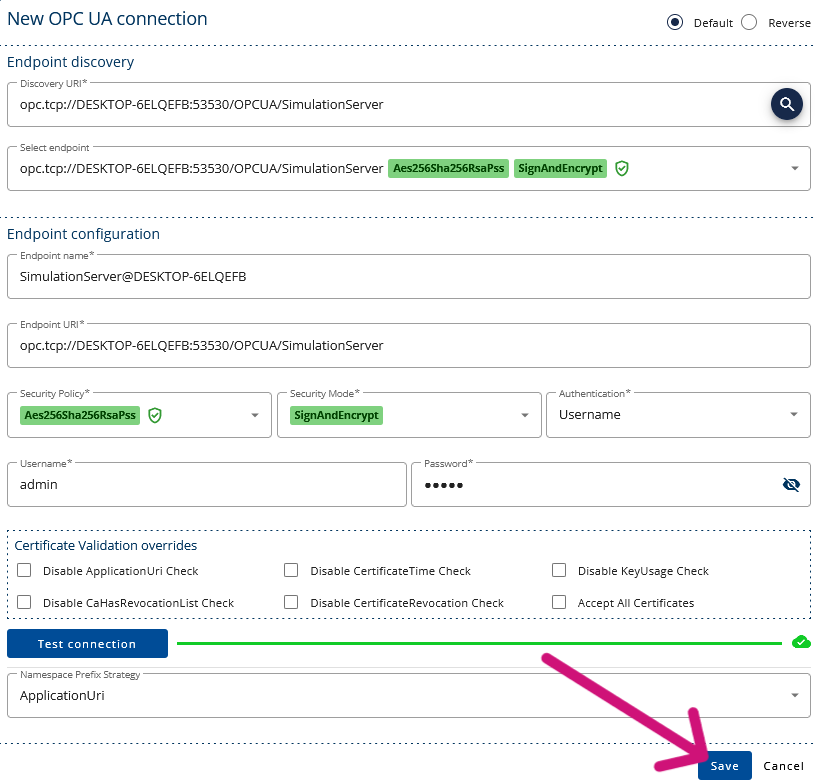
2. We use Simulation Server as our external OPC UA server. Copy the connection address of the Simulation Server.
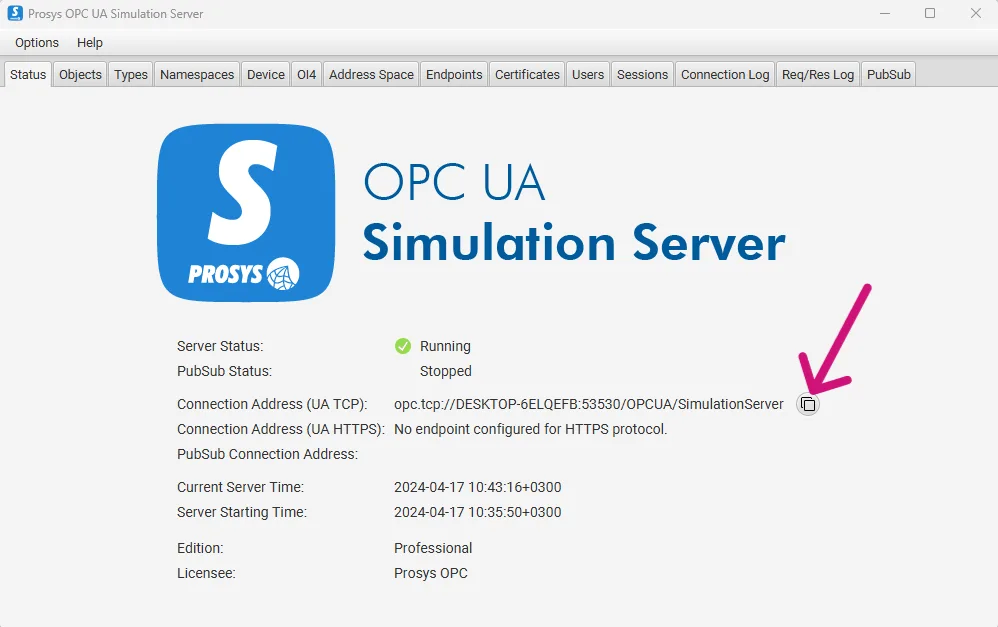
3. Paste the connection address to the Discovery URI and search endpoints by pressing enter or clicking the search button.

4. Forge will select the most secure connection type that the found endpoints support.
5. Additionally, basic username and password authentication is used in this example; select Username from the Authentication dropdown.
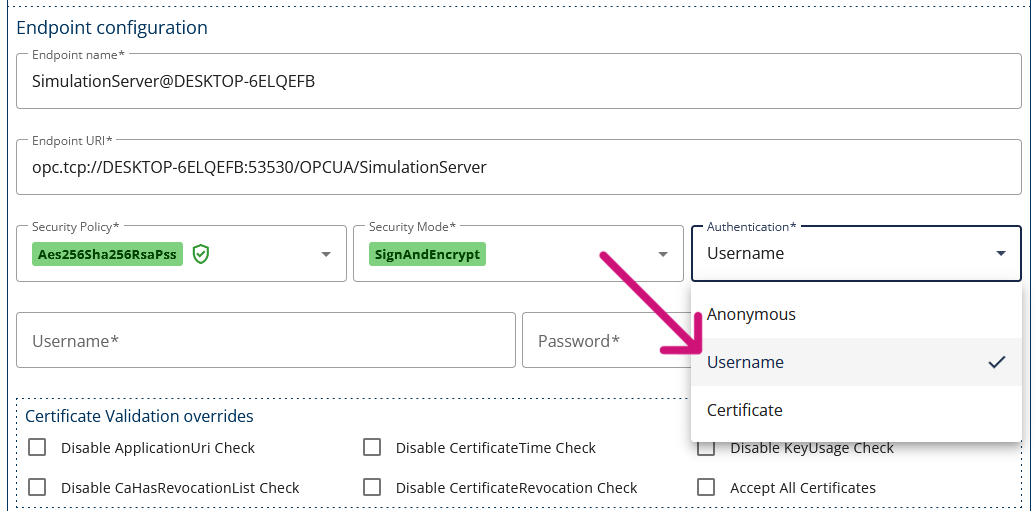
6. Give username and password of Simulation Server.
7. Press Test Connection.
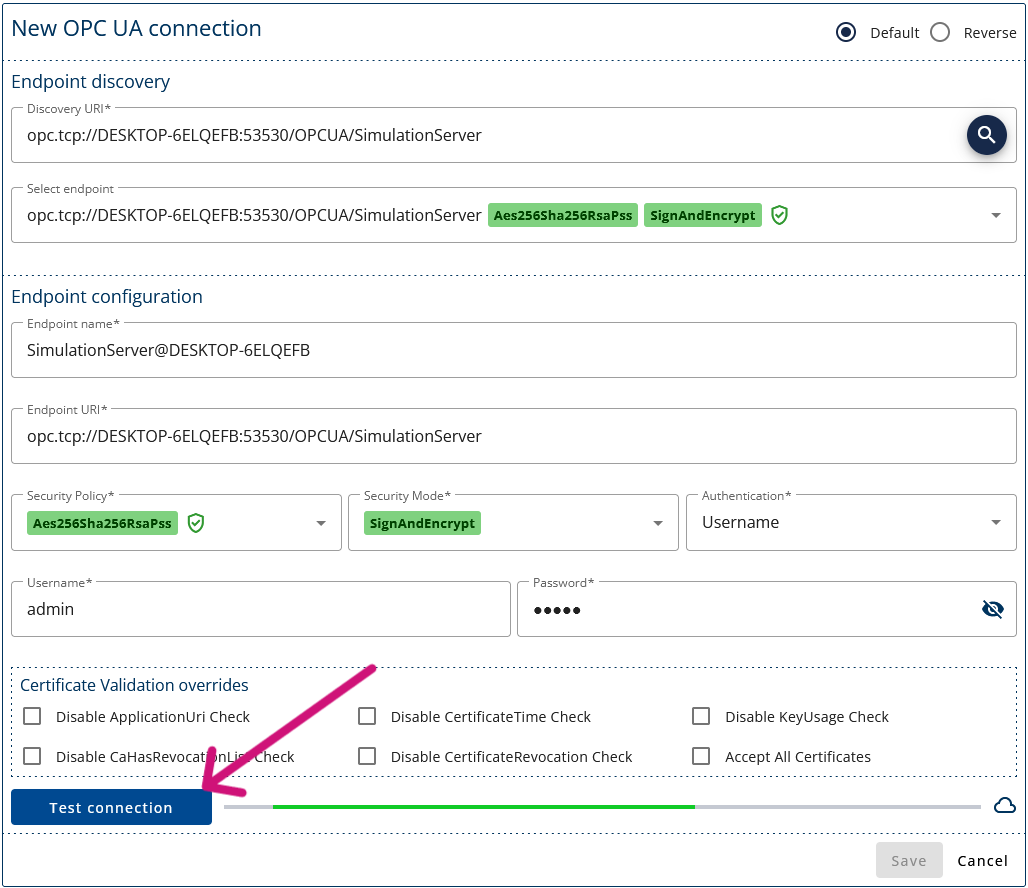
8. The connection test doesn’t succeed because the certificates must be trusted on both ends. Forge will automatically trust the Simulation Server’s certificate, but you must trust Forge’s certificate on the Simulation Server’s side.
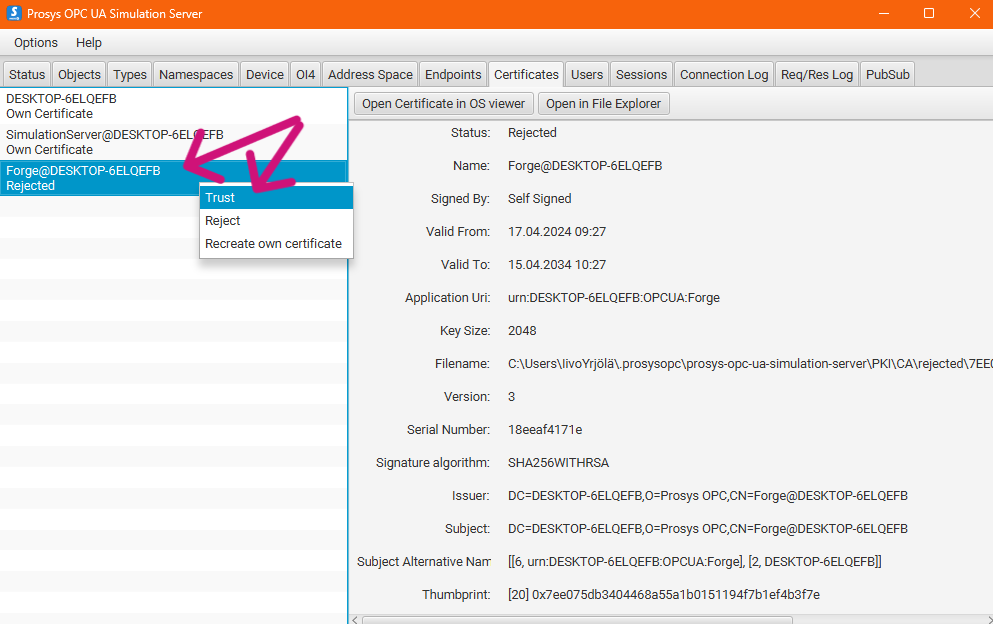
9. Press Test Connection. Now, the connection test should succeed.
NOTE: If you are going to have multiple OPC UA servers with the same ApplicationUri, you have to change the Namespace Prefix Strategy to avoid naming conflicts.
10. Save the connection by pressing Save.
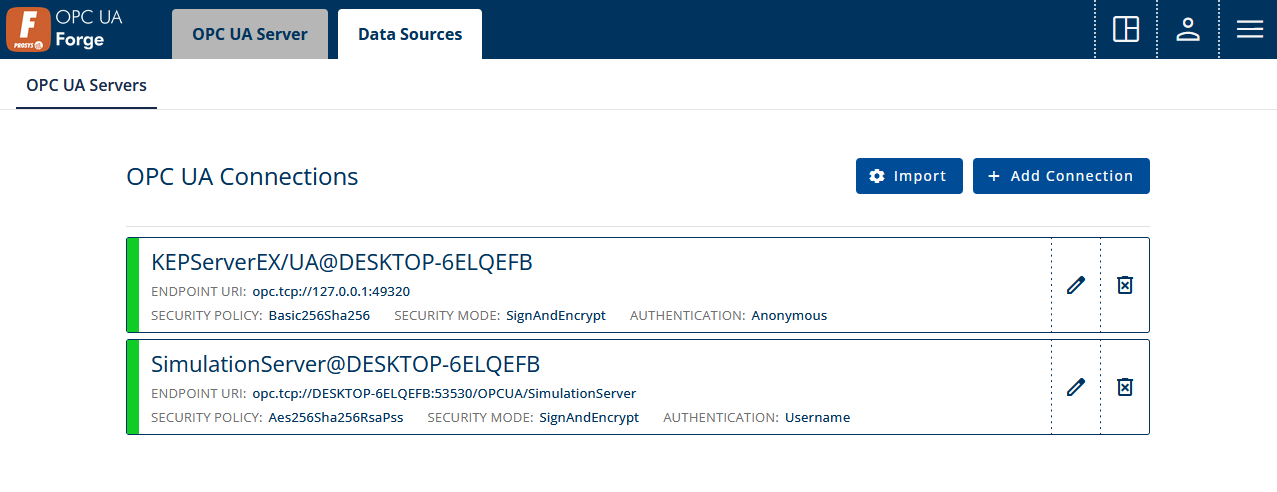
11. You might need to refresh the page to update the connection status.
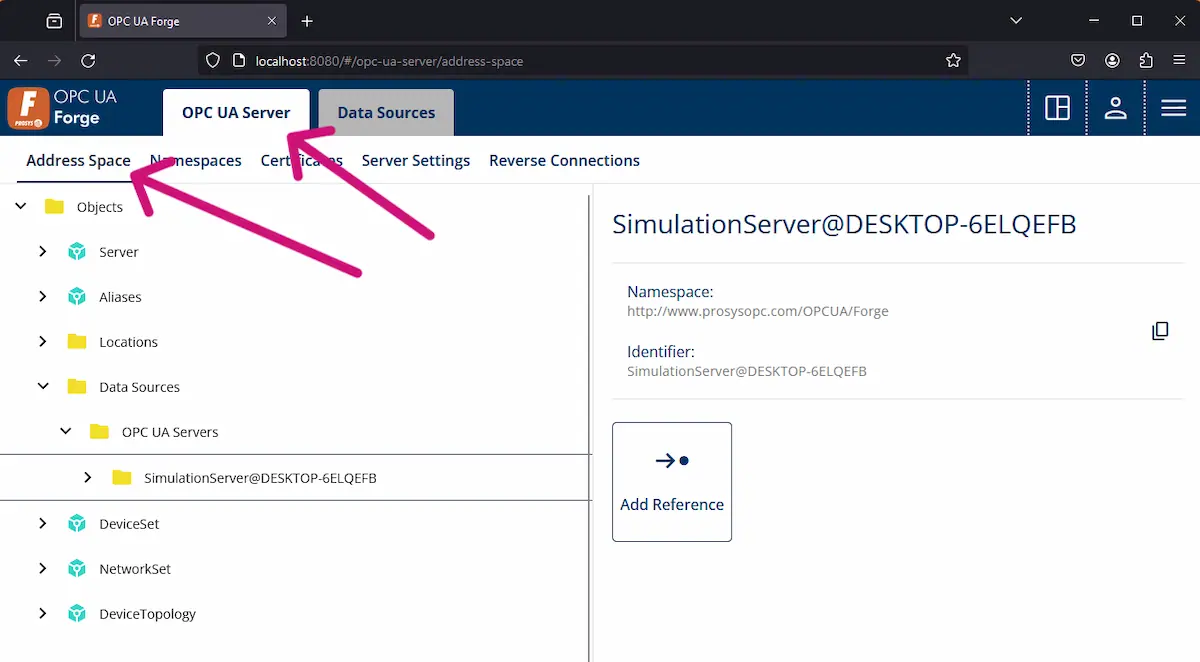
12. Forge can now access the information aggregated from Simulation Server, as seen from the Address Space view. Navigate to OPC UA Server > Address Space > Data Sources > OPC UA Servers to find your data.
13. You can follow steps 1-12 to connect Forge to any OPC UA server.
Next Steps
This wraps up the second article of our Mastering Forge series. To recap, here is what we did:
- We added a connection address,
- made the external OPC UA server trust Forge, and
- tested and saved the connection.
- Finally, we verified that the information is available in the Address Space. We are now able to use the information for further configurations.
In our next article, Mastering Forge #3, we’ll check Forge’s OPC UA server security settings and establish a secure connection between Forge and an OPC UA client. This includes certificate management.
If you want to learn more about Forge and its capabilities, you can request a detailed introduction by emailing sales@prosysopc.com or using our contact form. We’d be delighted to provide tailored information about Forge that aligns with your interests and requirements.
Author Info

Iivo Yrjölä
Customer Integration & Support, Prosys OPC
Email: iivo.yrjola@prosysopc.com
