
Setting Up Forge’s MCP Server for AI Assistants
In this article, we will set up a connection between Prosys Forge and Claude Desktop or ChatGPT Desktop using Forge’s MCP (Model Context Protocol) server capabilities. For a quick overview, check out our introductory video demonstrating the capabilities of the MCP connection.
The AI module in Forge enables MCP-compatible clients, such as Claude Desktop and ChatGPT Desktop, to connect directly to Forge and interact with its exposed tools. These tools allow AI assistants to browse the address space, access current and historical data, write values, invoke OPC UA methods, and view or modify Forge configurations without the need for custom integrations.
During this tutorial, we’ll be using the following products:
- Prosys Forge
- You can download an evaluation version through the request form.
- An AI client of your choice:
Setting MCP in Forge
1. AI Module
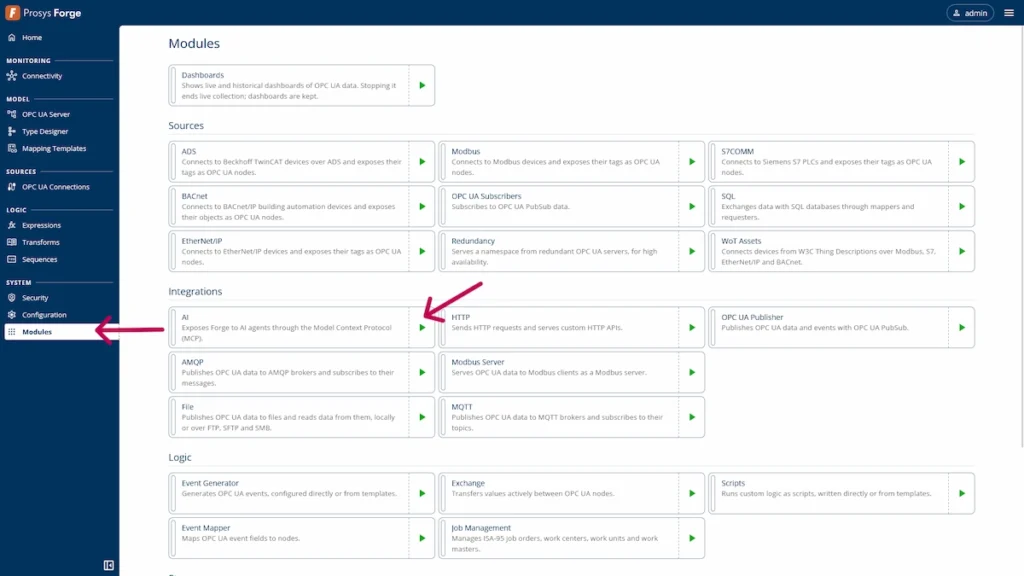
1. Let’s begin by starting the AI module from the Modules page.
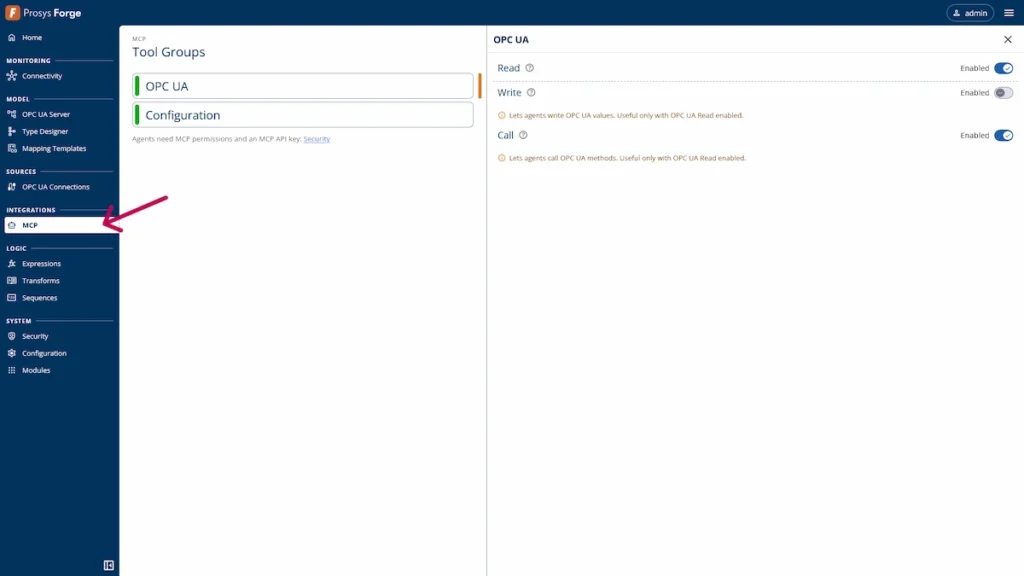
2. Next, use the left-hand menu to navigate to the MCP module page, which displays the available MCP Tool Groups. These groups determine what AI assistants can access and which operations they can perform through the MCP connection.
Two tool groups are available:
OPC UA: Provides Read, Write, and Call operations for interacting with OPC UA servers.
Configuration: Allows AI assistants to read and modify Forge configurations through the MCP connection.
Enable the tool groups you want to make available to your AI assistant. Each tool group has its own permission settings, allowing you to control which operations are permitted.
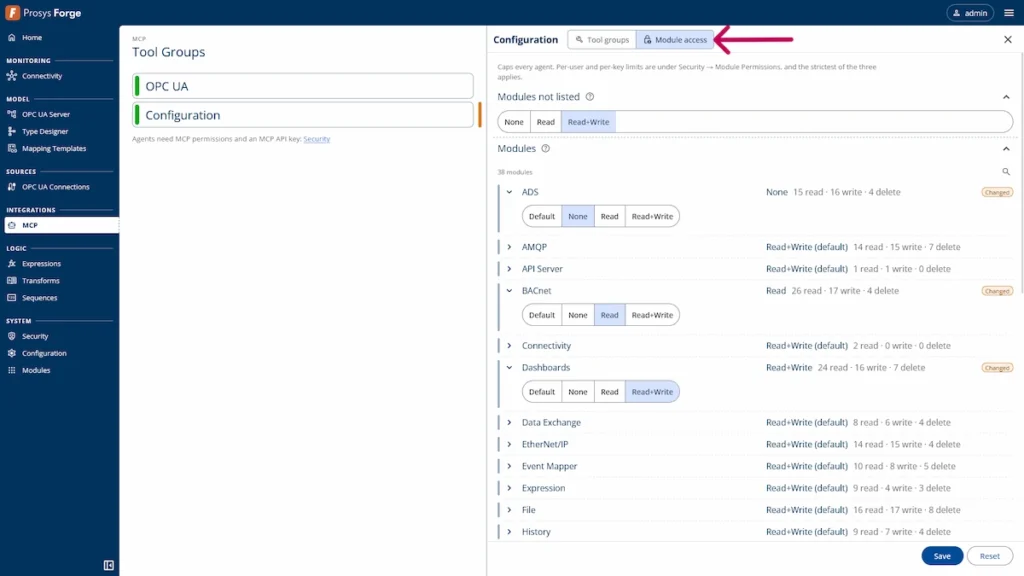
3. For the Configuration tool group, you can further customize access by selecting the Module access tab.
Here, you can define general permissions that apply to all modules or override them with individual module permissions.
2. Configure User MCP Permissions
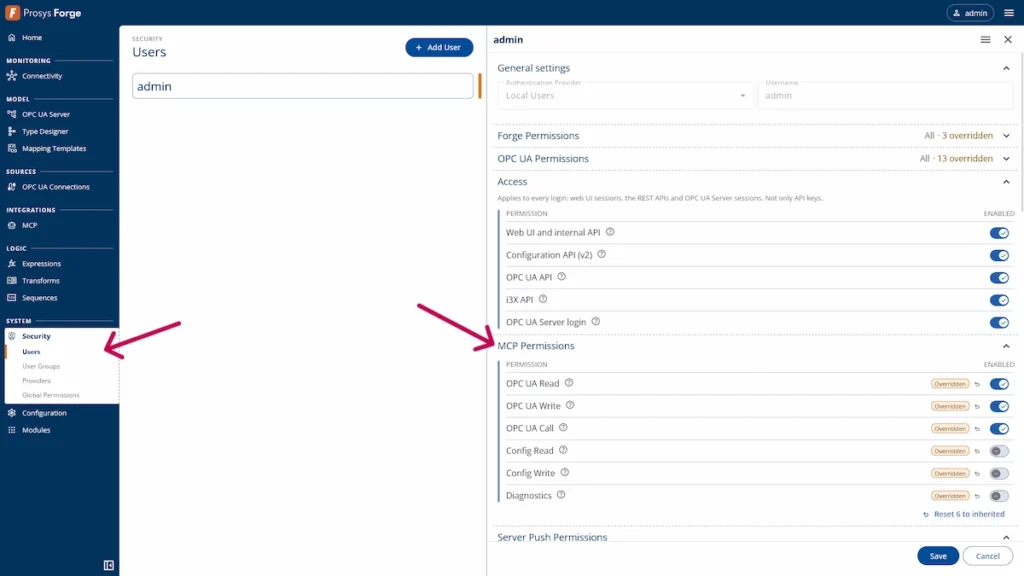
Next, navigate to Security -> Users and select the user who will create the MCP API key needed for the connection.
Under MCP Permissions, enable the permissions you want to grant to the user.
These permissions determine which MCP operations can be performed using API keys created by that user. Make sure to enable the permissions required for your intended use case.
3. Generate an MCP API Key
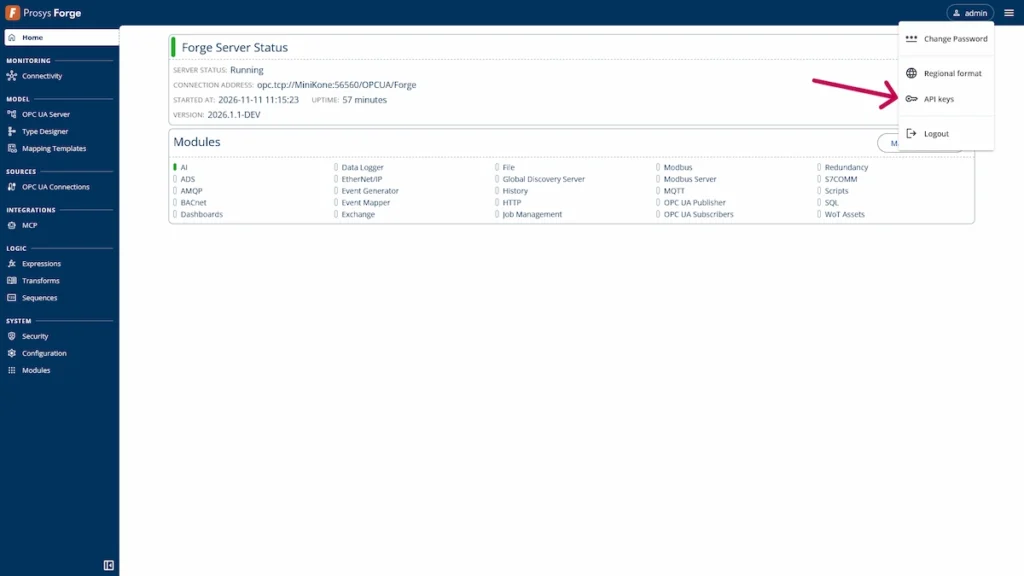
1. Click the user icon in the top-right corner of Forge and select API keys from the dropdown menu.
2. On the API Keys page, click Add API key to create a new key. Enter a description for the key and select MCP as the key type.
Under MCP Permissions, configure the permissions for the API key. By default, these permissions are inherited from the user creating the key. You can further restrict access by disabling individual permissions, but you cannot enable permissions that are disabled for the user.
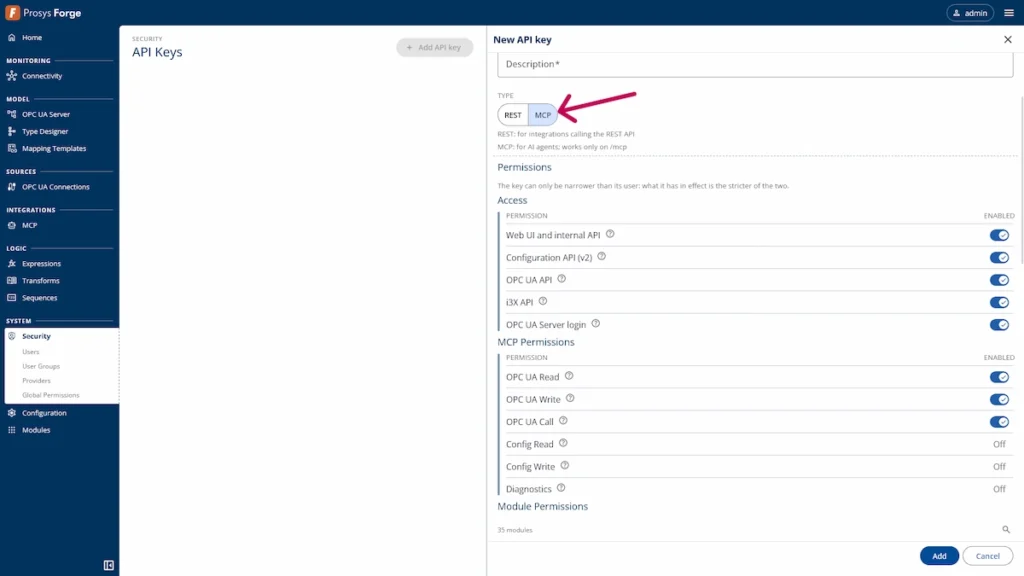
3. Once you have configured the permissions, click Add to generate the MCP API key.
Make sure to copy and store the API key in a secure location, as it will not be displayed again after creation.
Once you have generated the MCP API key, follow the configuration instructions below for your chosen AI client.
Configuring Claude Desktop
To create a connection to the local Forge MCP server, you need the following:
- Claude Desktop app
- Forge running with the MCP server enabled
- A Forge MCP API key generated earlier
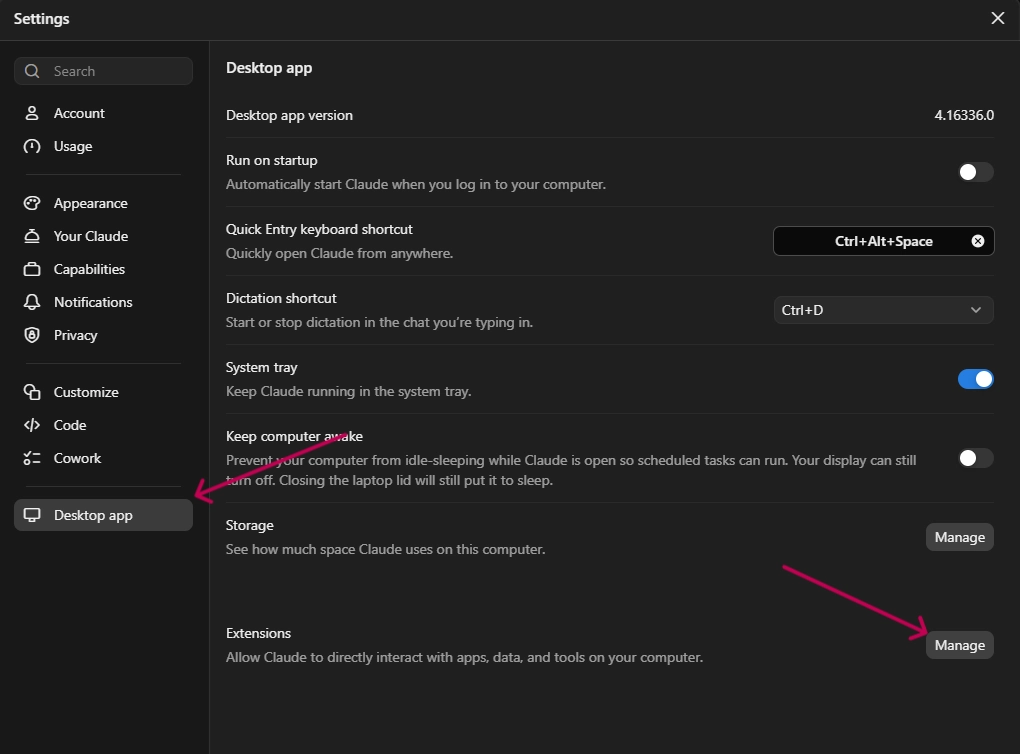
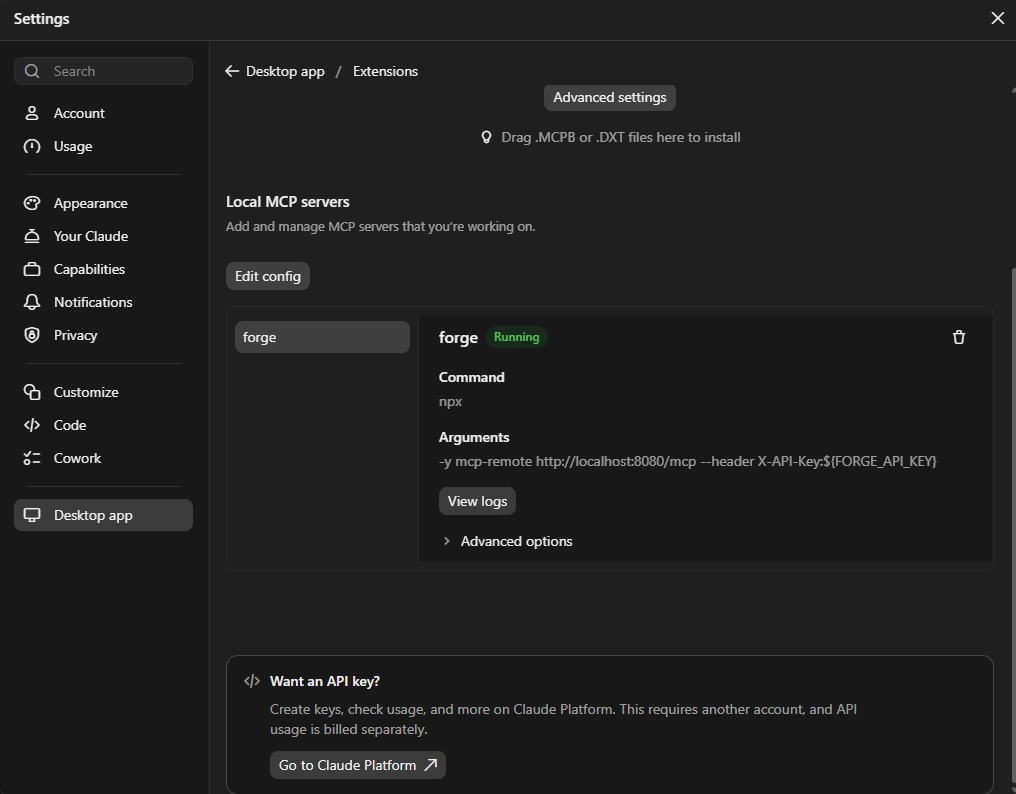
1. Start by opening the Claude Desktop settings. Then, navigate to the Desktop app tab and click Manage for the extensions.
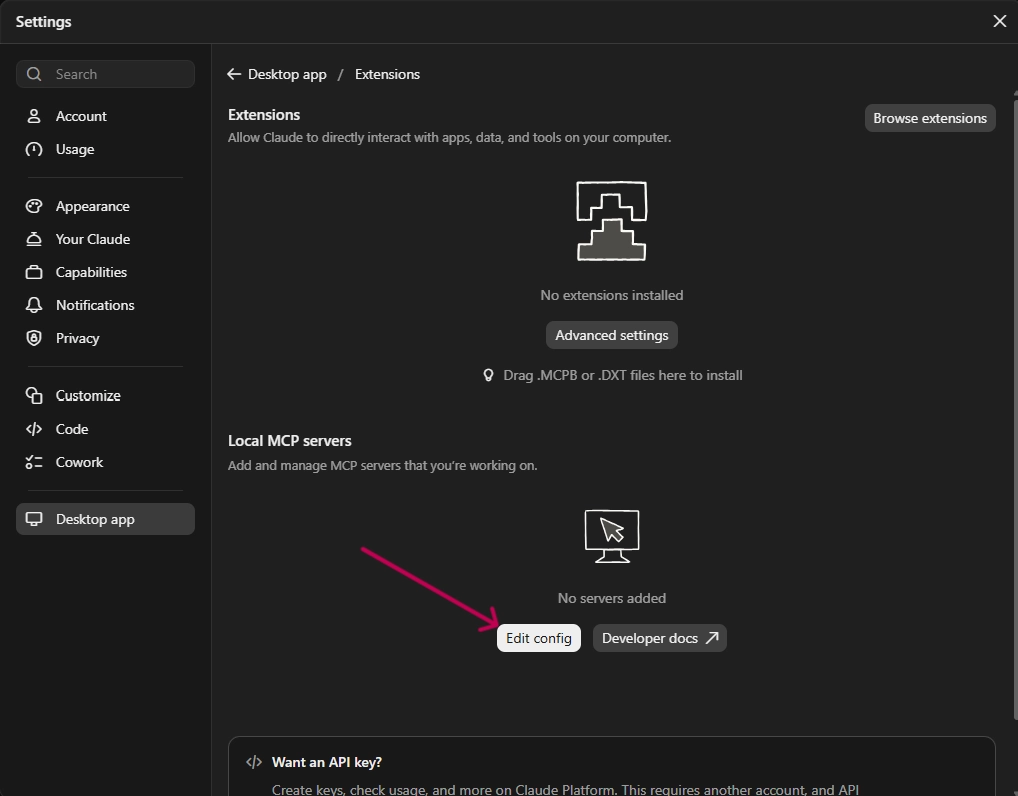
Then click Edit config to open your file manager, where you can locate and edit the claude_desktop_config.json file.
2. Before editing the configuration file, make sure Claude Desktop is completely closed. Simply closing the application window does not fully quit Claude Desktop, as it may continue running in the background. Instead, exit the application completely using the system tray or application menu.
3. Open the claude_desktop_config.json file and add the following configuration for the Forge MCP server. Do not overwrite any existing configurations. If your configuration file already contains an mcpServers section, simply add the forge server entry alongside your existing MCP servers.
Replace the YOUR_API_KEY placeholder with the Forge MCP API key you generated earlier.
					  "mcpServers": {
    "forge": {
      "command": "npx",
      "args": [
        "-y",
        "mcp-remote",
        "http://localhost:8080/mcp",
        "--header",
        "X-API-Key:${FORGE_API_KEY}"
      ],
      "env": {
        "FORGE_API_KEY": "YOUR_API_KEY"
      }
    }
  }
4. Save the configuration file and restart the Claude desktop app and the Forge MCP connection should be working.
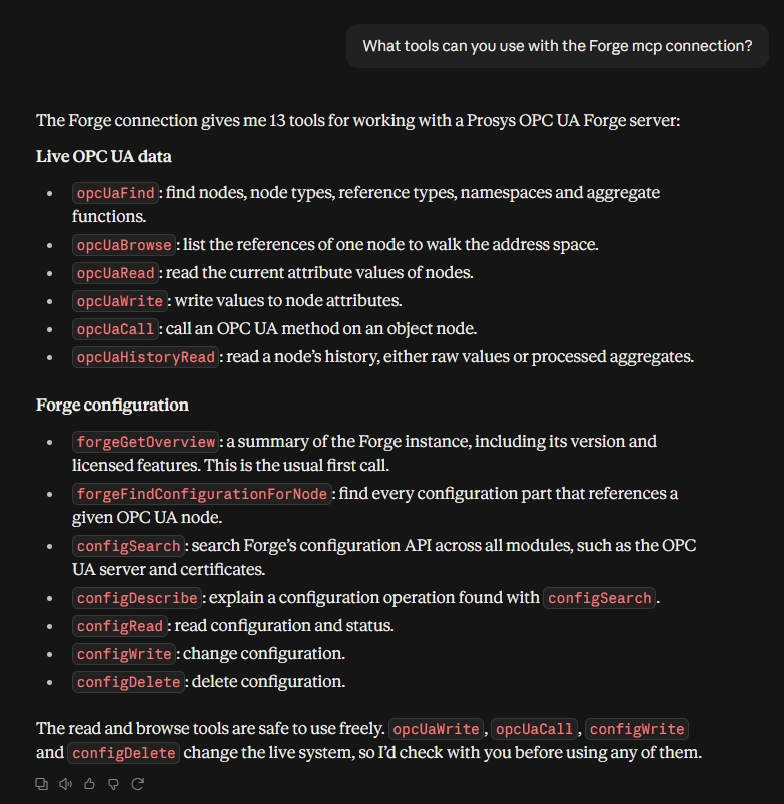
5. Now we can test the MCP connection for example by asking what tools can Claude use.
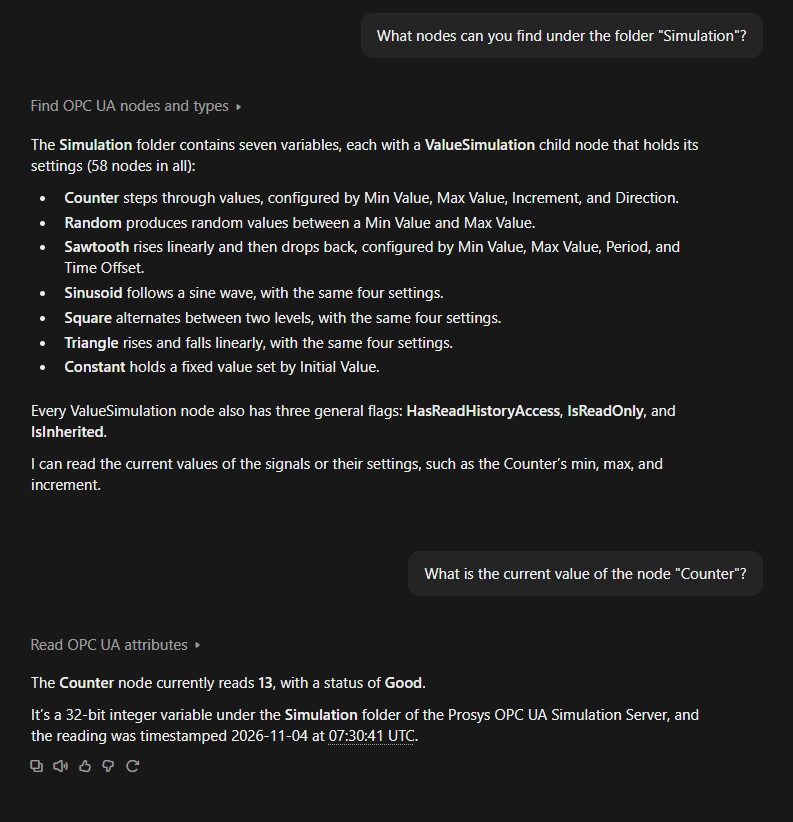
We can also ask Claude to explore the server’s address space and read live values from it.
Configuring ChatGPT Desktop
To create a connection to the local Forge MCP server, you need the following:
- ChatGPT Desktop app
- Forge running with the MCP server enabled
- A Forge MCP API key generated earlier
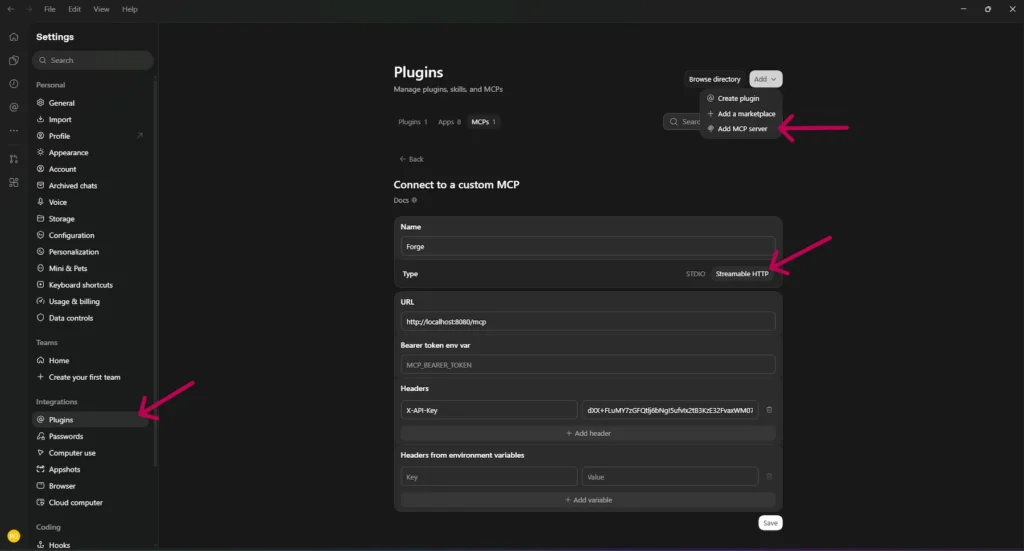
1. Start by opening the ChatGPT Desktop settings. Then, navigate to Plugins, click Add, and select Add MCP server.
2. Enter your MCP connection name and select Streamable HTTP as the connection type.
3. In the URL field, enter the address of your Forge MCP server. For a local Forge instance using the default port, enter:
http://localhost:8080/mcp
4. Under Headers, add a header with X-API-Key as the key and your Forge MCP API key as the value. You can leave other fields empty. Then click Save to save the connection.
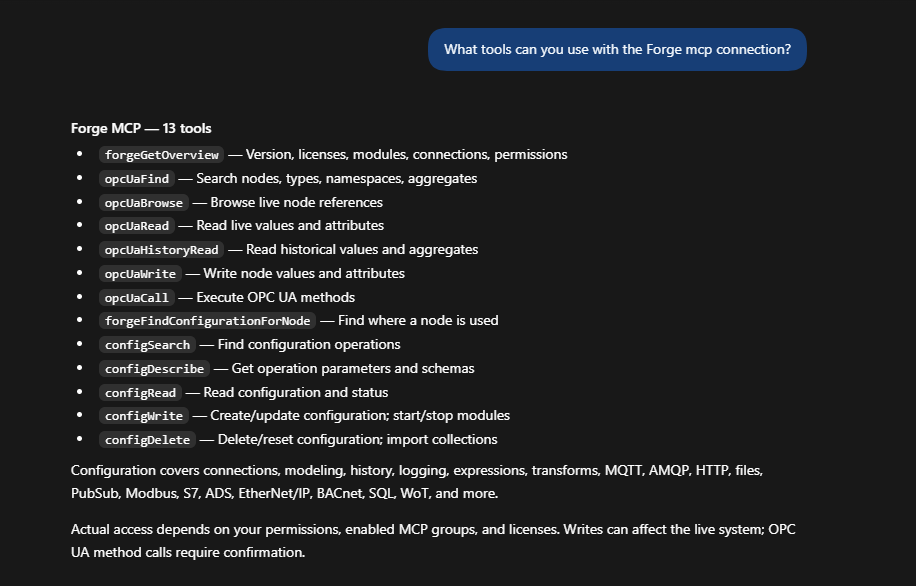
5. Open a new Work or Codex chat and test the connection by asking ChatGPT to list the available Forge MCP tools.
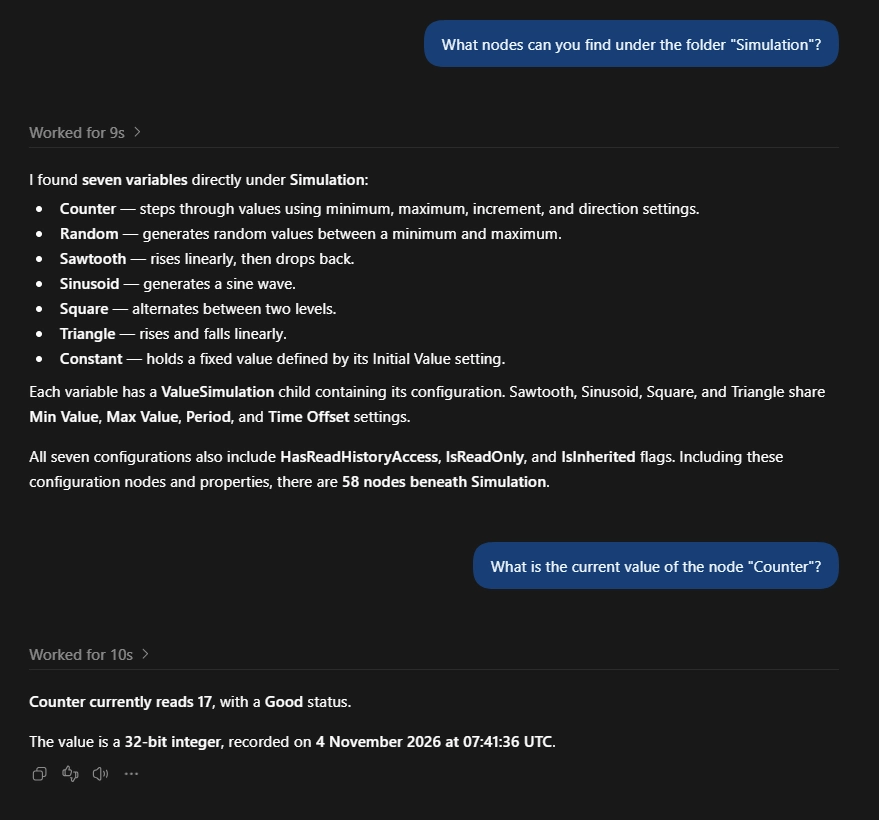
We can also ask ChatGPT to explore the server’s address space and read live values from it.
Recap
This wraps up this article. Here’s a quick recap of what we did:
- Started Forge’s AI module and enabled both tool groups.
- Configured user permissions to allow different MCP operations.
- Generated an API key for the MCP connection.
- Configured Claude Desktop or the ChatGPT desktop app to connect to Forge using MCP.
- Verified the MCP connection with simple prompts.
Now that your AI assistant is connected, see what it can do in our post Forge MCP: Bridging AI and Industry, where Claude builds a complete pump integration in Forge, from device to dashboard.
If you want to learn more about Forge and its capabilities, you can check these Forge resources or request a detailed introduction by emailing sales@prosysopc.com or using our contact form. We’d be delighted to provide tailored information about Forge that aligns with your interests and requirements.